![How To Use Krea 2 Open Source: Prompts, Workflows & LoRA [2026]](https://refinery.fal.media/url/https%3A%2F%2Fv3b.fal.media%2Ffiles%2Fb%2F0aa34f53%2F2y6ROgROzoiWnnXbs82n5.jpg/tr:w-1920,q-80/2y6ROgROzoiWnnXbs82n5.webp)
I'll break down how Krea 2's two open checkpoints split the work, prompts that lean on its aesthetic range, and a full walkthrough for training your own character LoRA and running it on fal.
TL;DR
Krea 2 is positioned as the most aesthetic open-source image model, and it ships as two checkpoints that do different jobs: a RAW base for training and a Turbo model for fast generation.
Turbo is an 8-step distilled checkpoint for quick, high-quality text-to-image, while RAW is the undistilled base you fine-tune and train LoRAs on.
The loop the model was designed for is simple: train a LoRA on RAW, then apply it on Turbo. On fal, the trainer handles the RAW side for you, so you just upload references and generate on Turbo, no checkpoint-juggling required.
Training a character LoRA takes 6 to 20 reference images and about $3.00 for a 1,000-step run, and every generation with it afterwards costs $0.01 per megapixel.
We at fal built loratlas, a browsable library of over 1,500 Krea 2 style LoRAs, which lets you try trained styles in your browser on your own fal key before you commit to training one.
Where can you access Krea 2?
The best place to access and use Krea 2 is on fal, split across three endpoints for each stage of the work:
-
fal-ai/krea-2/turbo is text-to-image generation on the fast Turbo checkpoint.
-
fal-ai/krea-2-trainer takes your reference images and returns trained LoRA weights.
-
fal-ai/krea-2/turbo/lora runs that same fast generation with your LoRA loaded on top.
You never have to pick a plan or hit a minimum usage, as fal's pricing is entirely based on a pay-per-use model.
For Krea 2, images are billed by the megapixel and training by the step, so a small test costs pennies and a big run costs what it costs.
The @fal-ai/client call below works the same way for every model on fal, and it takes care of auth and the queue for you.
Here's a basic text-to-image call:
javascript
import { fal } from "@fal-ai/client";

const result = await fal.subscribe("fal-ai/krea-2/turbo", {
  input: {
    prompt: "a vintage travel poster for Mars",
  },
  logs: true,
  onQueueUpdate: (update) => {
    if (update.status === "IN_PROGRESS") {
      update.logs.map((log) => log.message).forEach(console.log);
    }
  },
});

console.log(result.data);
console.log(result.requestId);
How do you write a prompt Krea 2 can act on?
Krea 2 was trained on short, medium, and long natural language, so a quick one-line description works fine.
Where it pays off is length.
From what I've seen, the longer and more specific you go, the better it renders.
A short prompt is for exploring, when you want to see a dozen directions quickly, and you don't much care that each one makes its own choices about light and framing.
The prompt in the code sample above is that register: one line, a subject, a bit of mood.
Prompt: A fashion model mid-spin in a billowing scarlet gown against a stark white studio, fabric caught in motion, high-end editorial lighting.
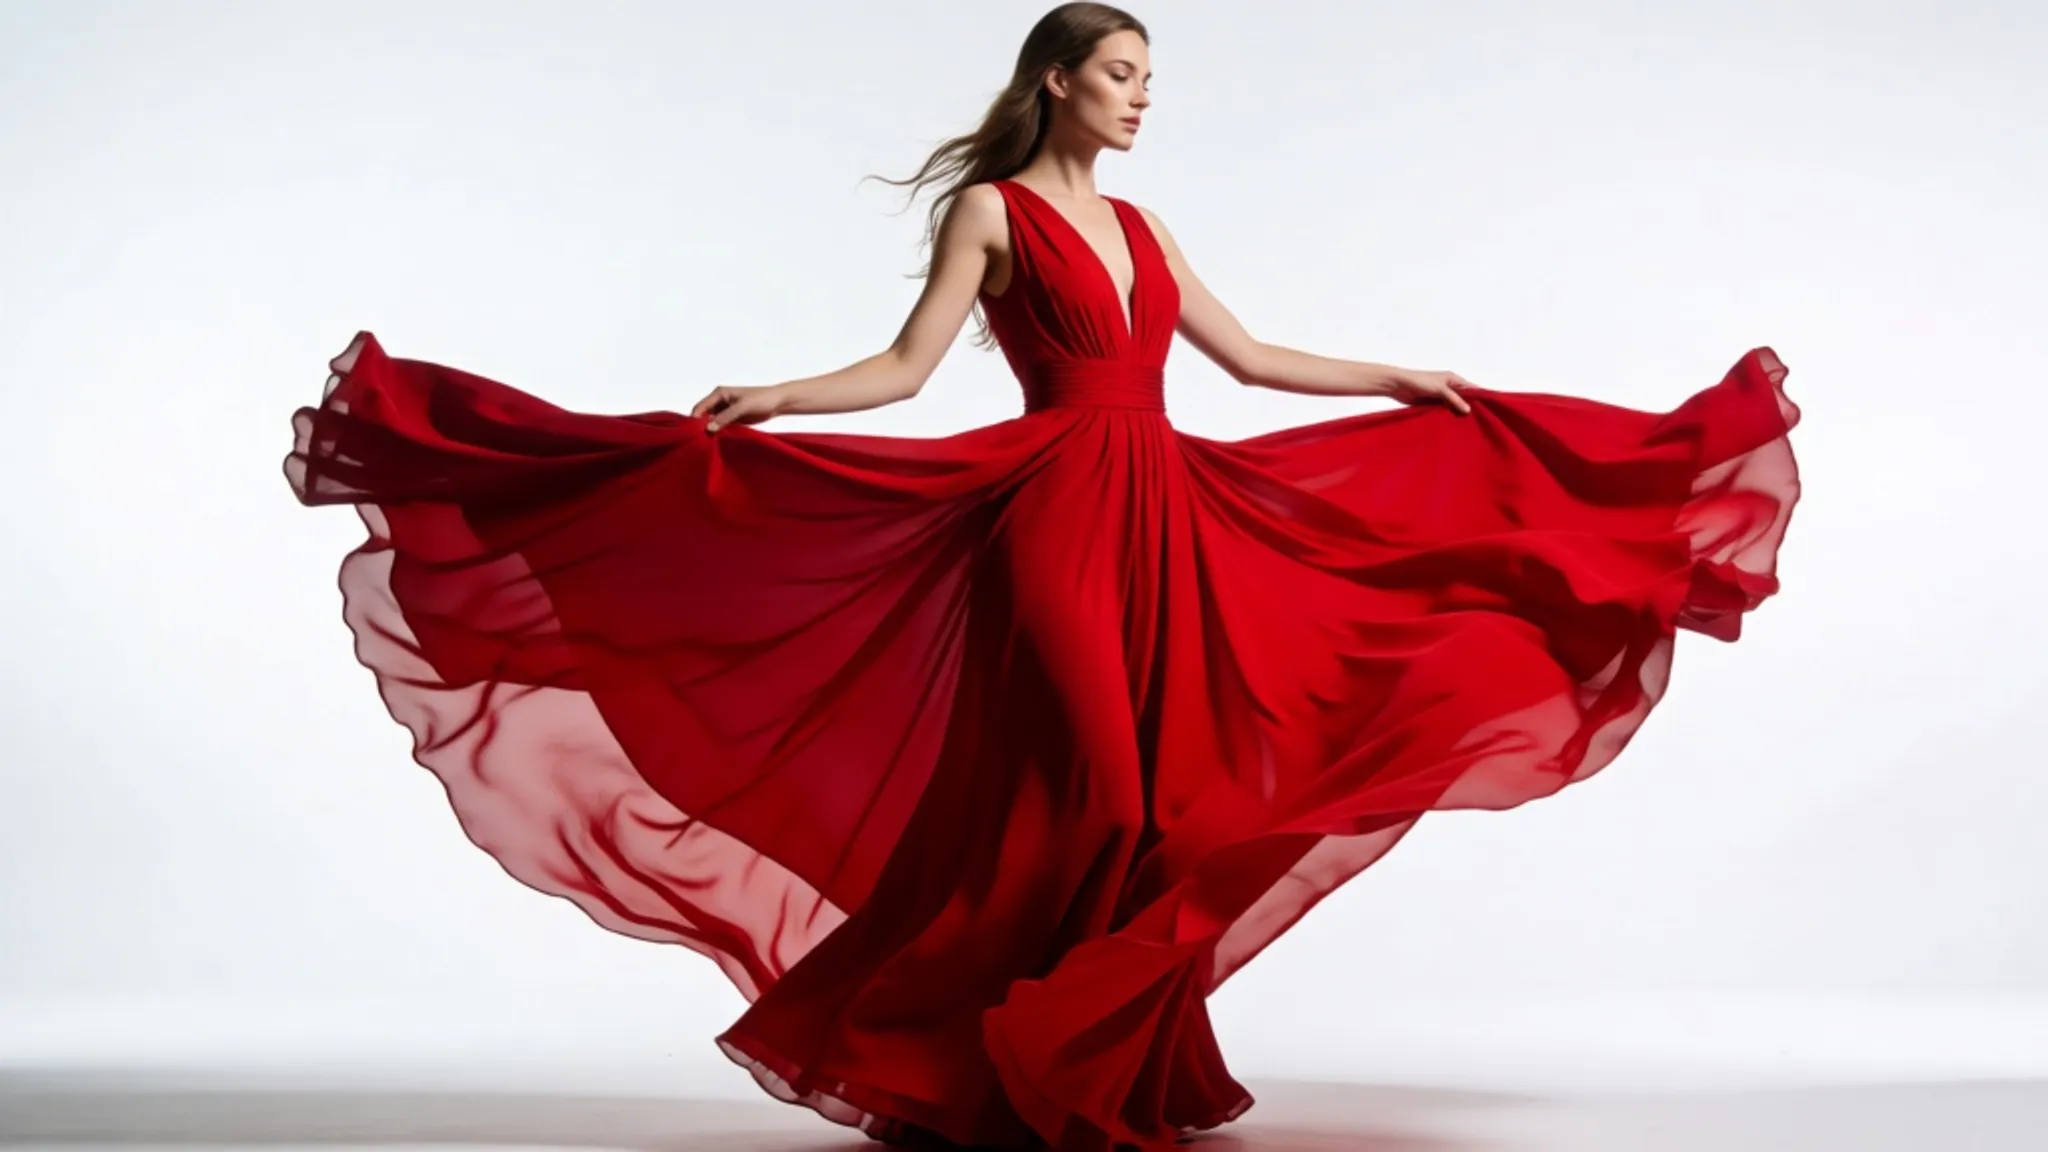
Generated using Krea 2 Turbo on fal, an AI model from Krea.
The long register is for when you already know the image, and you'd sooner spend words than reroll for it.
You want to spell it out like art direction: subject and pose, the medium and the brushwork, the palette, the light, the mood you're chasing.
Prompt: A cinematic wide shot of an opulent Art Deco hotel lobby at night, black marble floors polished to a mirror and reflecting a towering brass chandelier that drips warm light down over the room. Fluted walnut columns with gold inlay, deep emerald velvet armchairs arranged around a low onyx table, a curved reception desk of backlit amber glass along the far wall. A bellhop in a crimson uniform crosses the floor mid-stride, slightly motion-blurred. Warm tungsten pools set against cool blue shadow in the corners, a faint haze in the air catching the light, a rich jewel-tone palette of emerald, gold, and oxblood. Shot on a wide lens with deep focus, luxurious and quietly grand. Landscape_16_9.
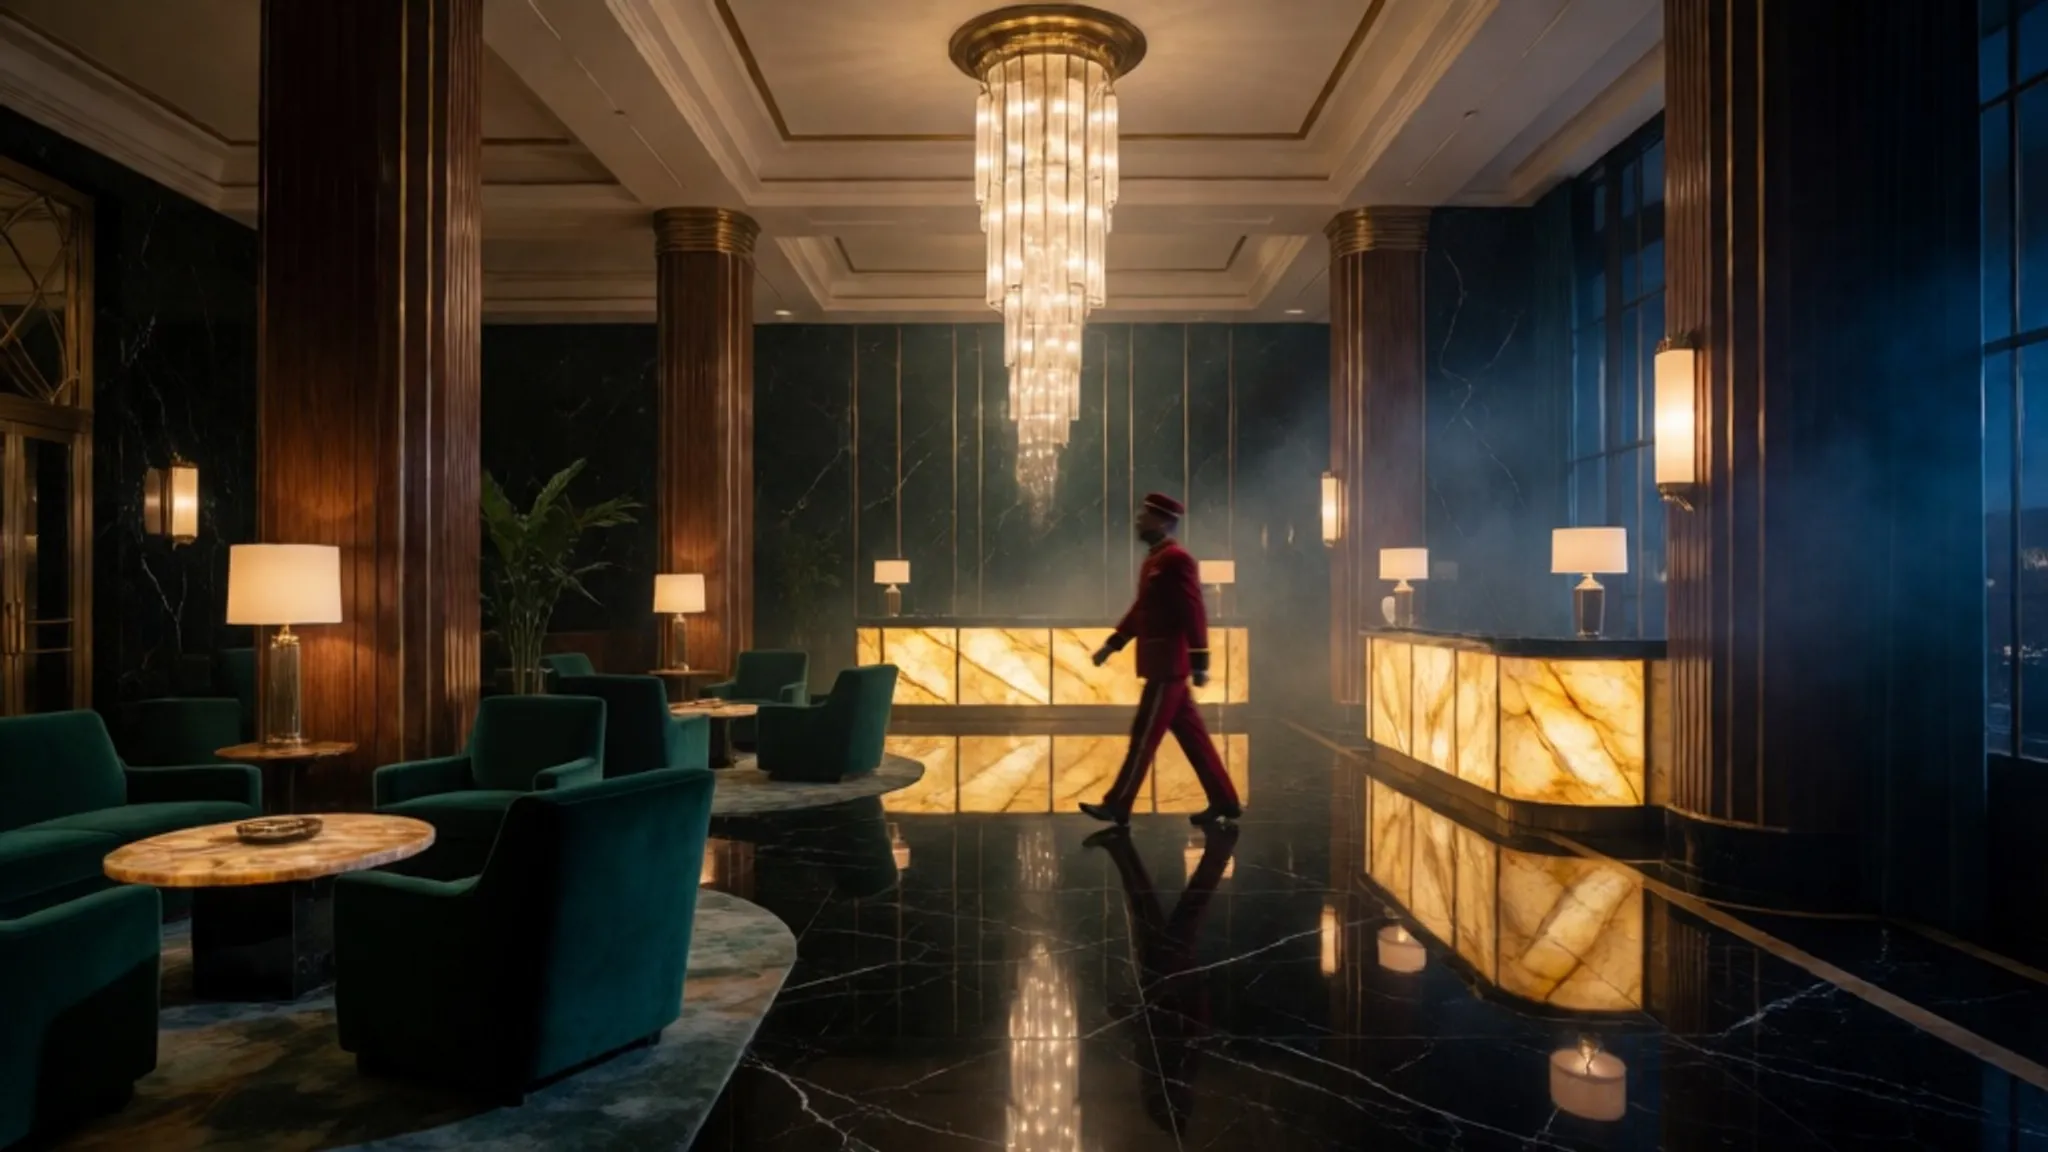
Generated using Krea 2 Turbo on fal, an AI model from Krea.
How do you steer Krea 2's aesthetic?
People come to Krea 2 for the look, so the most direct lever you have is telling it which look you're after.
Its range is wide, running from crisp photoreal all the way out to loose painterly work.
But it only lands somewhere specific when you point it there.
Give it no direction, and it settles into a house style, agreeable and hard to tell apart from the next agreeable render.
Name a medium, an era, a printing process, or an artist's general approach, and the whole image reorganizes around that.
Prompt: A 1980s synthwave illustration of a sleek sports car tearing down a neon-lit coastal highway at sunset, chrome bodywork streaked with magenta and cyan reflections, a glowing pink grid stretching to the horizon, palm trees in silhouette. Bold retro-futuristic color, heavy sun glare, a fine scan-line texture over the whole frame, an outrun album-cover mood.
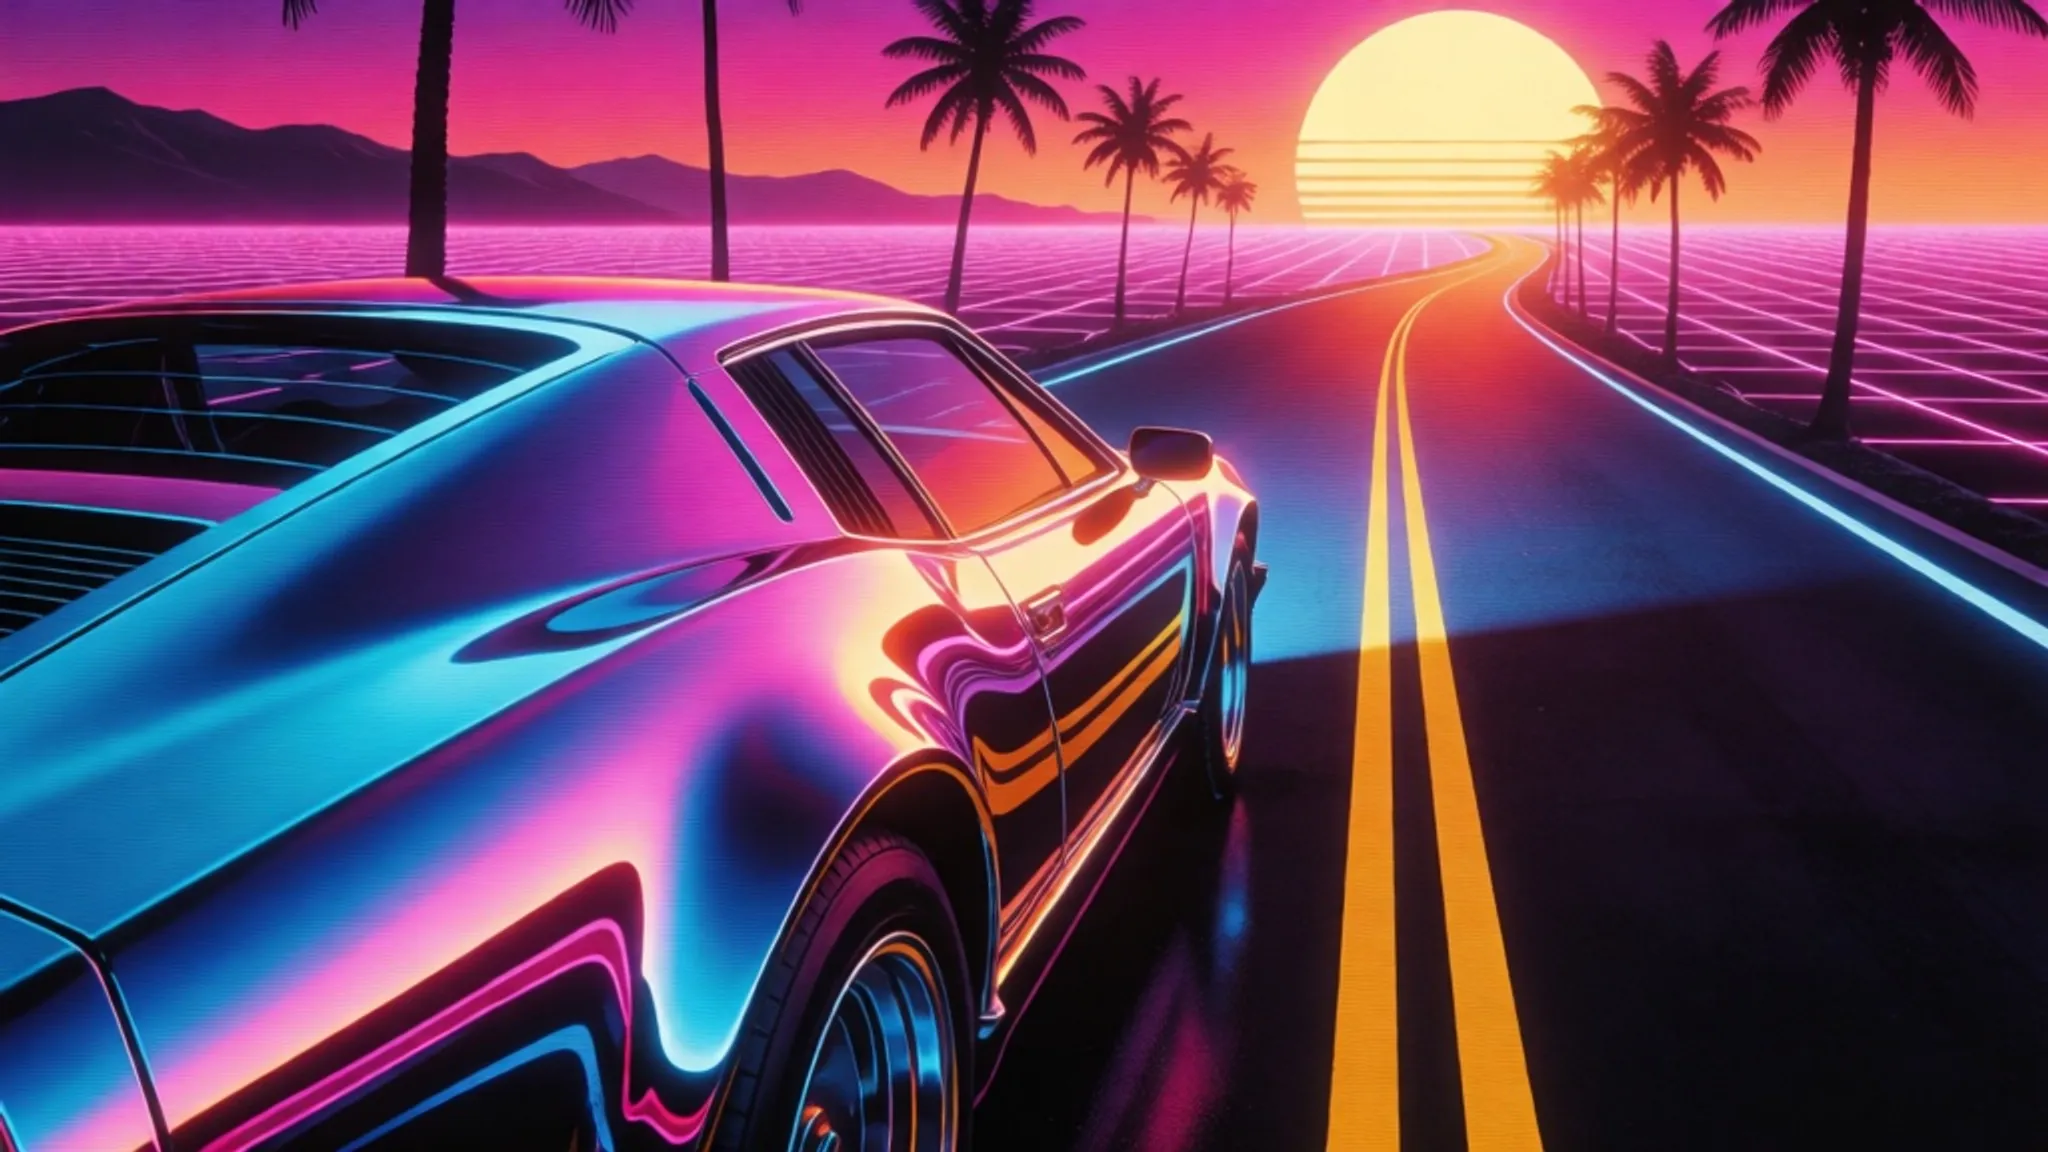
Generated using Krea 2 Turbo on fal, an AI model from Krea.
💡 Prompt-only work has a ceiling, though.
It gets you near a look, or near a face, but not the exact same one twice.
Locking one down for good is what the LoRA section is for (keep reading to see my workflow!).
How do you keep Krea 2 output from looking AI-generated?
With a model this aesthetic, broken anatomy is rarely what gives it away.
Uniformity is.
Everything arrives polished in the same register, and a dozen images in, the sameness is obvious.
Two habits pull you back out:
One is borrowing specificity from the real world.
Generators quietly sand off the small, slightly wrong details that make a real photograph read as real, so put them back: clay drying in uneven streaks on a forearm, a chipped mug rim that the model would otherwise smooth into perfection.
Say where the light falls and what color it is, name the material itself and not just "detailed," and the frame stops looking assembled and starts looking observed.
The other is the move this guide keeps pointing at: train a LoRA.
Then the look you fall back on is one you chose, not the model's tasteful average, and the same trick locks in a face you can reuse just as easily.
This photoreal prompt is loaded with the kind of specific, slightly imperfect detail that breaks the generic sheen:
Prompt: A photoreal beauty close-up of a woman's face turned three-quarters to a window, real skin texture held sharp, faint freckles across the nose, a few flyaway hairs lit from behind, fine peach fuzz along the jaw, one slightly chapped lower lip. Soft directional daylight rakes across the cheekbone and catches a dewy highlight there, the far side of the face falling into gentle shadow. Natural minimal makeup, a single catchlight in each eye, pores and the faint texture of the skin visible and not airbrushed. Shot around 85mm at f2, a calm and intimate mood. Portrait_4_3.
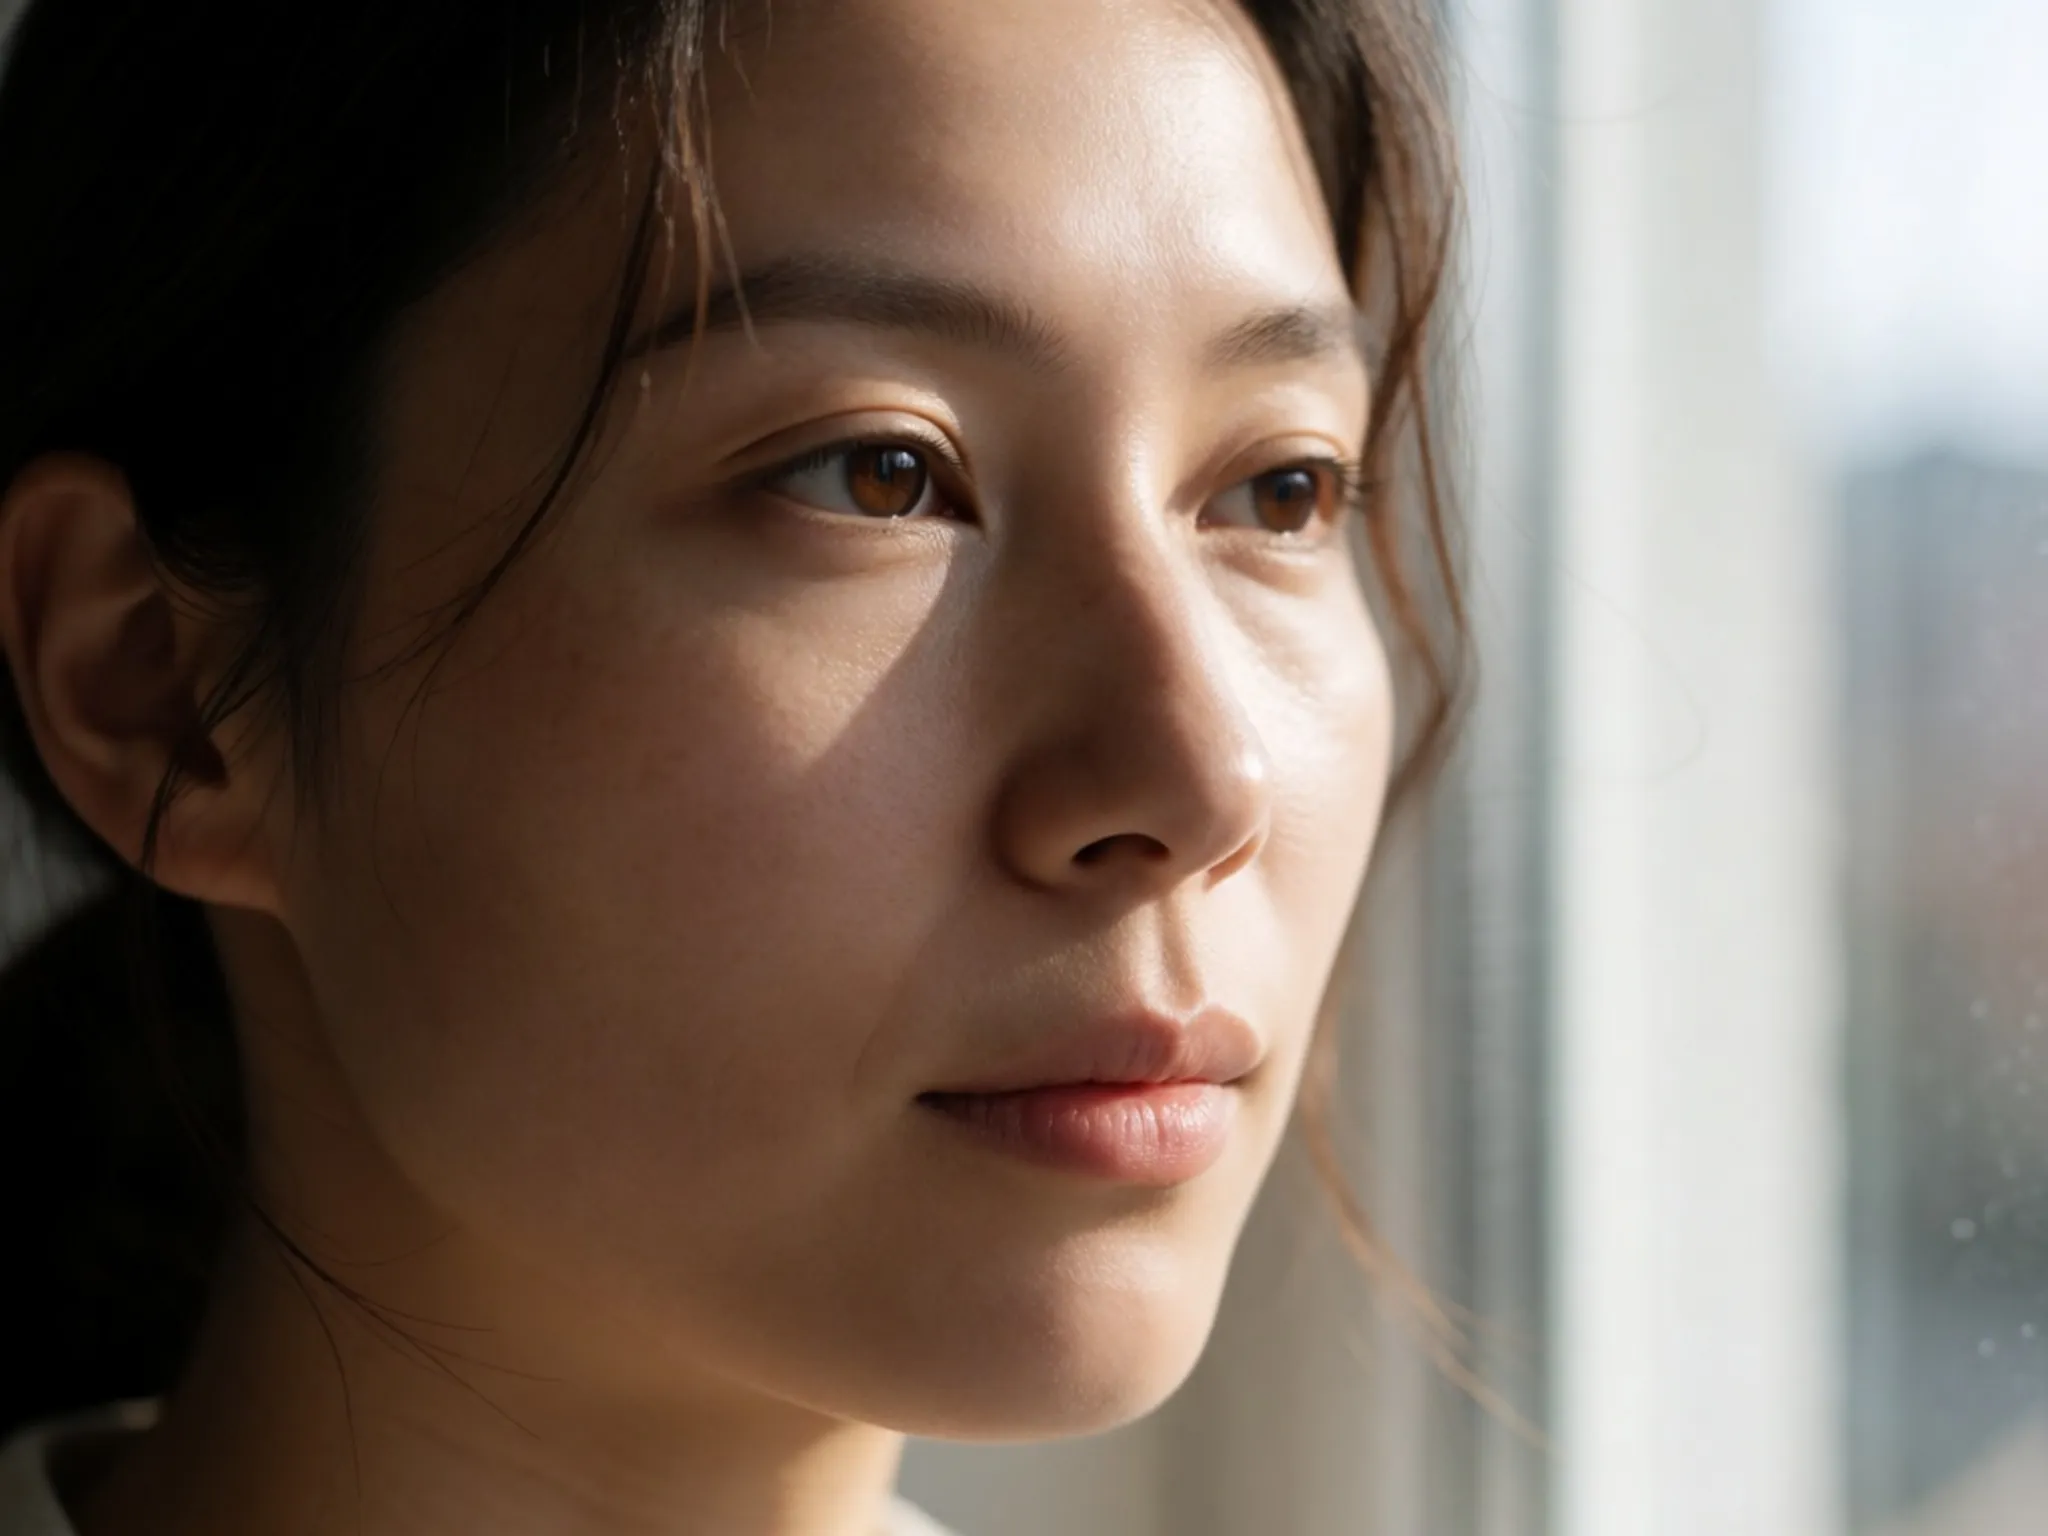
Generated using Krea 2 Turbo on fal, an AI model from Krea.
falMODEL APIs
The fastest, cheapest and most reliable way to run genAI models. 1 API, 100s of models
What are the best Krea 2 prompt patterns? (copy these!)
Each of these plays to something Krea 2 does well.
You can swap in your own subject and keep the scaffolding:
A painterly character portrait
Warm, hand-painted character work suits this model as well as anything:
Prompt: A painterly character portrait of a grizzled river-boat captain in his sixties, a weather-beaten face, a salt-and-pepper beard, a knitted navy cap, a clay pipe clenched in his teeth. Rendered in the warm, textured style of classic character concept art, thick confident brushwork on the coat, softer blending across the skin, a rim of cold light from a lantern behind him lifting him off a foggy night harbor. Amber lantern glow on one cheek, deep teal shadow on the other, sharp catchlights in the eyes, the fog painted in loose vertical strokes. Shoulders up, a three-quarter turn, looking just past the camera.
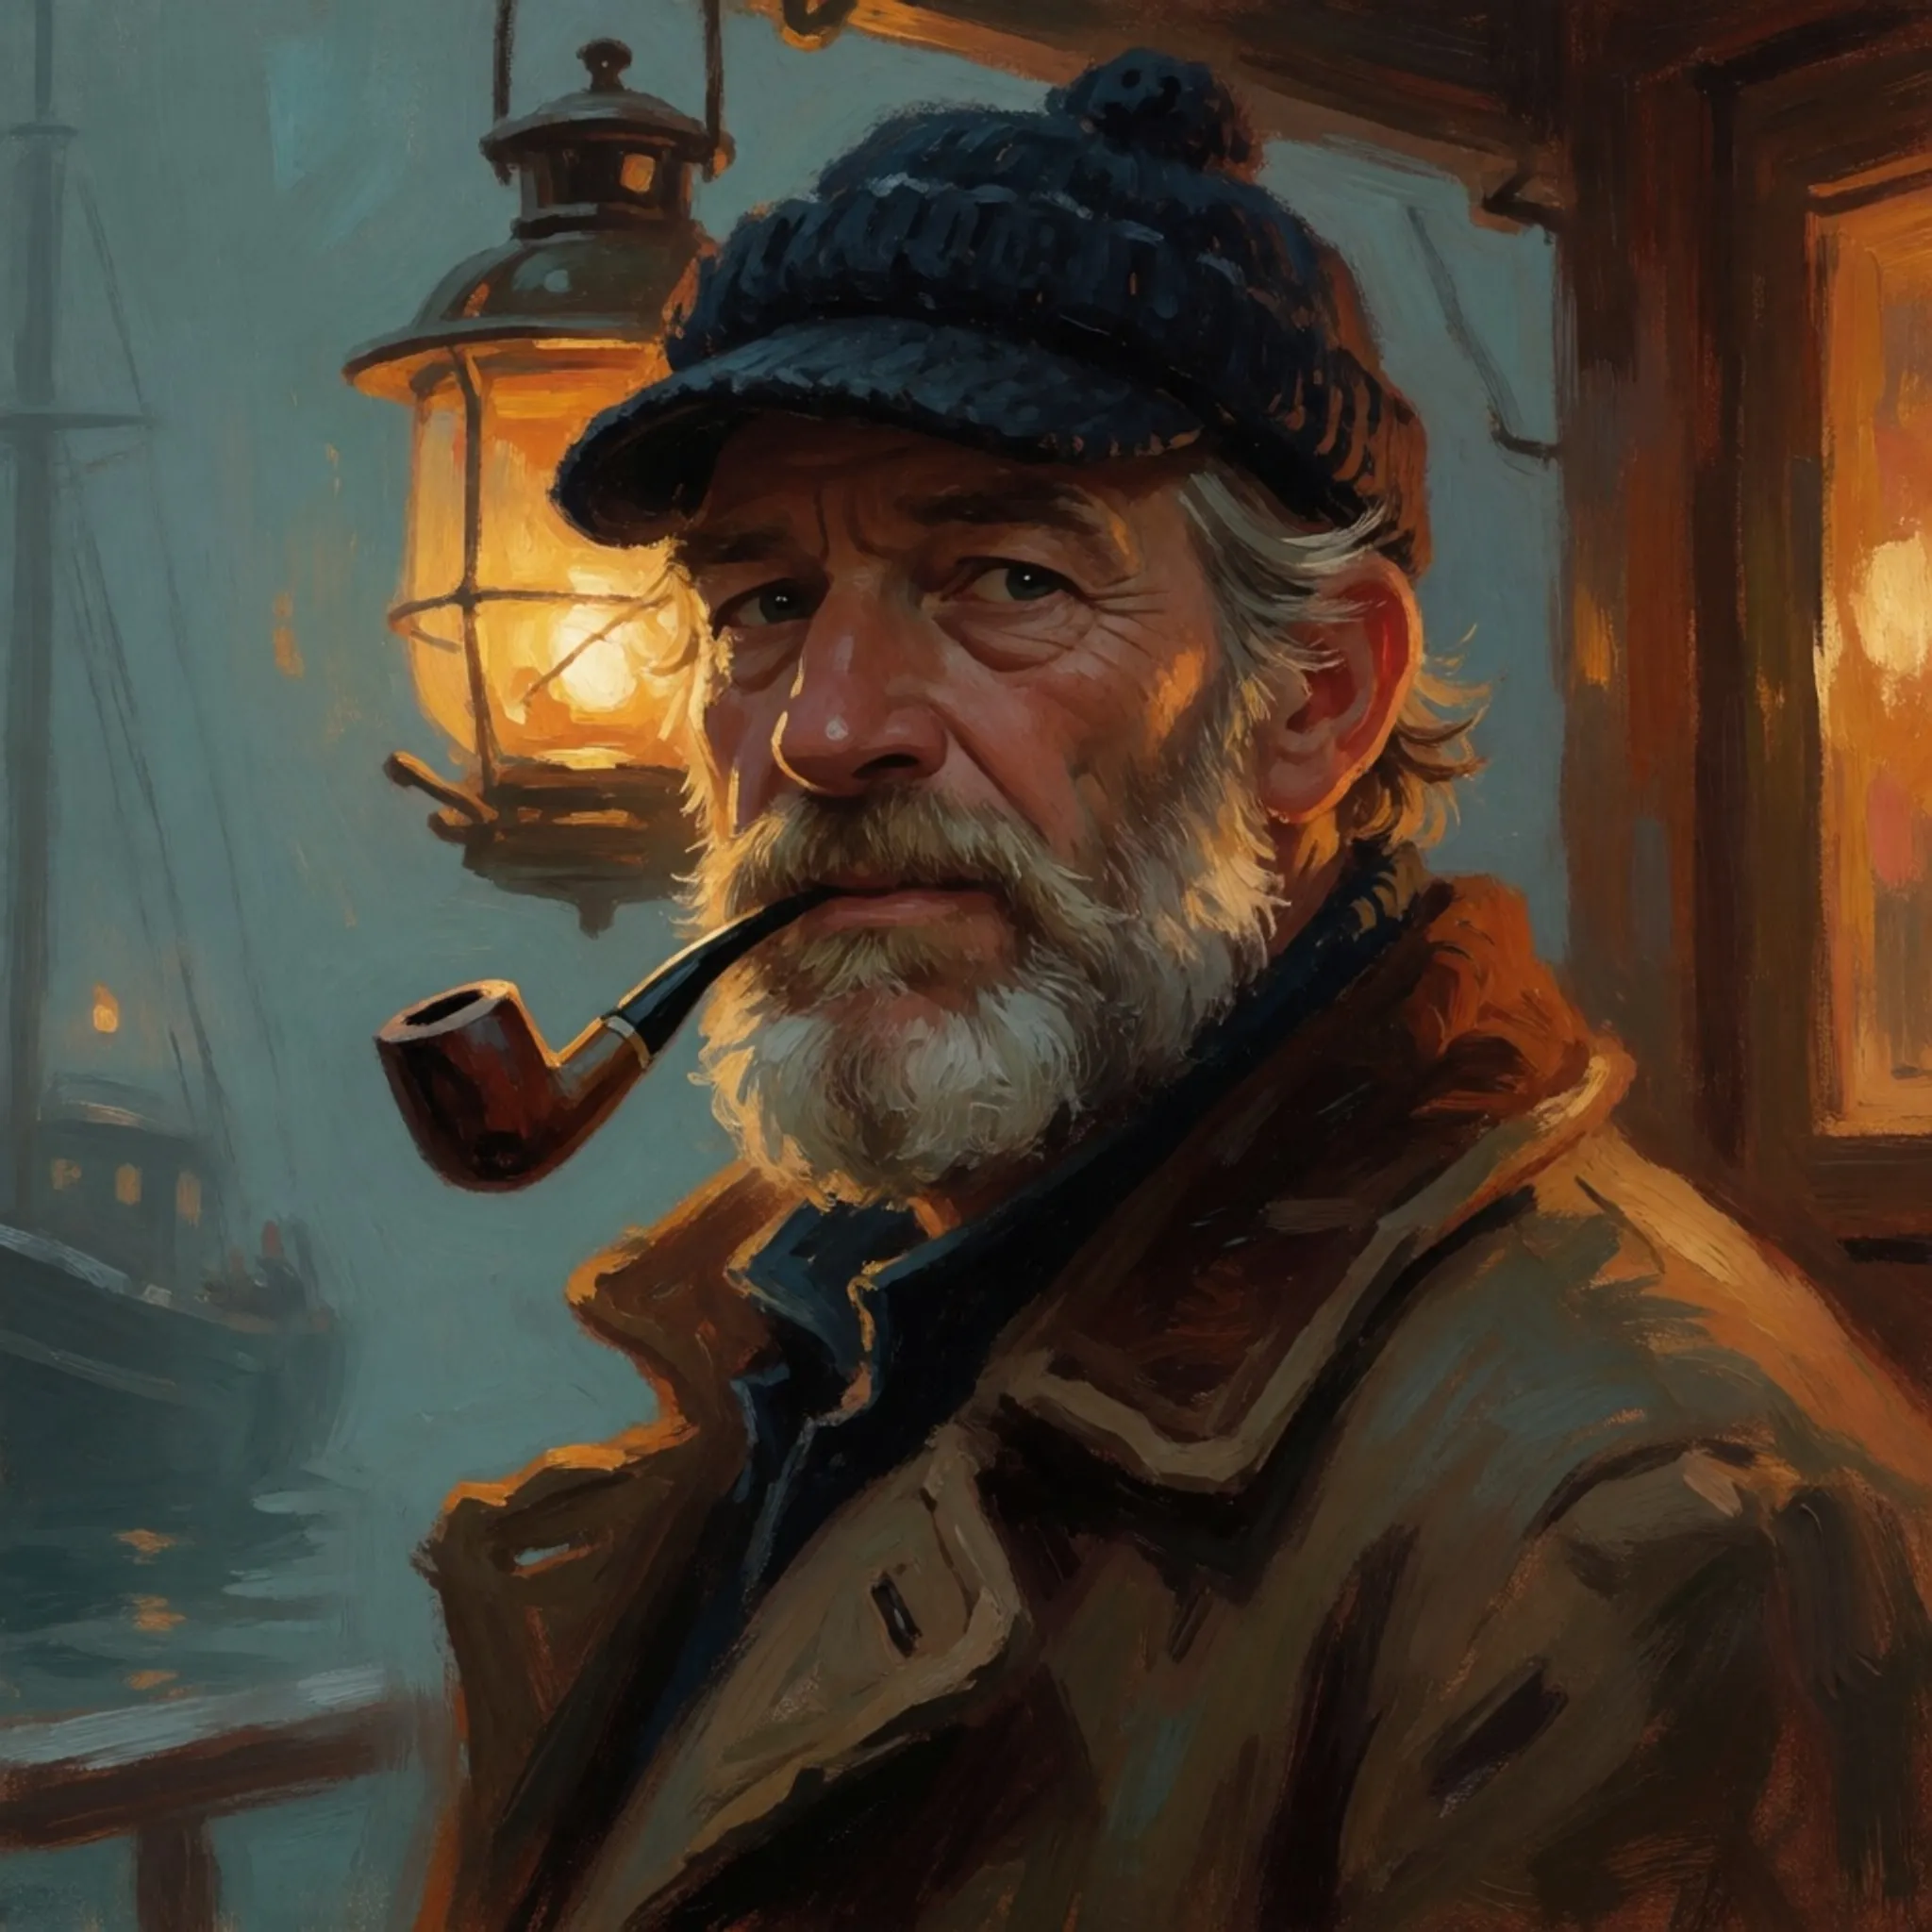
Generated using Krea 2 Turbo on fal, an AI model from Krea.
A macro texture shot
Tight, physical detail is a good stress test for an aesthetic model, and Krea 2 holds up on surfaces.
Prompt: An extreme macro photograph of a single drop of water hanging from the tip of a pine needle after rain, the whole forest behind it bent and inverted inside the droplet. Shot at high magnification, the needle tack-sharp, the droplet acting as a tiny lens with the green canopy and a sliver of grey sky refracted inside it. Cool overcast light, a soft wash of out-of-focus branches behind, every waxy ridge on the needle visible, a bright specular highlight riding the surface tension. A deep green and silver palette.
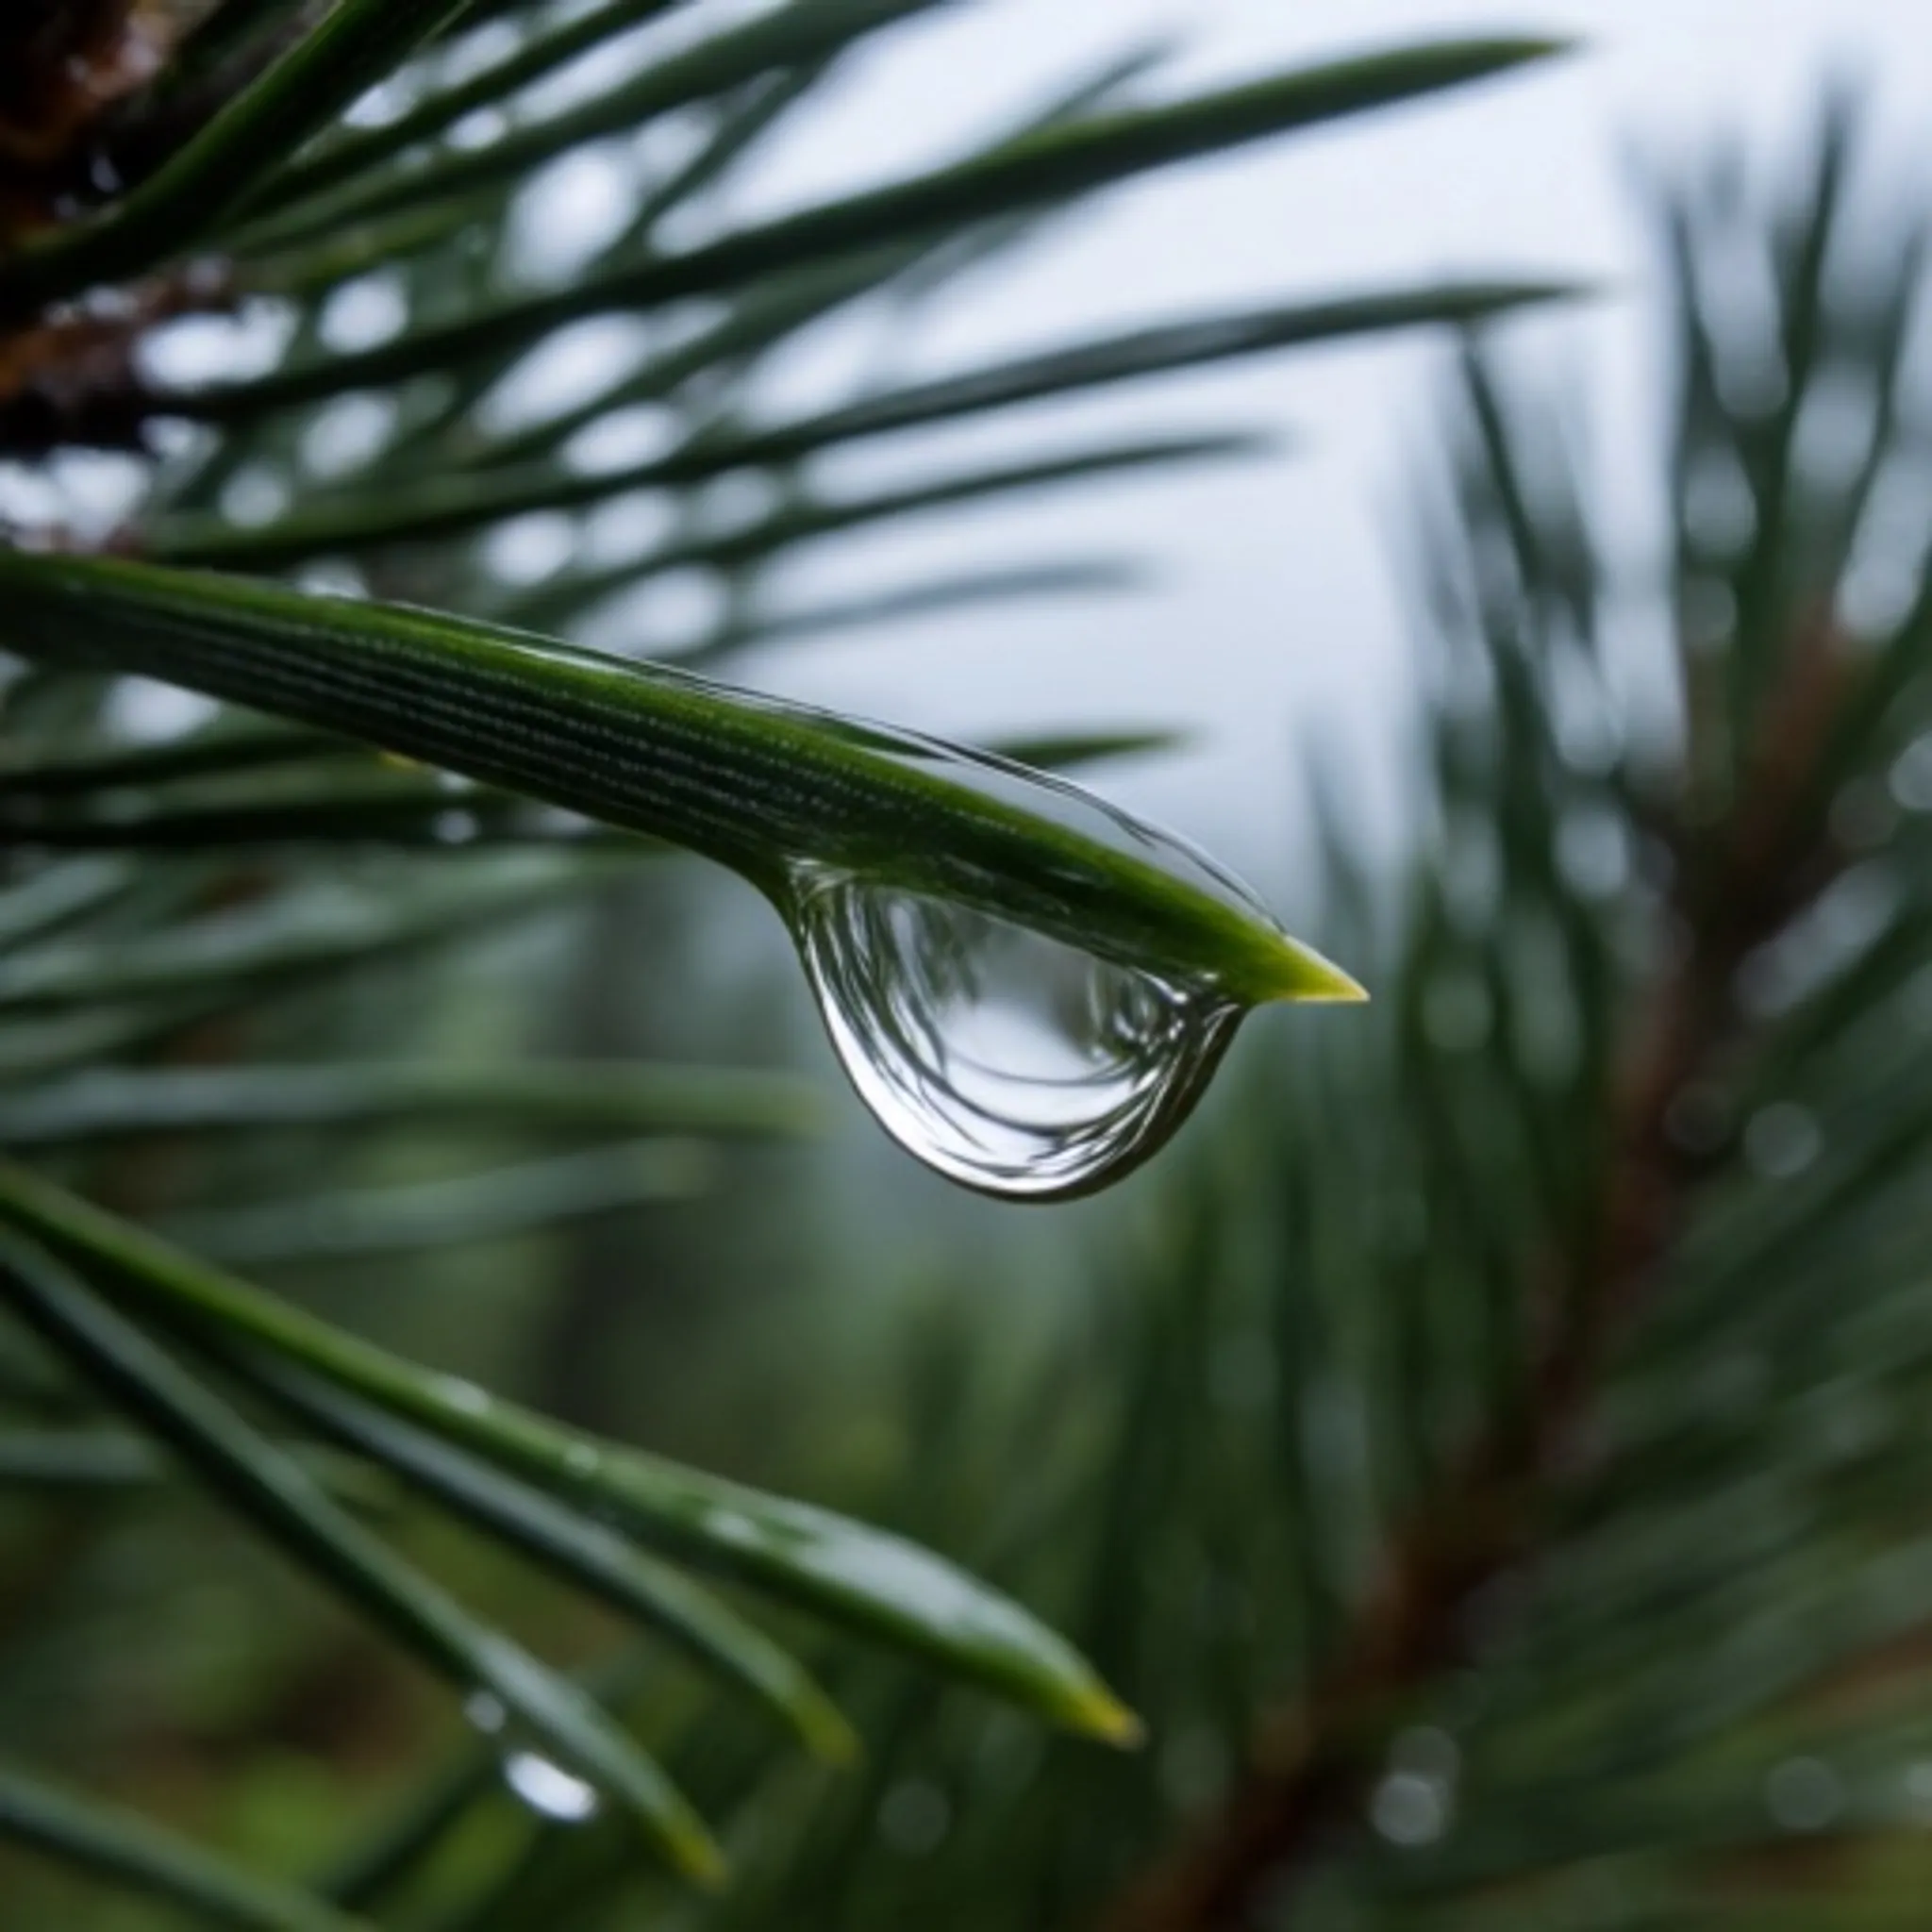
Generated using Krea 2 Turbo on fal, an AI model from Krea.
A storybook illustration
Soft, warm, hand-illustrated work shows off the far end of the model's range from the photoreal shots.
Prompt: A children's book illustration of a small mouse in a red raincoat sailing a walnut-shell boat down a rushing gutter after a storm, drawn in warm gouache with a soft grainy texture and visible paper tooth. Rounded friendly shapes, no hard outlines, a limited palette of butter yellow, sky blue, leaf green, and the coat's red. Fat raindrops still falling, a paper straw for a mast, a single leaf for a sail, the mouse mid-laugh and gripping the rim. Gentle diffused light, a cozy and adventurous mood, plenty of clean space around the boat.

Generated using Krea 2 Turbo on fal, an AI model from Krea.
A cinematic wide shot
Atmosphere and graded light are what the model does best, so hand it scale and a strong sky.
Prompt: A cinematic wide shot of a lone figure standing on a rocky ridge, silhouetted against a vast green aurora rippling over jagged snow-capped peaks, a scatter of stars above and the last cool glow of twilight along the horizon. The tiny figure gives scale to the mountains, soft reflected light glinting on the snow, a palette of deep blue and luminous green. Fine film-grain texture, a wide lens with deep focus, epic and still.
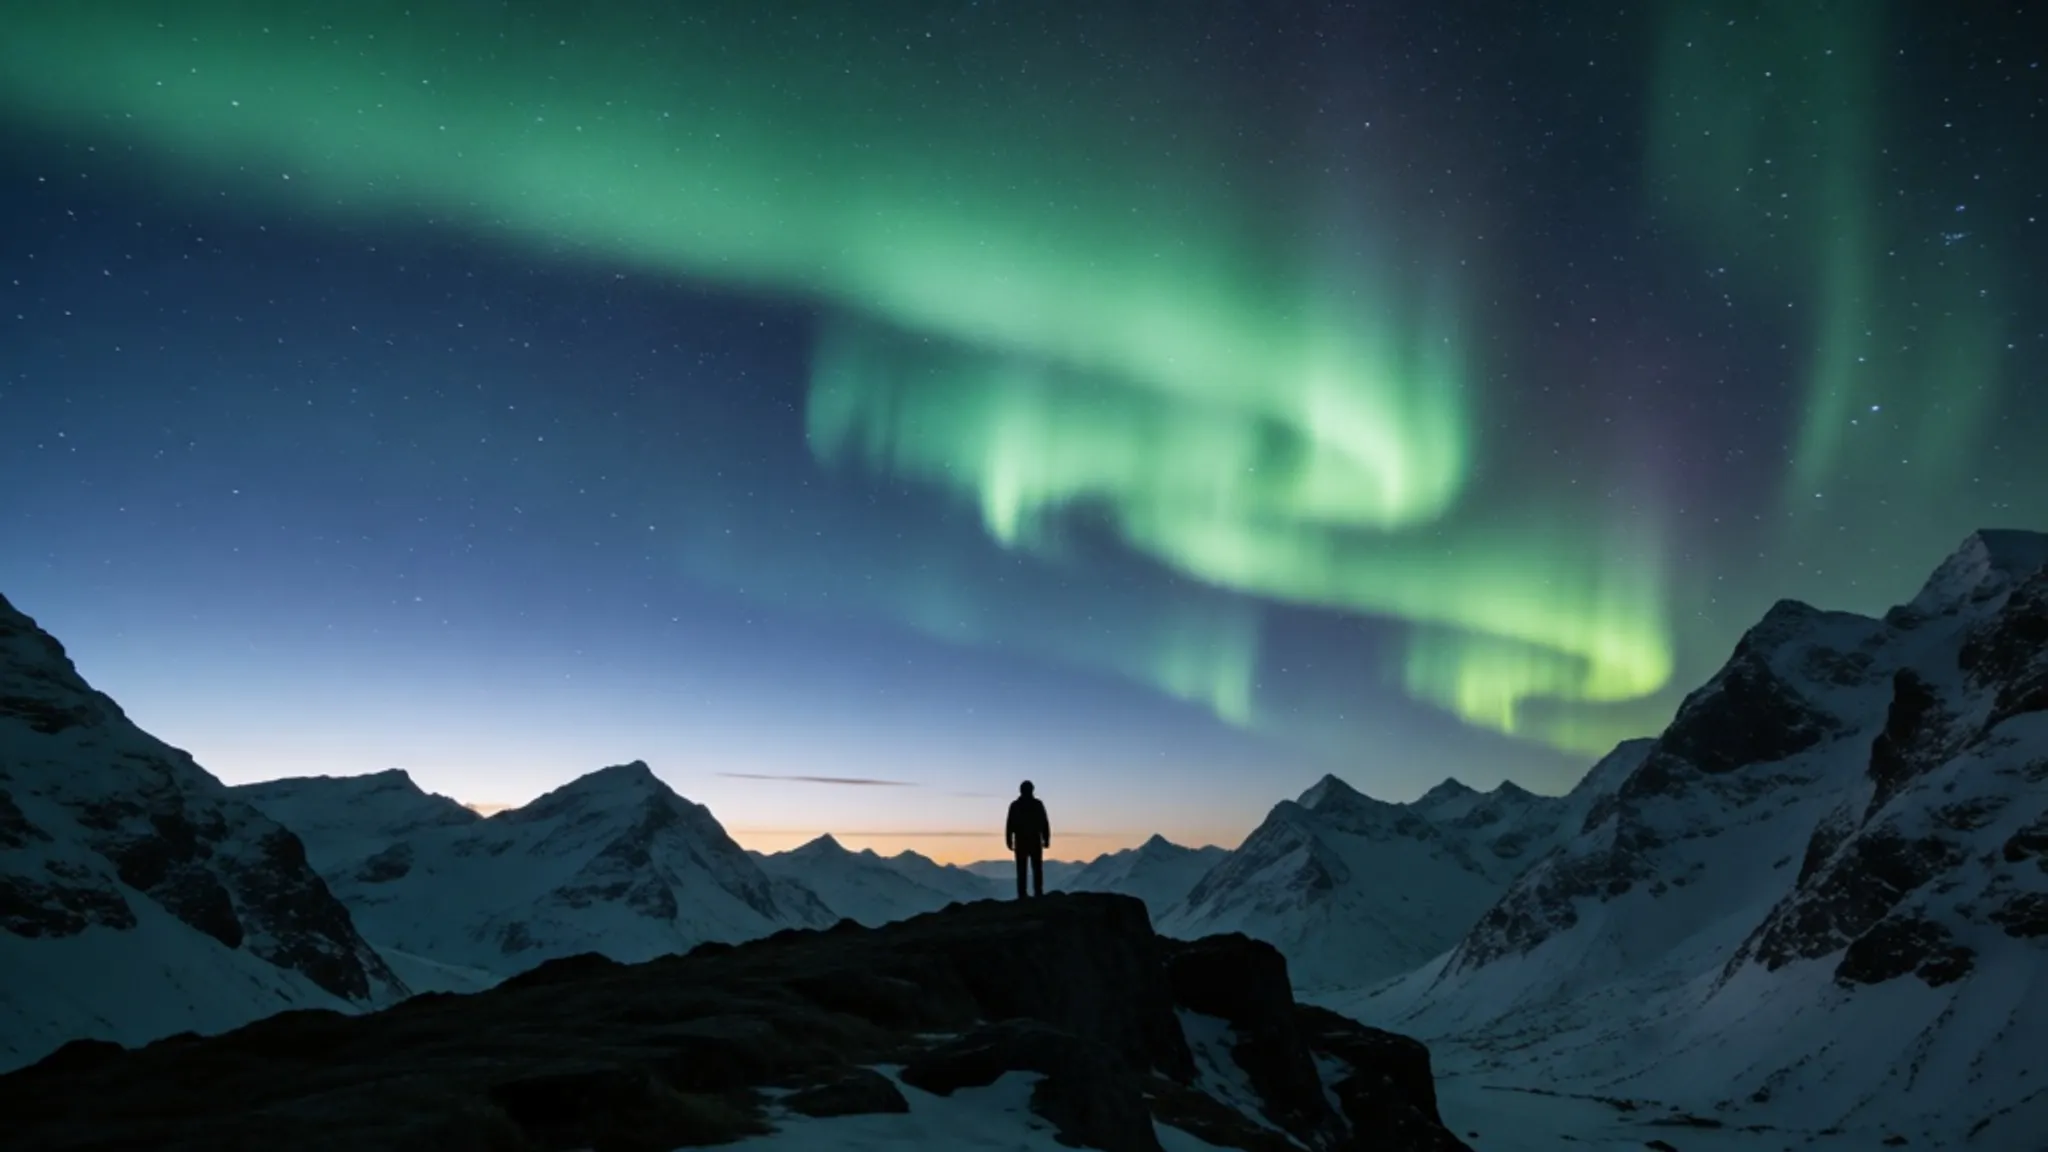
Generated using Krea 2 Turbo on fal, an AI model from Krea.
A bold flat-color poster
At the graphic end, clean shapes and flat fills are a different muscle, and it's worth showing the model can do restraint as well as richness.
Prompt: A bold flat-color illustration of a tiger prowling through tall grass, built entirely from clean confident shapes and flat fills with no gradients. A saturated palette of tangerine orange, deep forest green, cream, and charcoal, the tiger's stripes as crisp graphic marks, the grass as overlapping flat blades. A hot yellow full moon behind it, minimal shading, a subtle paper grain over the whole image, a poster-like sense of balance and negative space.
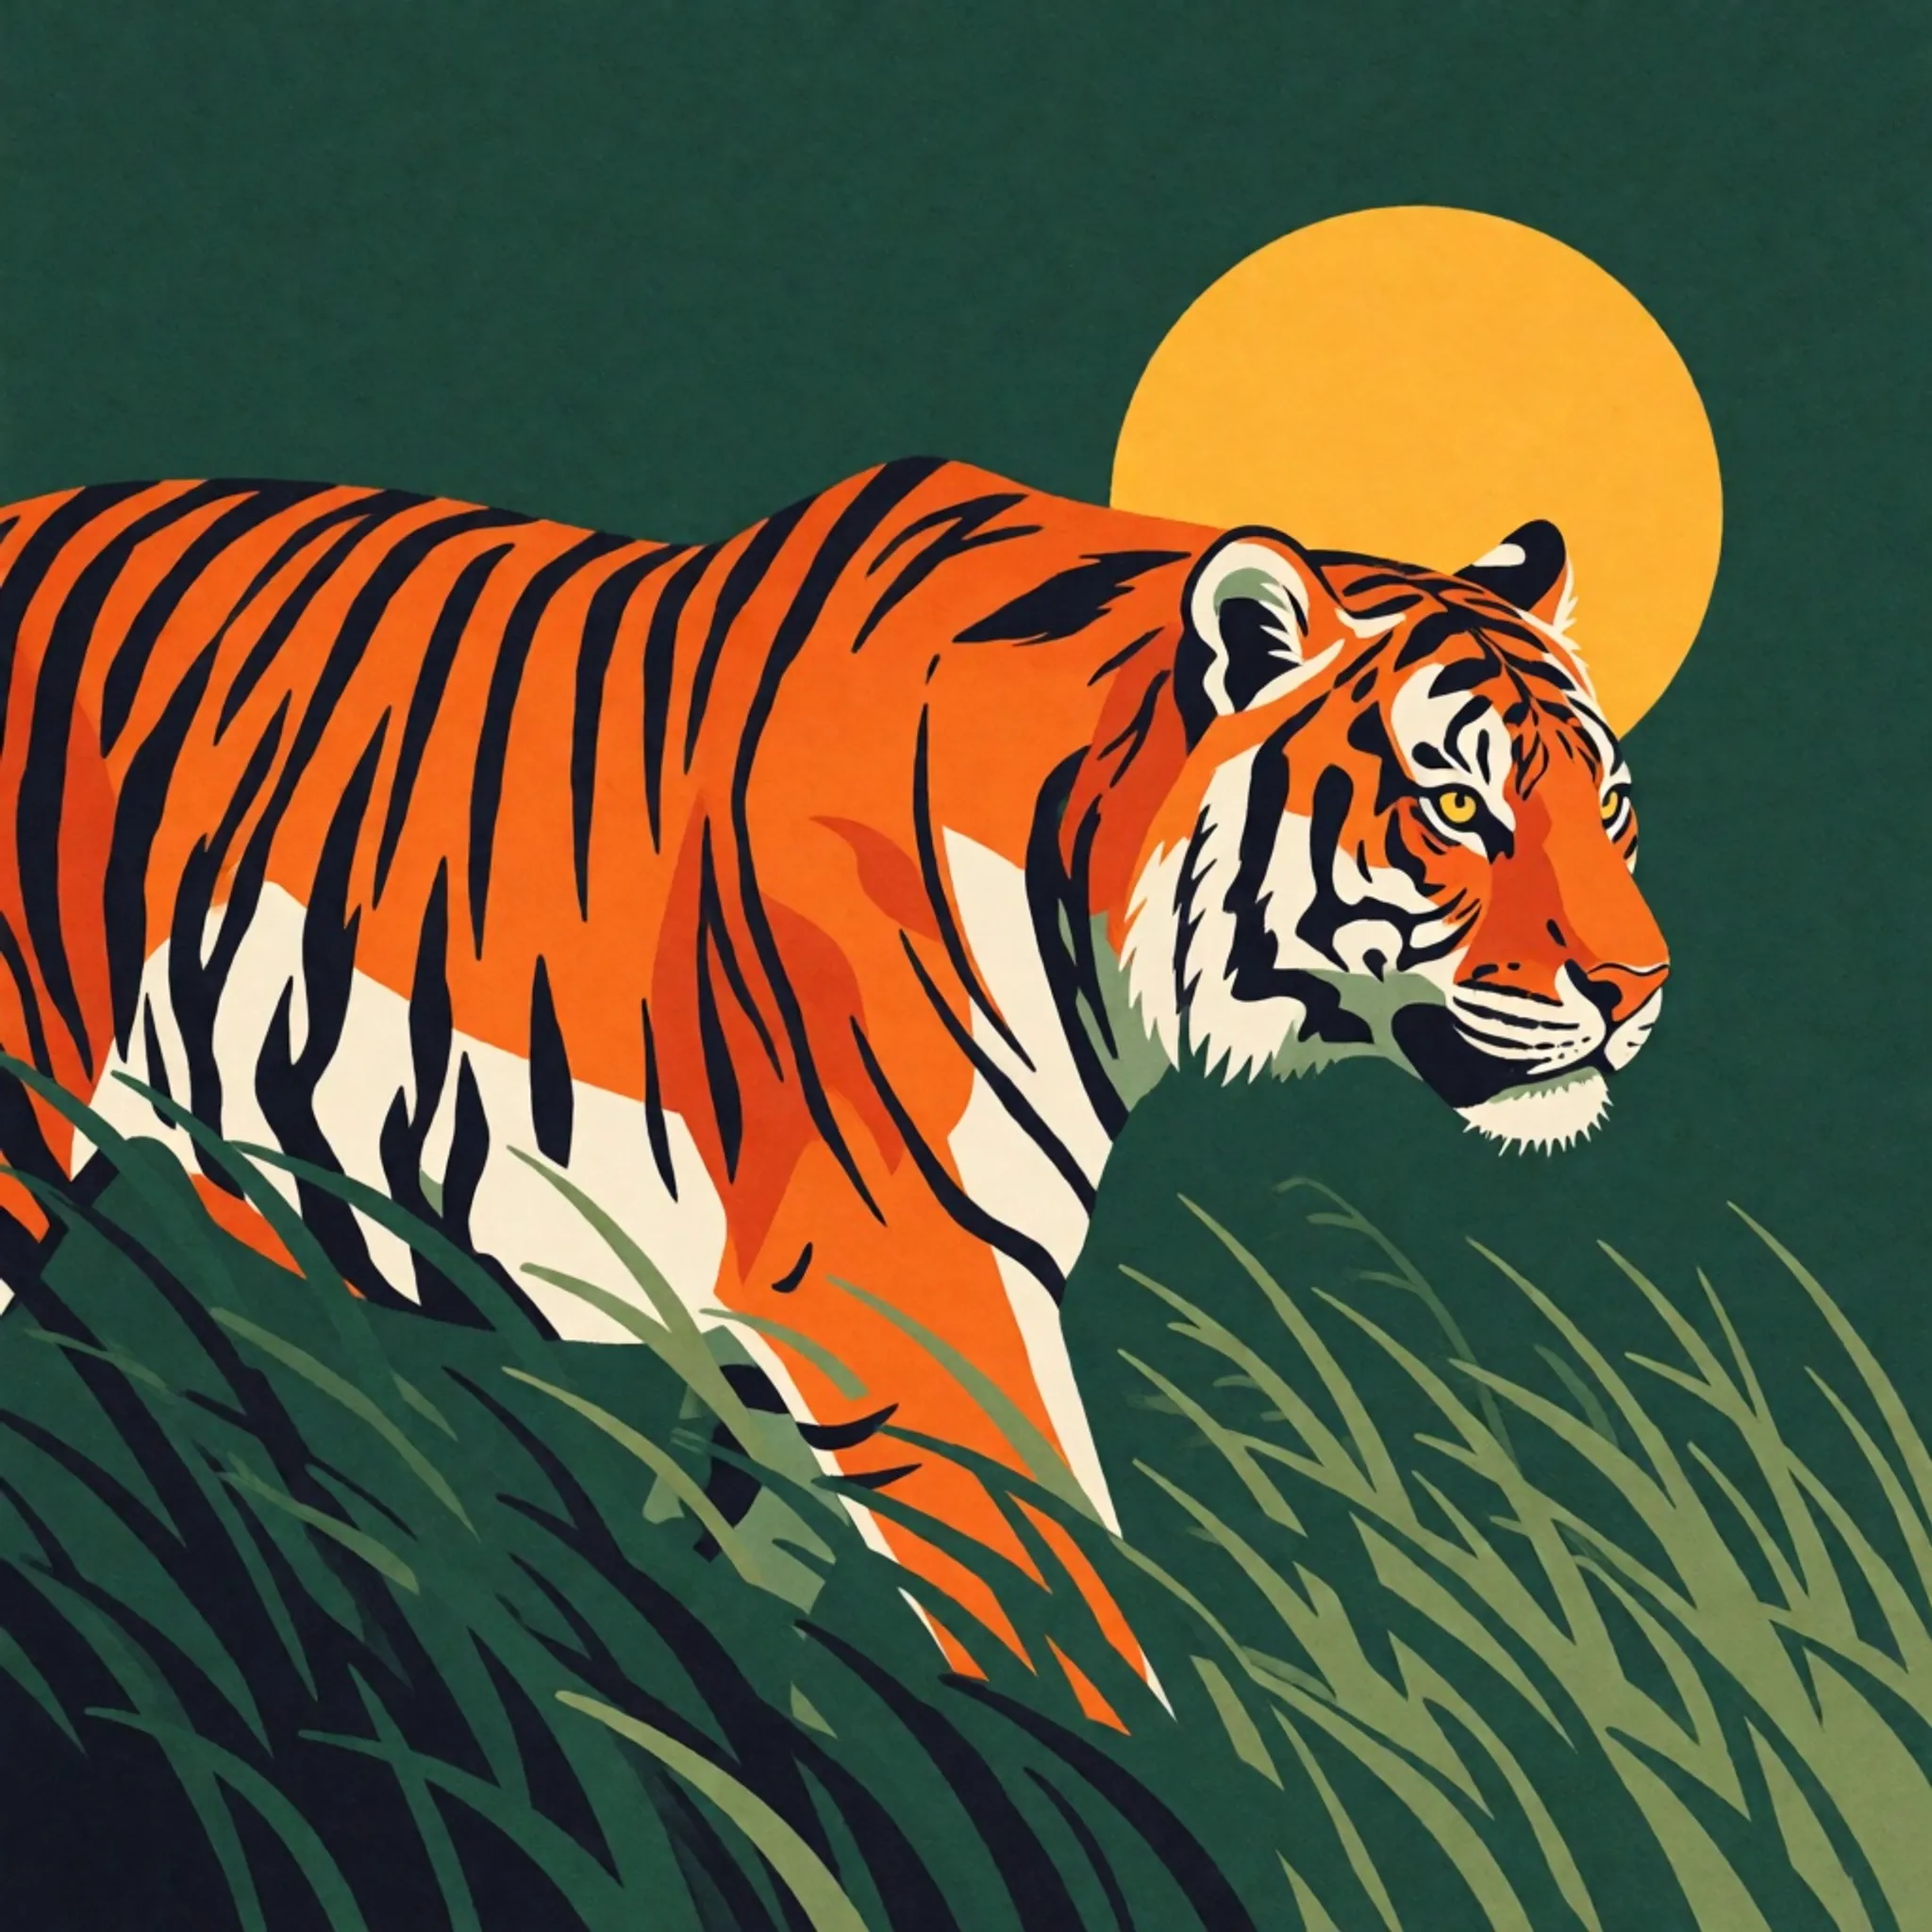
Generated using Krea 2 Turbo on fal, an AI model from Krea.
How do you train a custom character with a Krea 2 LoRA?
Now for the reason the open weights matter at all.
A LoRA is a small add-on you train once that teaches Krea 2 one specific thing, then loads on top of Turbo whenever you call it.
It can hold a style.
But the version that pays for itself in e-commerce is a character: one consistent face you own, ready to stand in front of any product, in any setting, with no model and no studio to book.
So that's what we'll build: an AI influencer whose face stays put across every shot.
The same four steps train a style too; only the captions change.
The catch with a face is consistency.
You won't get the same person out of twelve separate prompts; the model will just hand you twelve different women.
So you make one, then hold her steady.
Step 1: Build a consistent training set
You need twelve images of one face, varied enough that the LoRA learns the person and not a jacket or a pose.
Twelve clean, on-model shots beat twenty where three faces drifted.
Consistency is the whole job here.
Start with the face.
This description is what keeps her recognizable, so it rides on every prompt, word for word:
Prompt: Vela, a 28-year-old woman with warm medium-tan skin, an oval face with soft high cheekbones, large dark-brown almond eyes, full brows, a small straight nose, and a warm resting expression. Long dark-brown hair with loose waves and a center part. A small beauty mark below her left eye and faint freckles across her nose. Natural, minimal makeup, realistic skin.
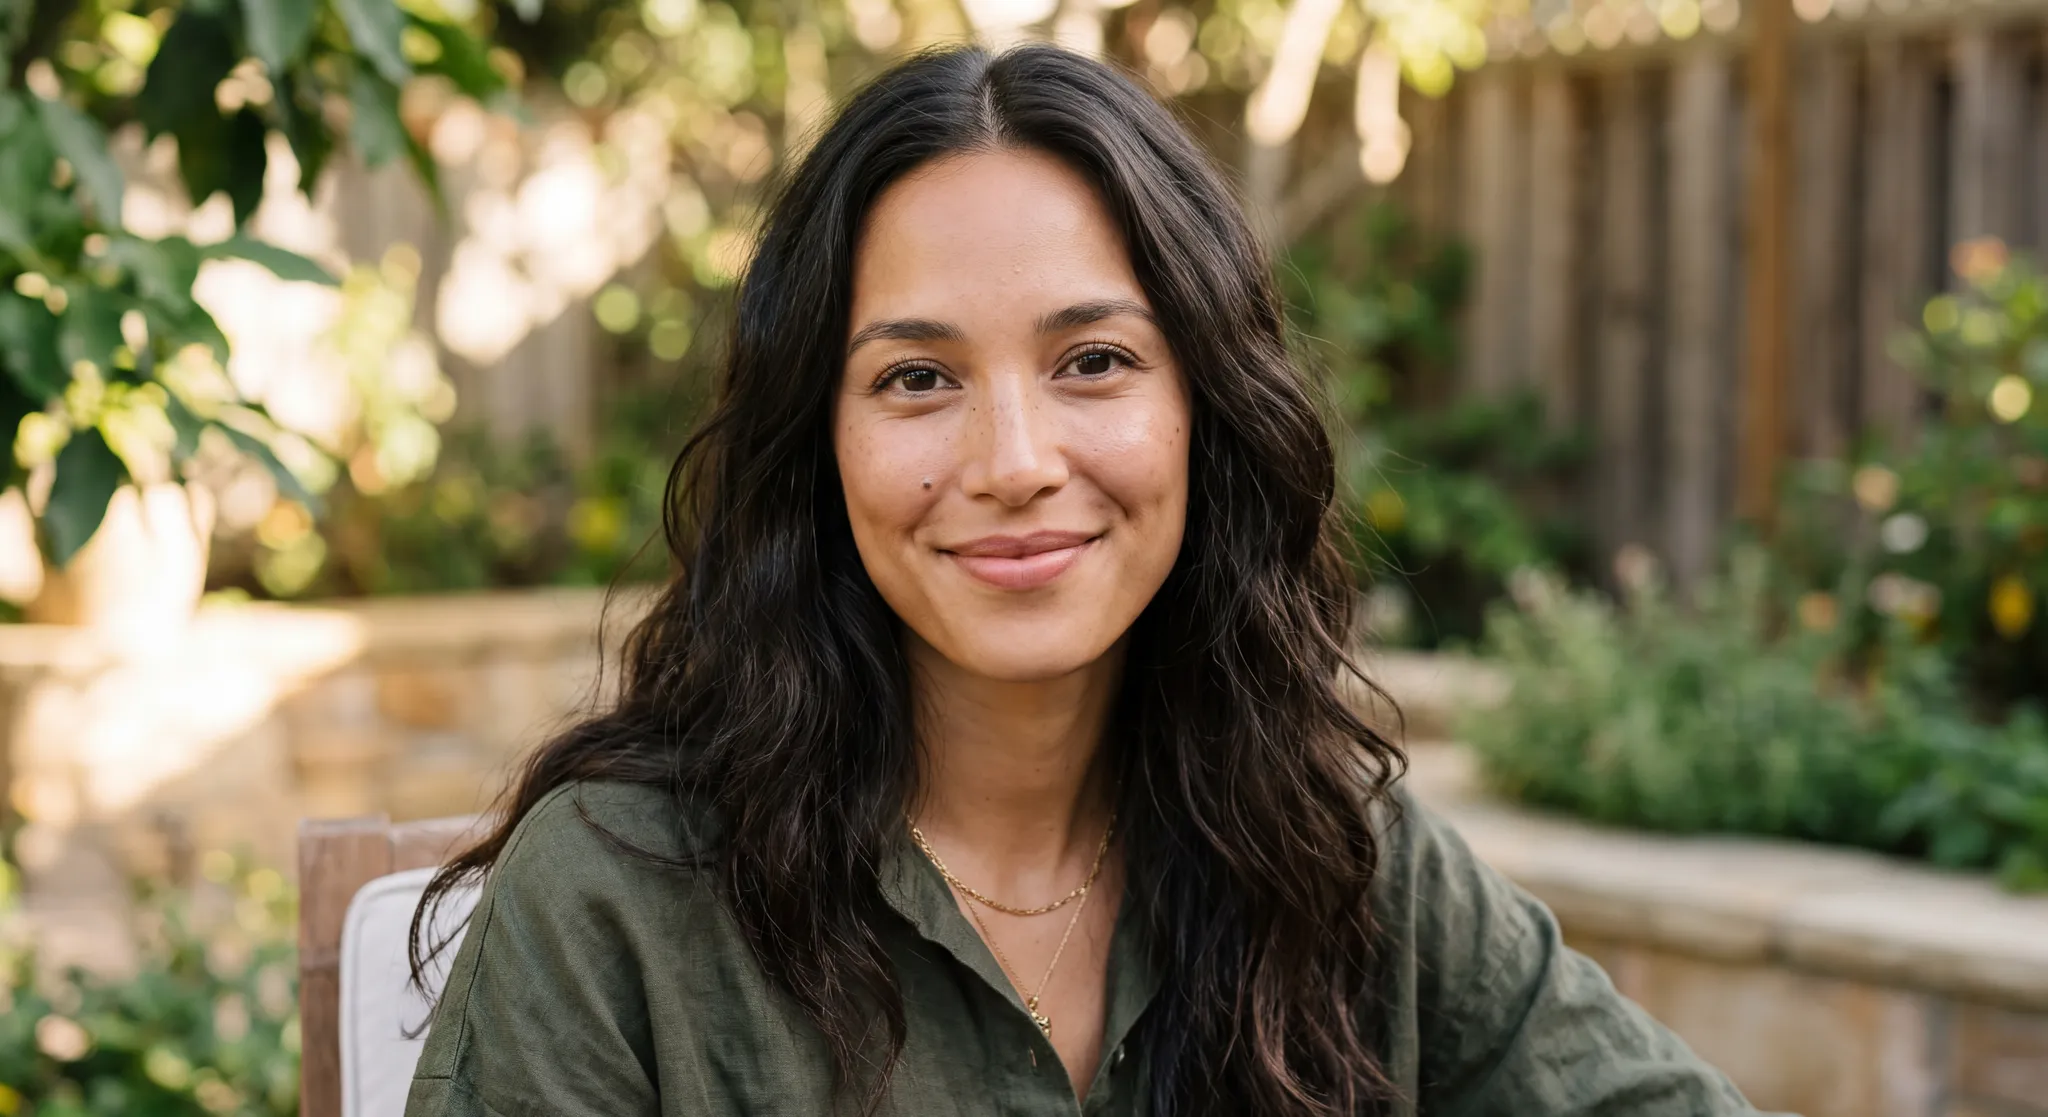
Generated using Nano Banana 2 on fal.
We generate that as our anchor first: a clean front-on portrait.
Then we want to hold that face across the other eleven.
The best way to do this is to attach the anchor as a reference in Nano Banana 2, which is built to keep a character consistent, and change one thing at a time: the angle, the expression, the light, the framing.
We want to check each result against the anchor, and regenerate any that drift off her.
Here's the spread, twelve shots across angle, expression, lighting, and composition, her face clear in every one.
The wardrobe and background change each time on purpose, so the LoRA binds to her and not to a sweater:
1. Anchor: straight-on head-and-shoulders, relaxed closed-mouth smile, soft even studio light, a neutral grey background.
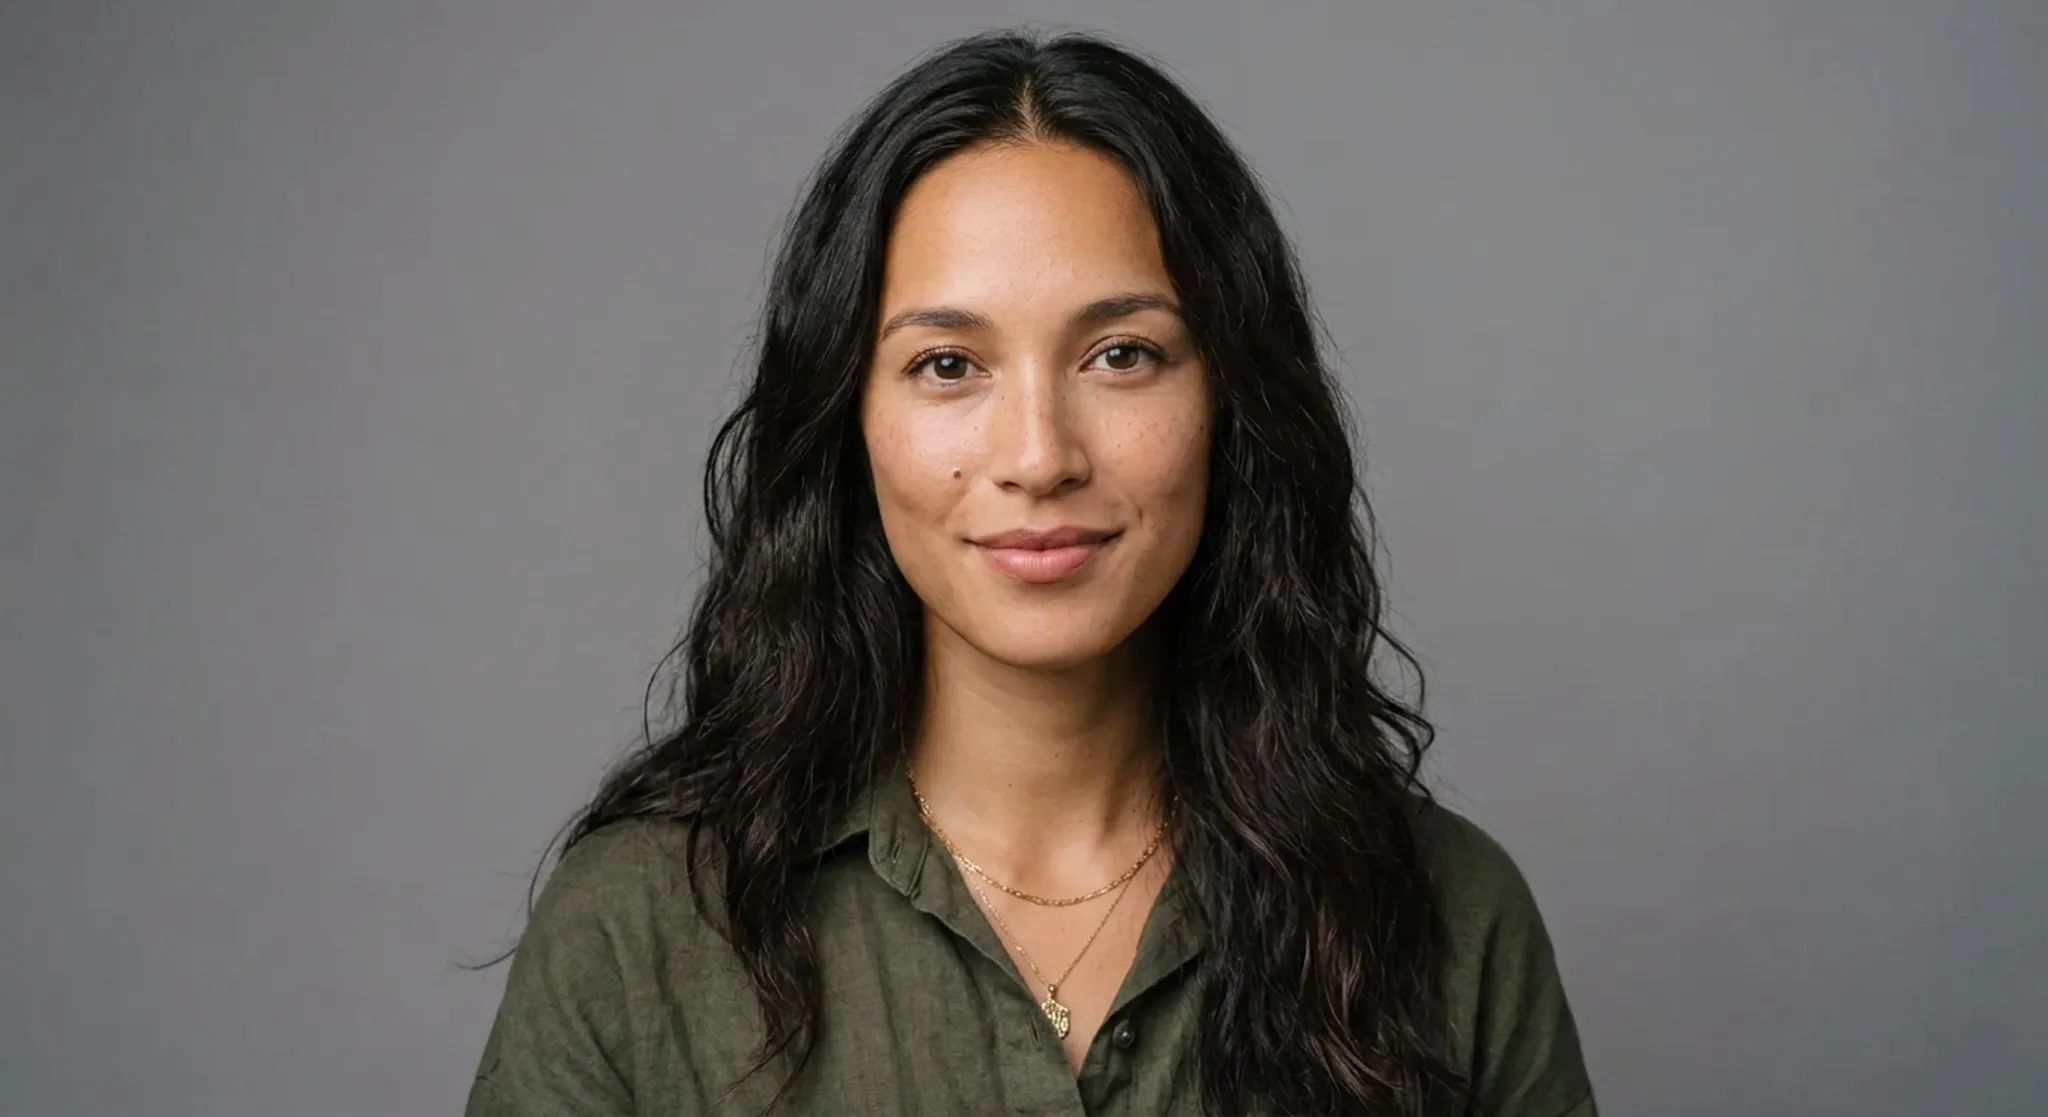
Generated using Nano Banana 2 Edit on fal.
2. Three-quarter turn, gentle smile, soft window light from the left, blurred warm interior.
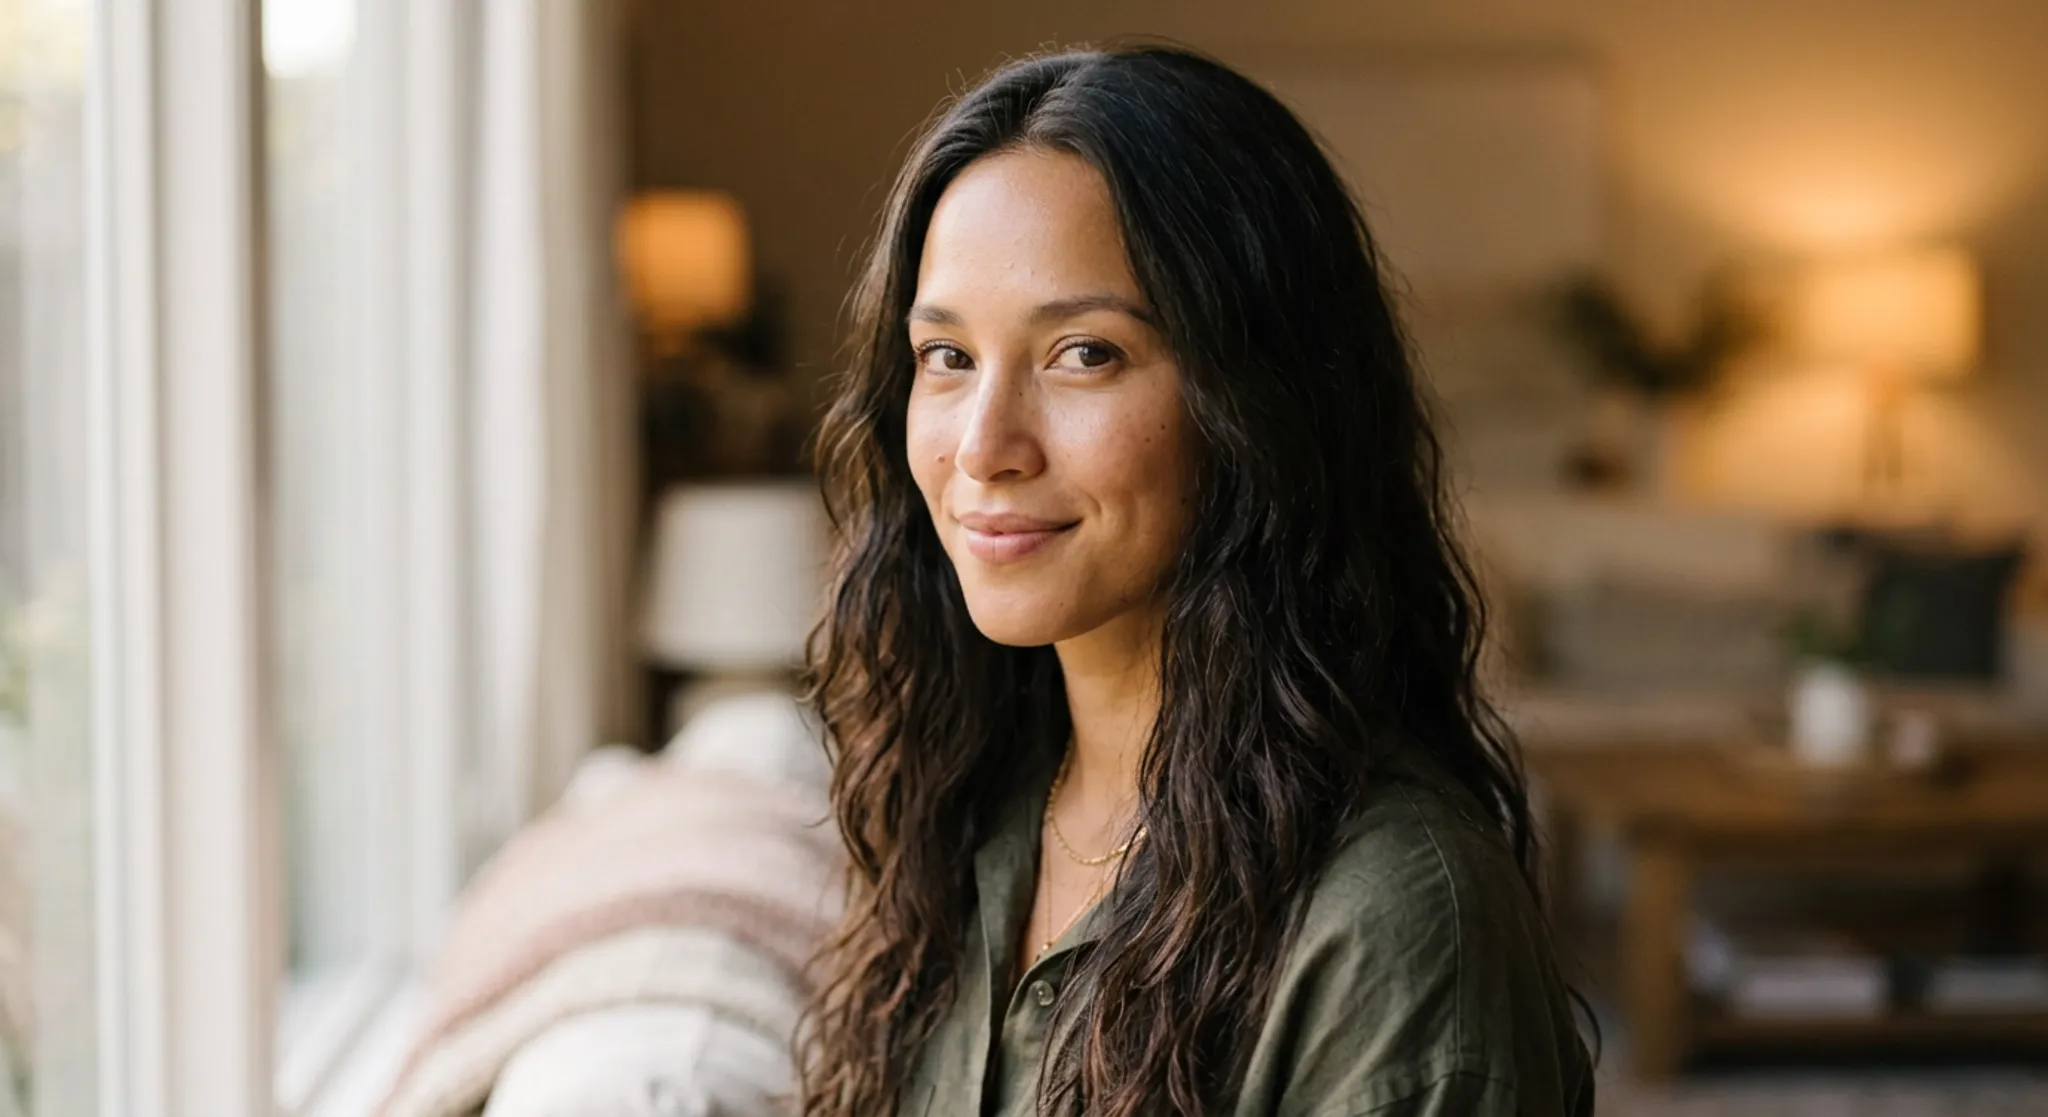
Generated using Nano Banana 2 Edit on fal.
3. Full side profile, calm, natural daylight, clean pale background.
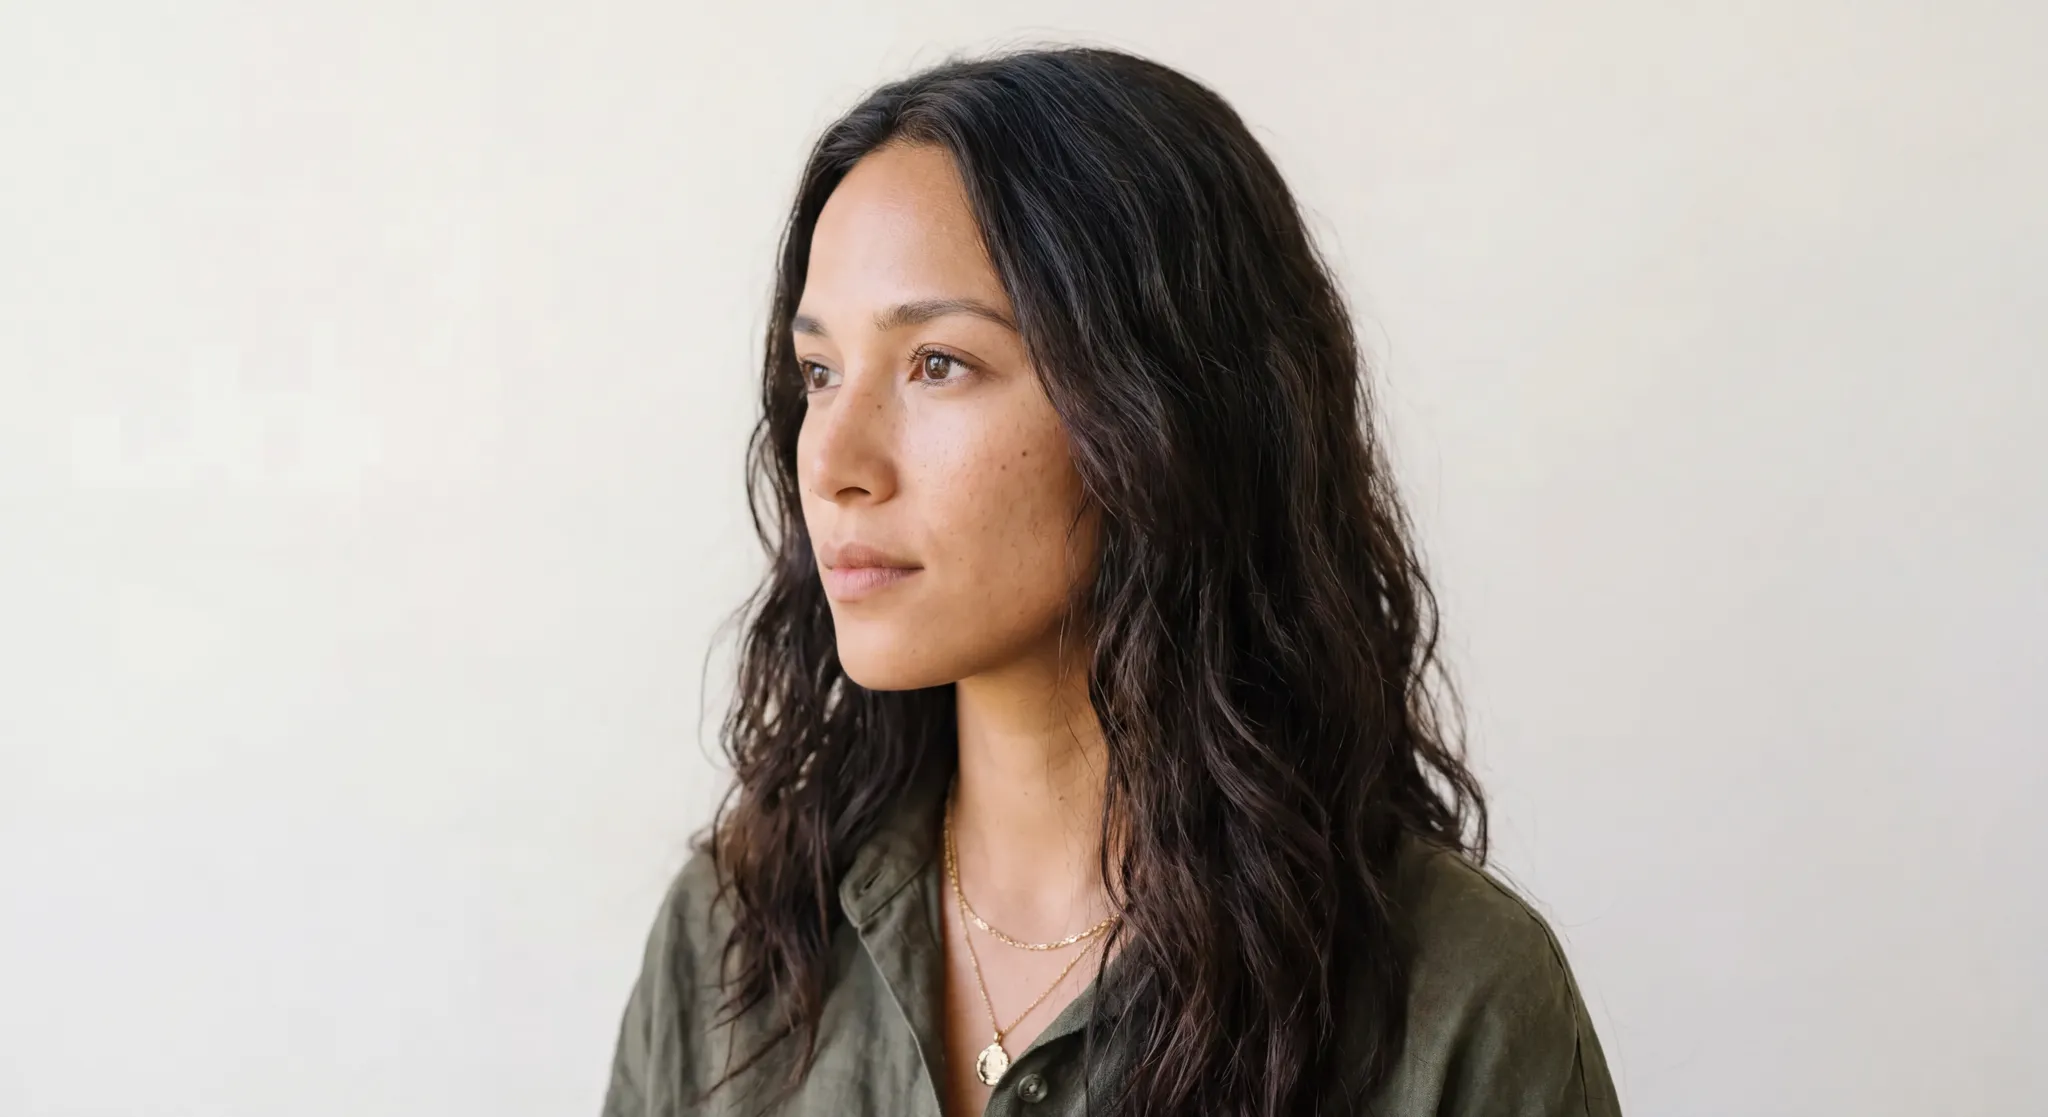
Generated using Nano Banana 2 Edit on fal.
4. Slight low angle, open laugh, golden-hour backlight rimming her hair, blurred park.
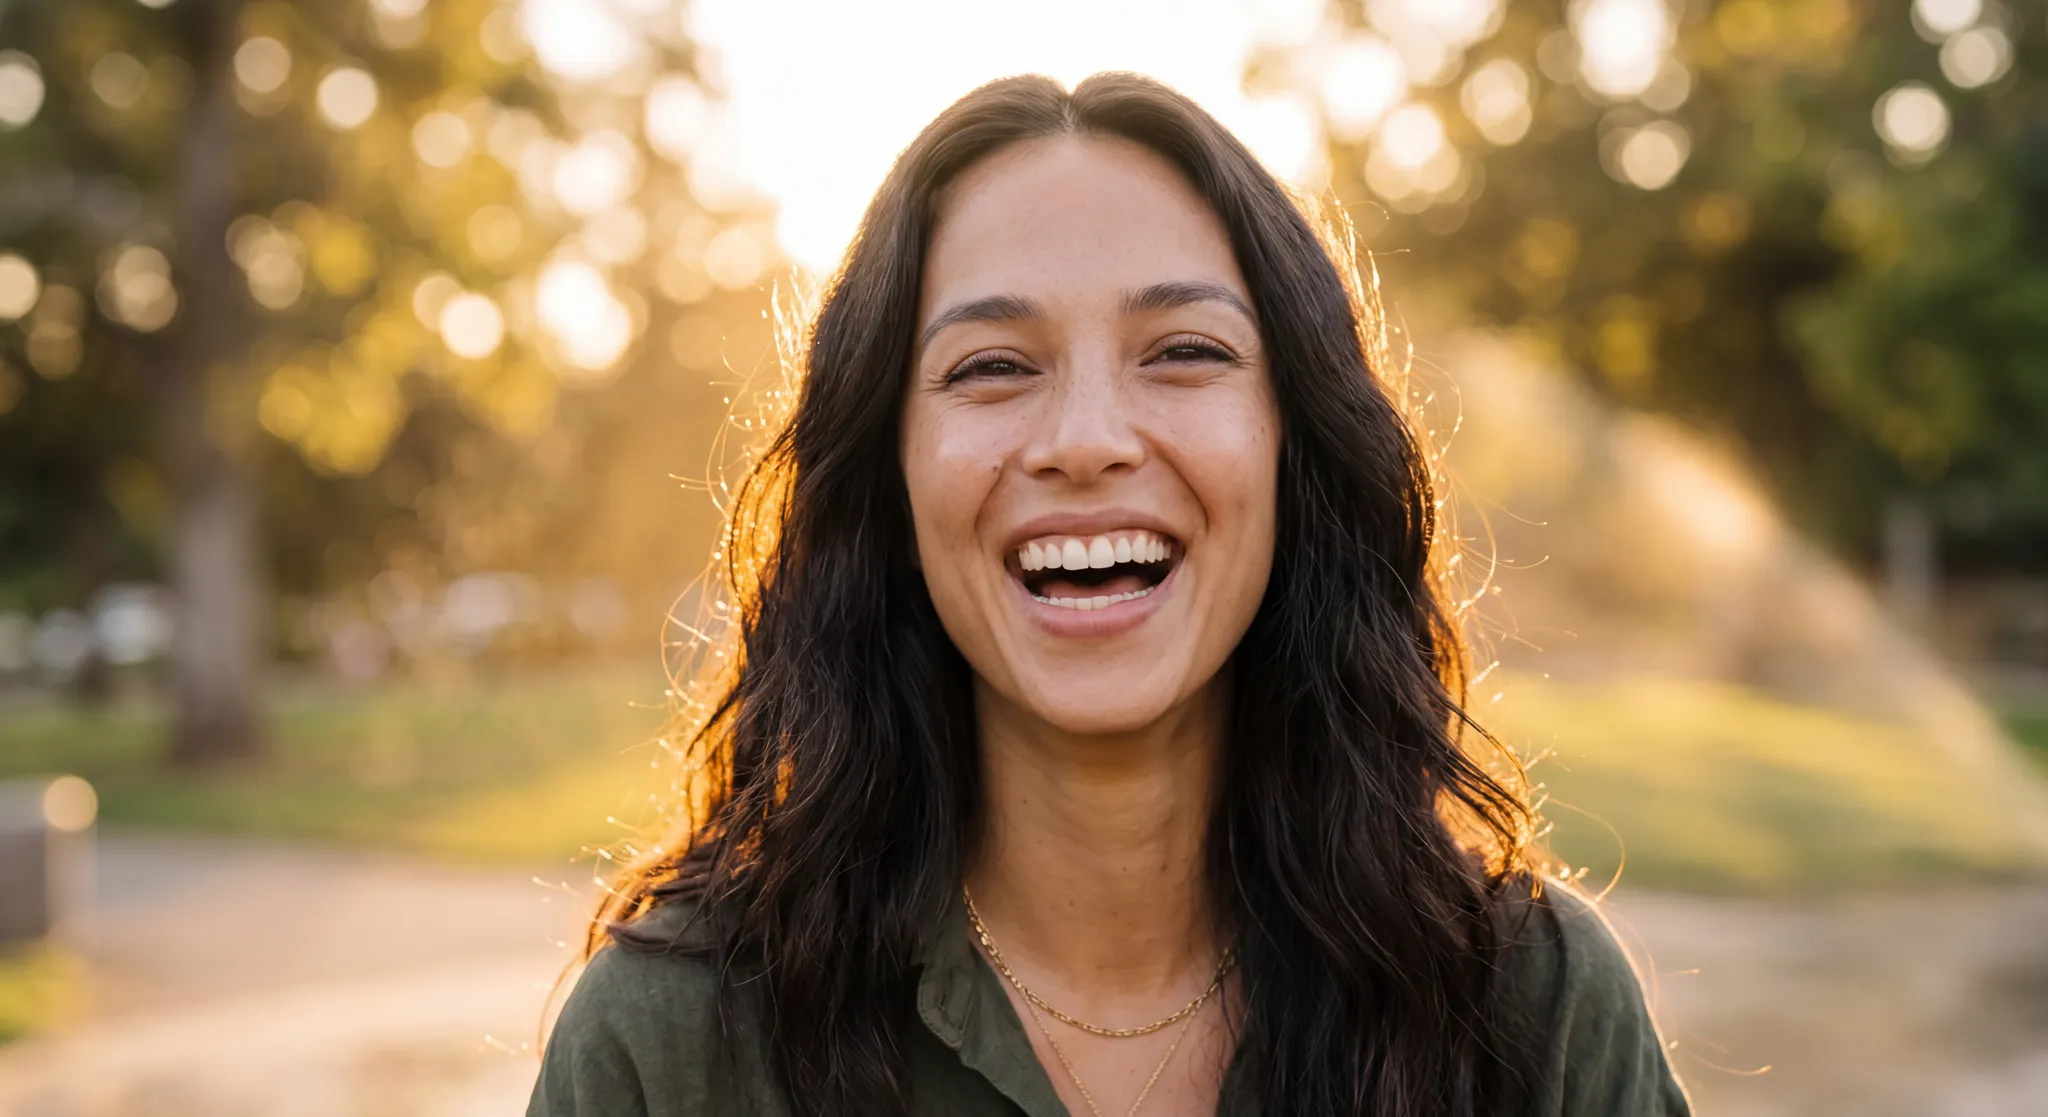
Generated using Nano Banana 2 Edit on fal.
5. Slight high angle, thoughtful look past the lens, flat overcast light, blurred street.
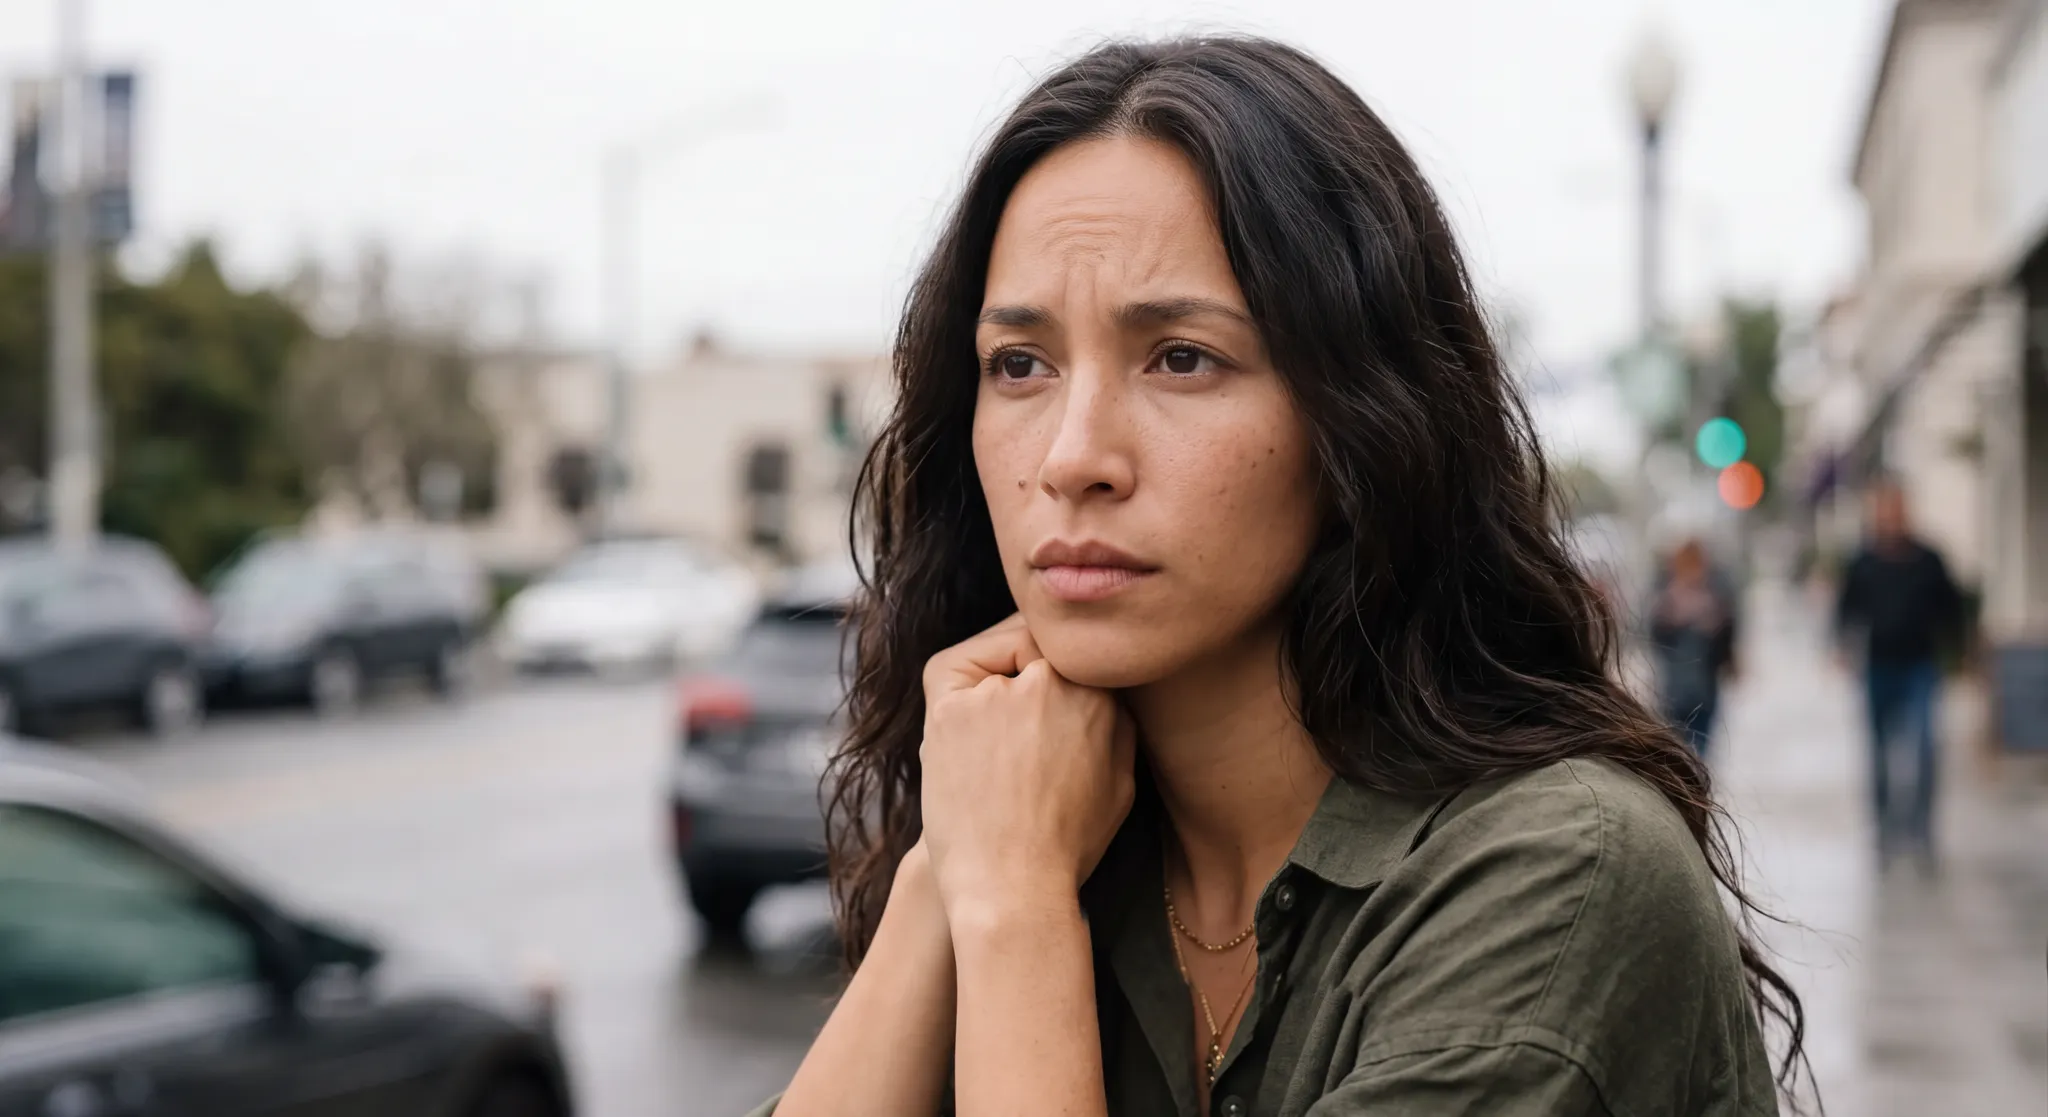
Generated using Nano Banana 2 Edit on fal.
6. Candid mid-laugh, medium shot, bright airy daylight, softly blurred cafe.
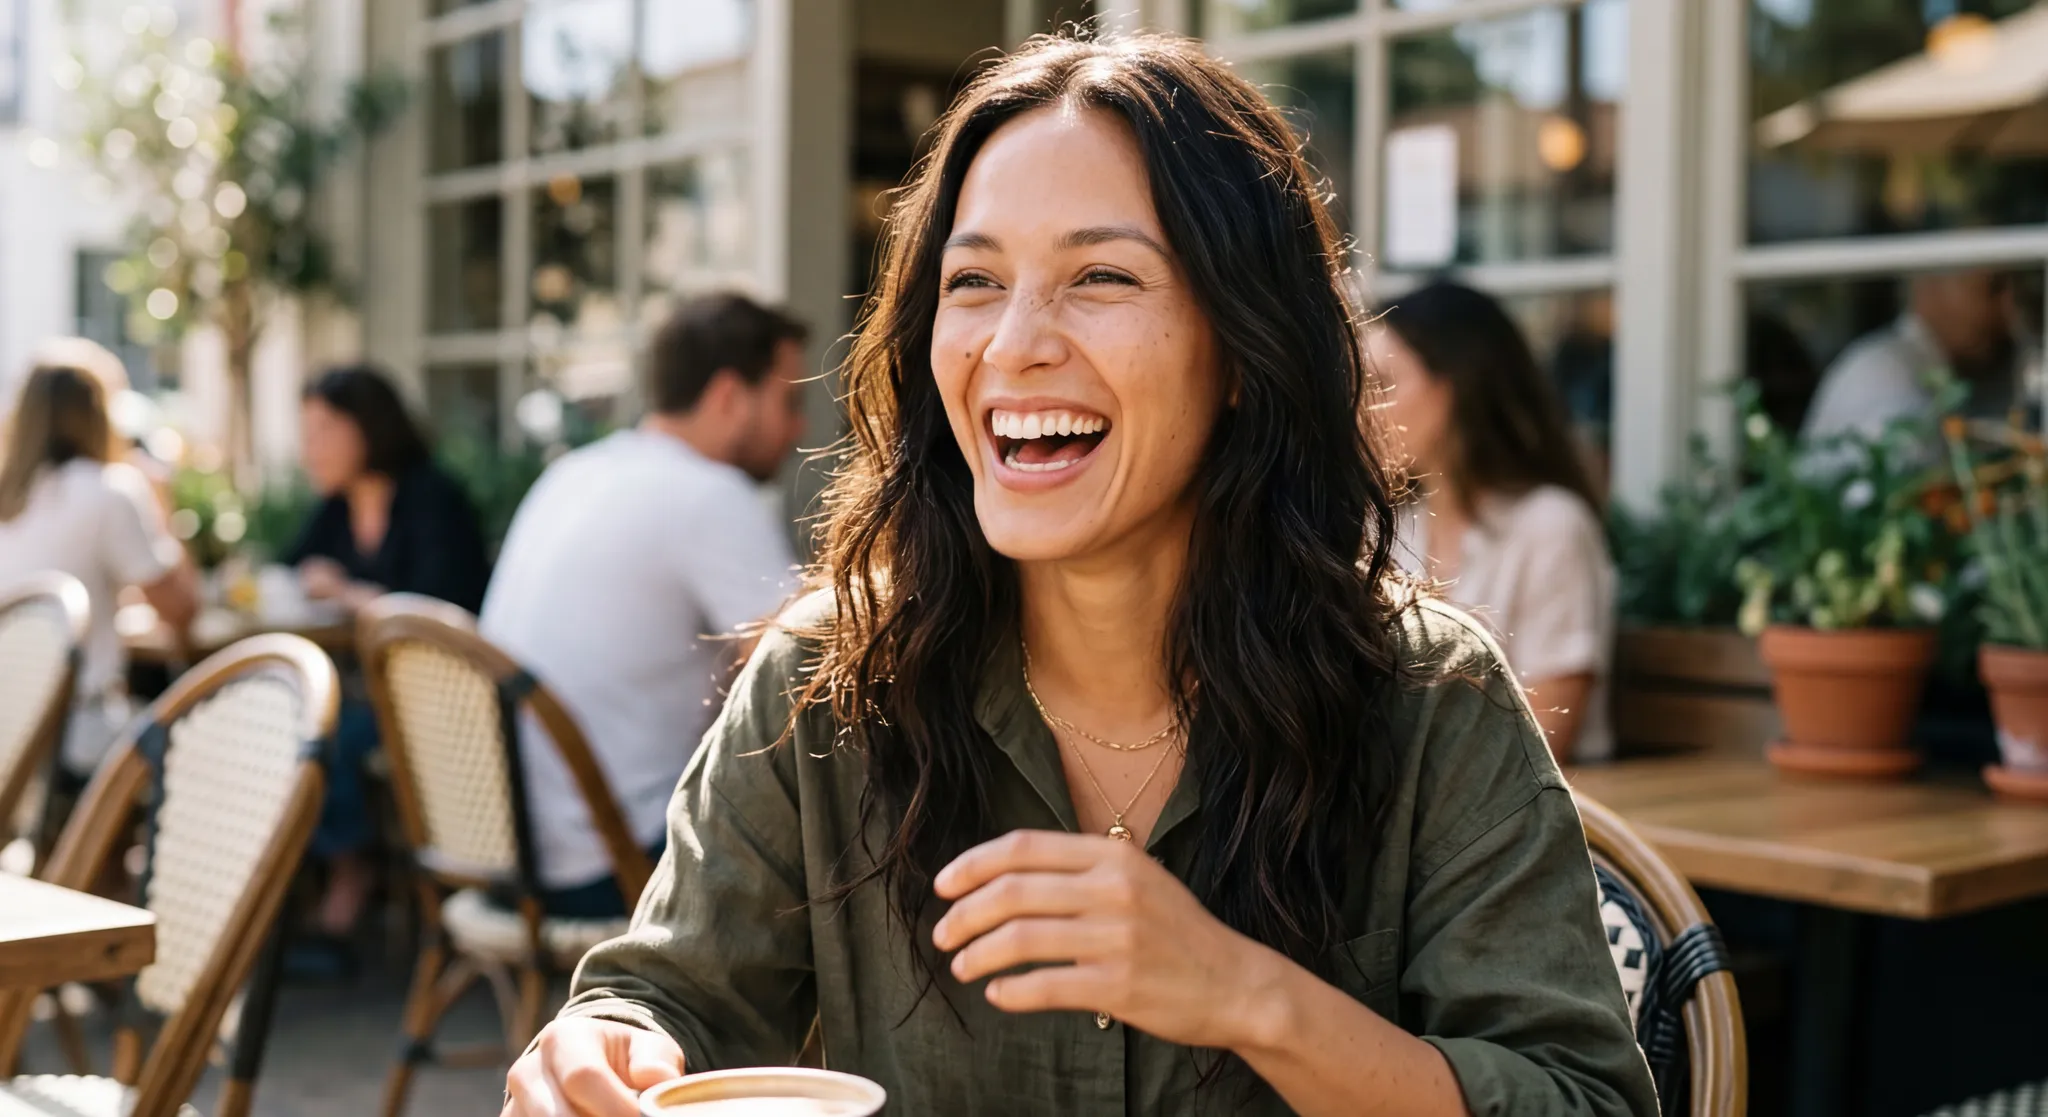
Generated using Nano Banana 2 Edit on fal.
7. Tight close-up, confident and serious, dramatic side key light with a soft shadow, charcoal background.
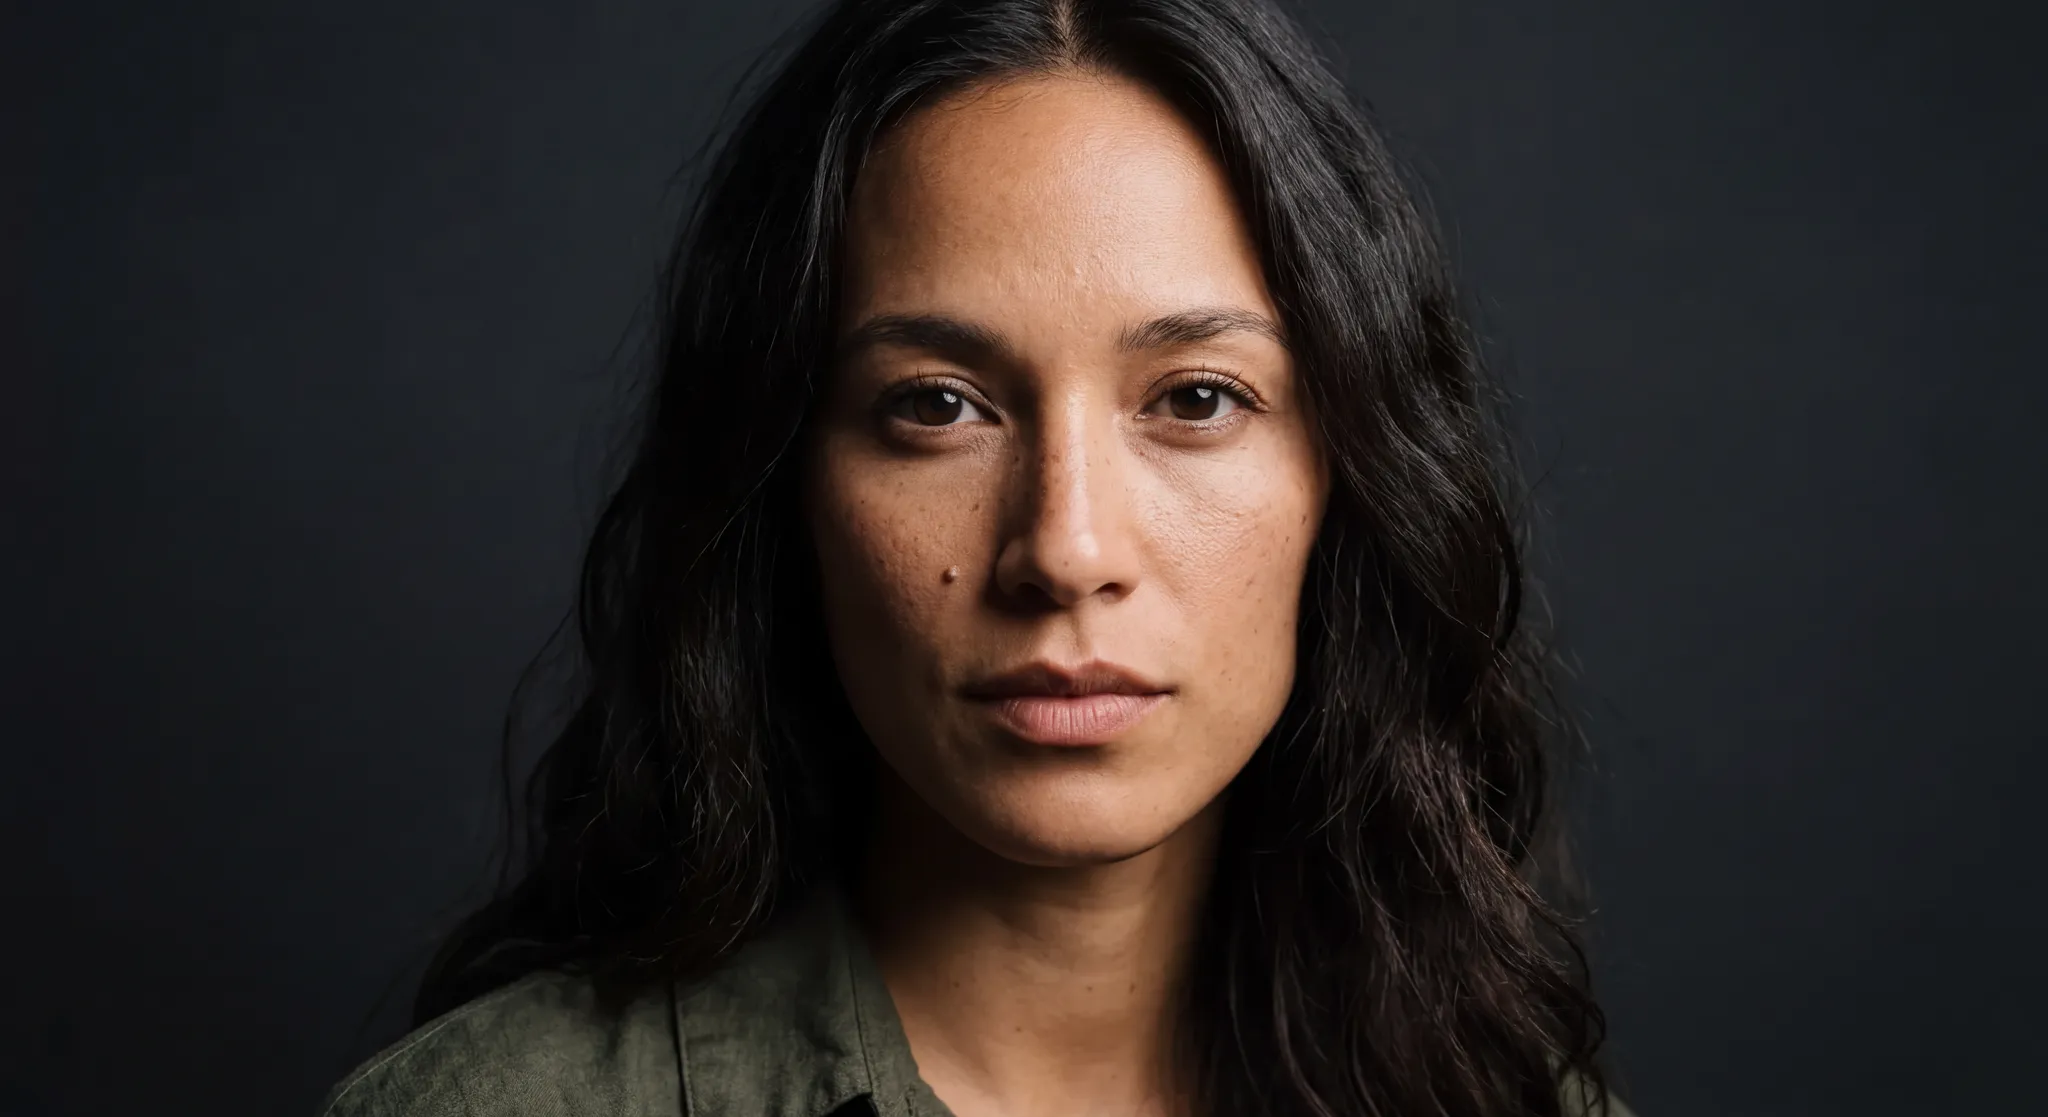
Generated using Nano Banana 2 Edit on fal.
8. Delighted, brows up, even bright studio light, solid coral backdrop.
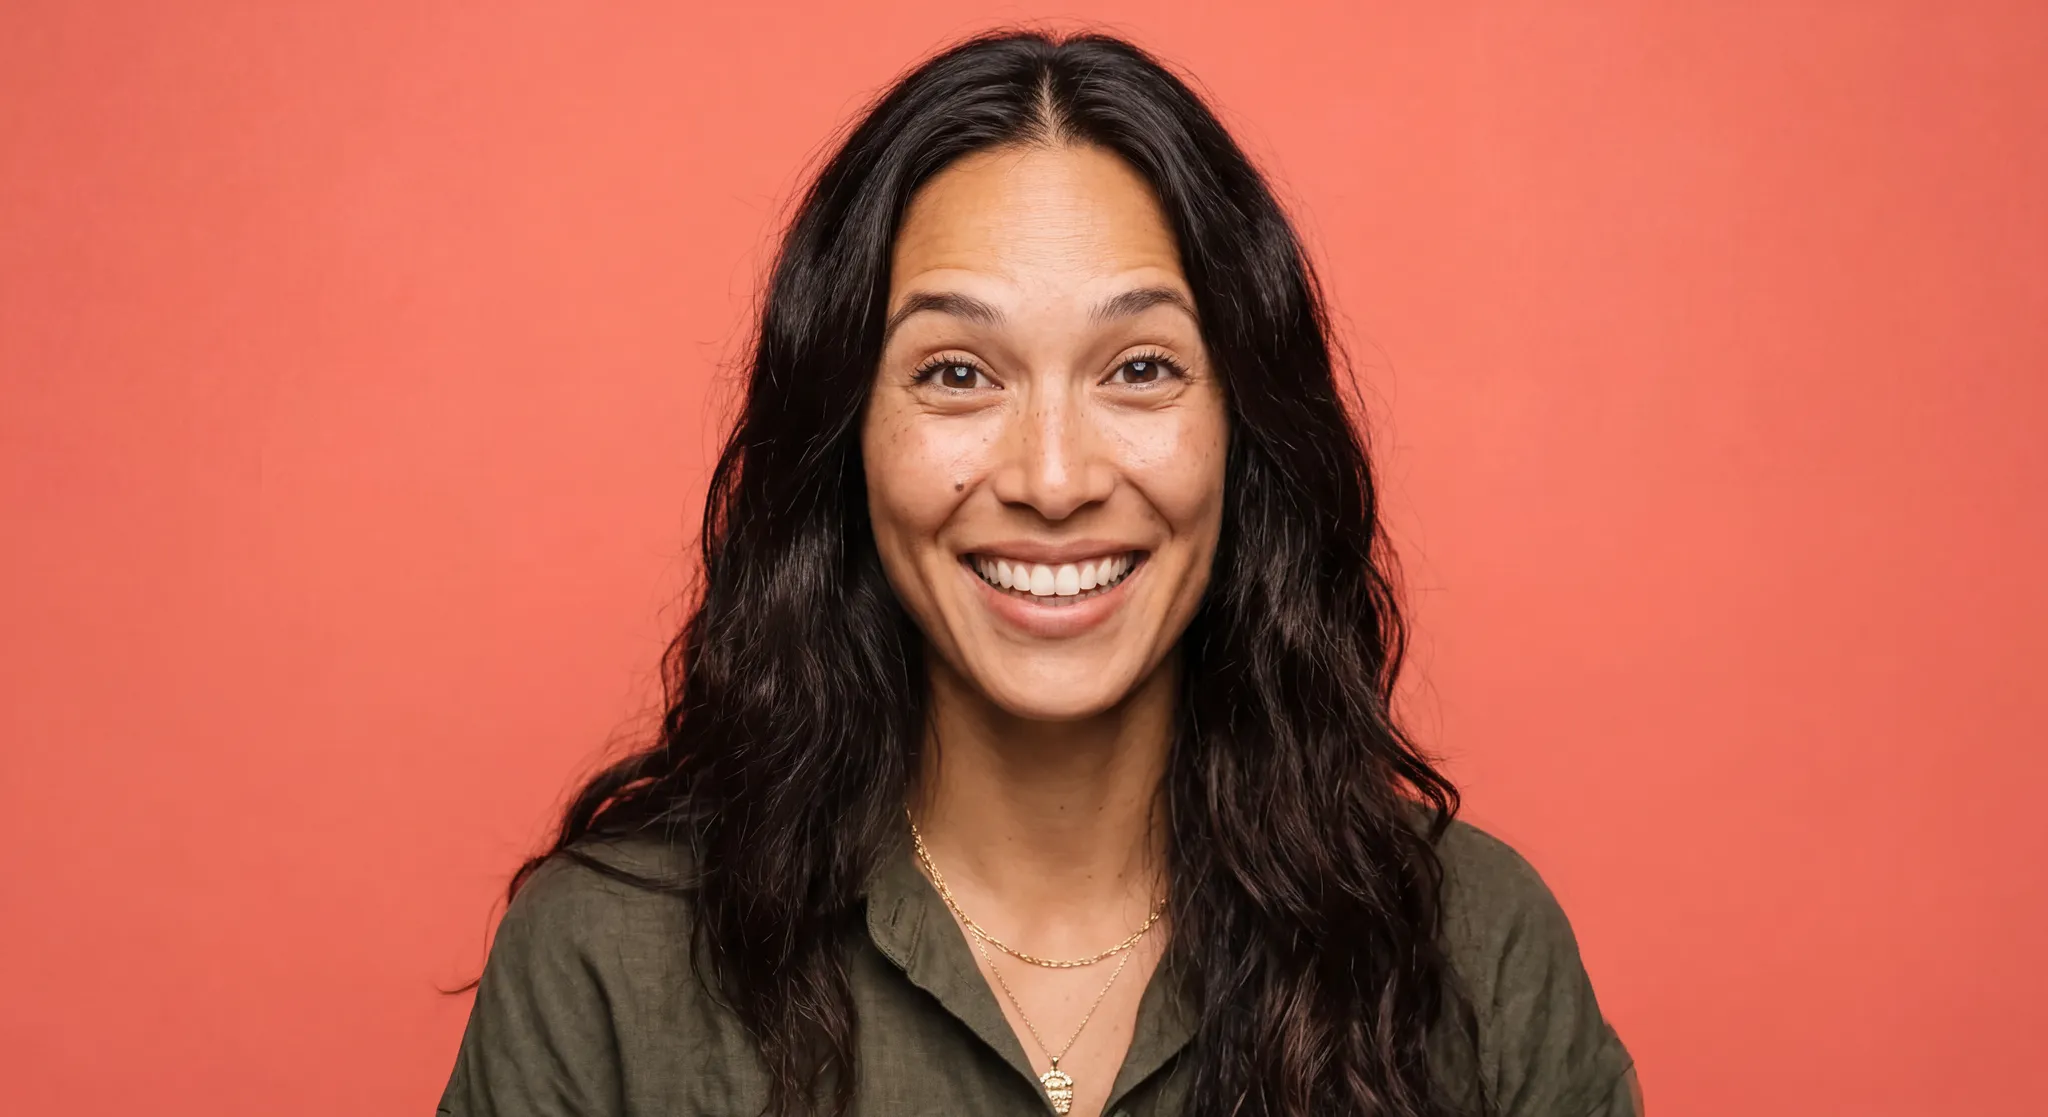
Generated using Nano Banana 2 Edit on fal.
9. Warm evening lamp light, relaxed soft smile, dim home interior.
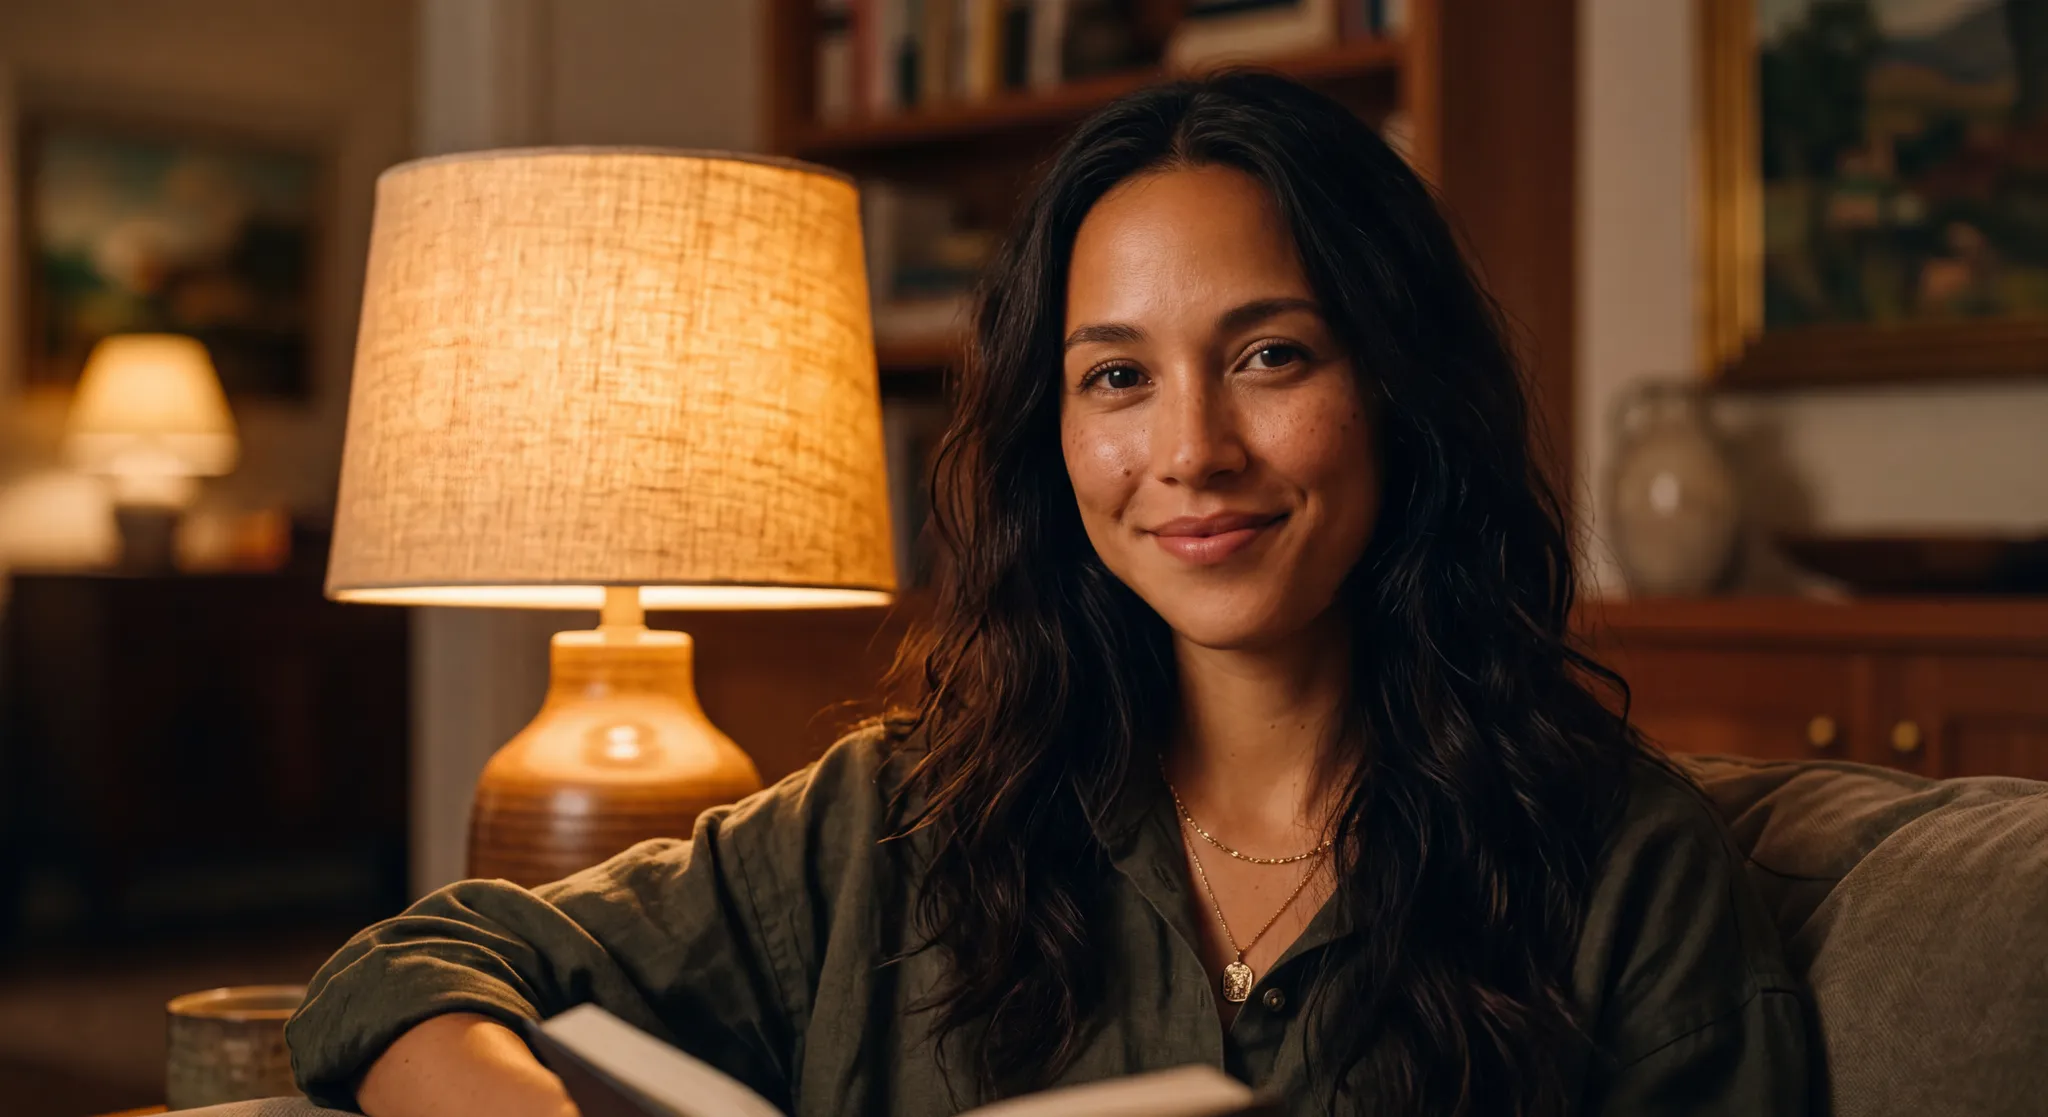
Generated using Nano Banana 2 Edit on fal.
10. By a window in cool blue daylight, calm, looking out, minimalist room.
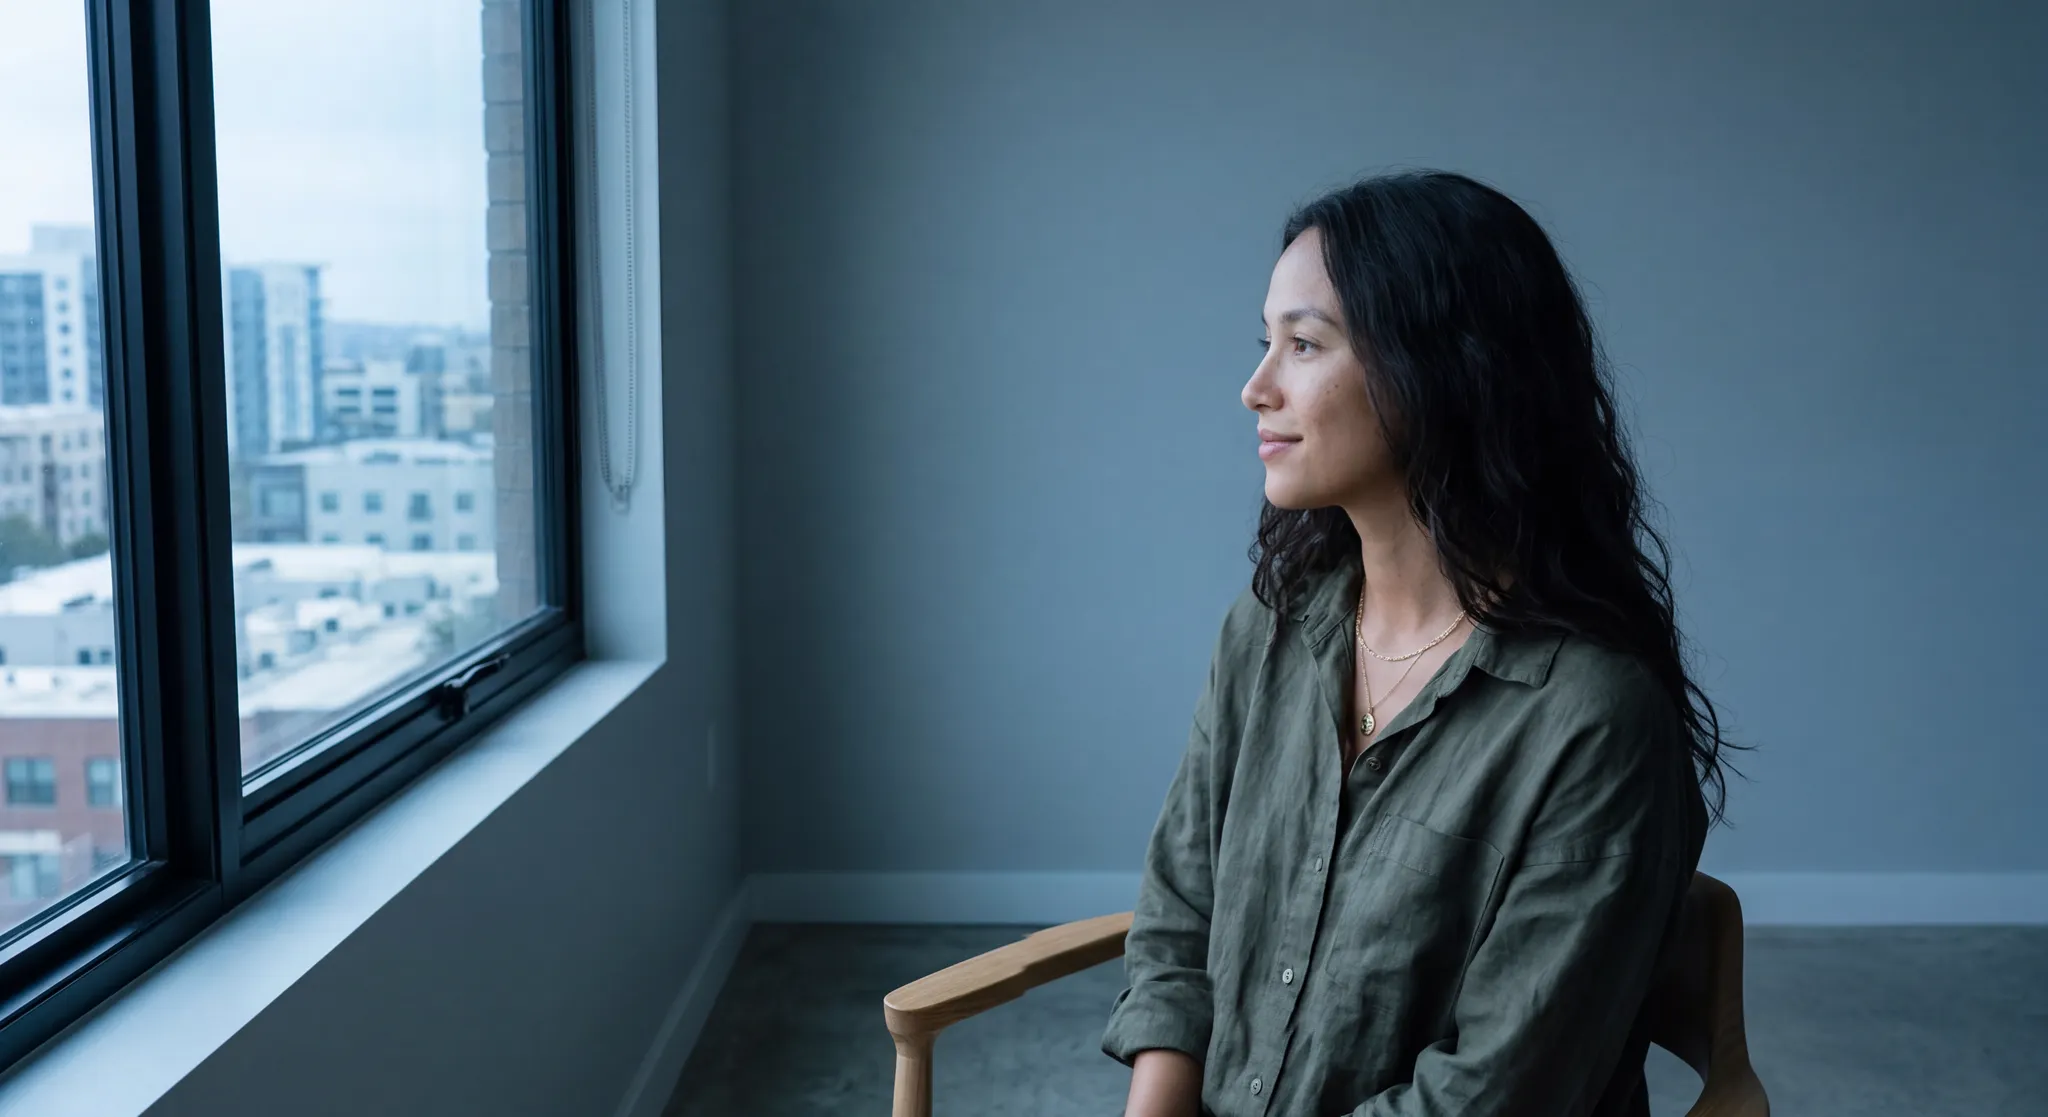
Generated using Nano Banana 2 Edit on fal.
11. Bright midday sun with hard shadows, a slight natural squint, sunglasses pushed up on her head, clear sky.
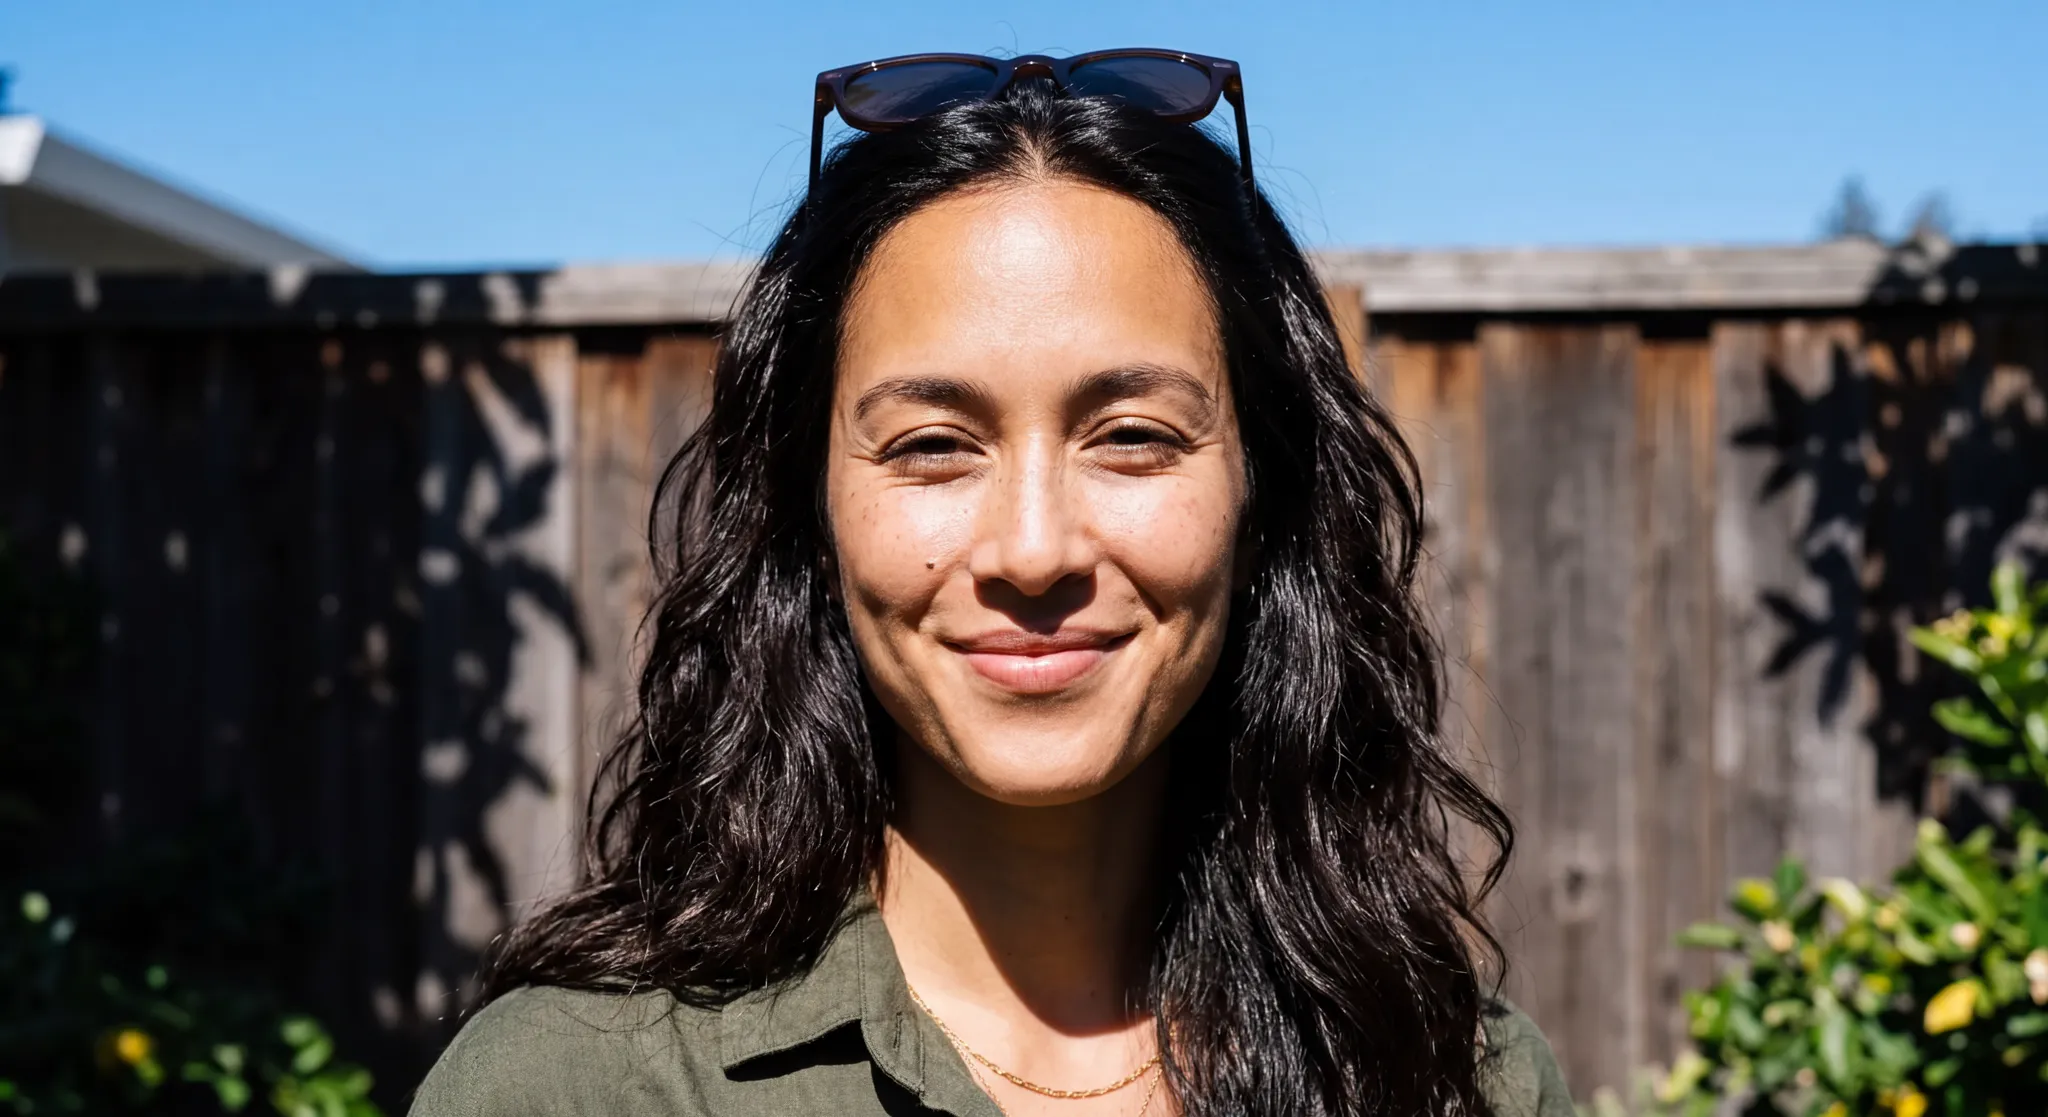
Generated using Nano Banana 2 Edit on fal.
12. Wider lifestyle shot on a sunny sidewalk, turning back with a warm smile, blurred storefronts, face still sharp.
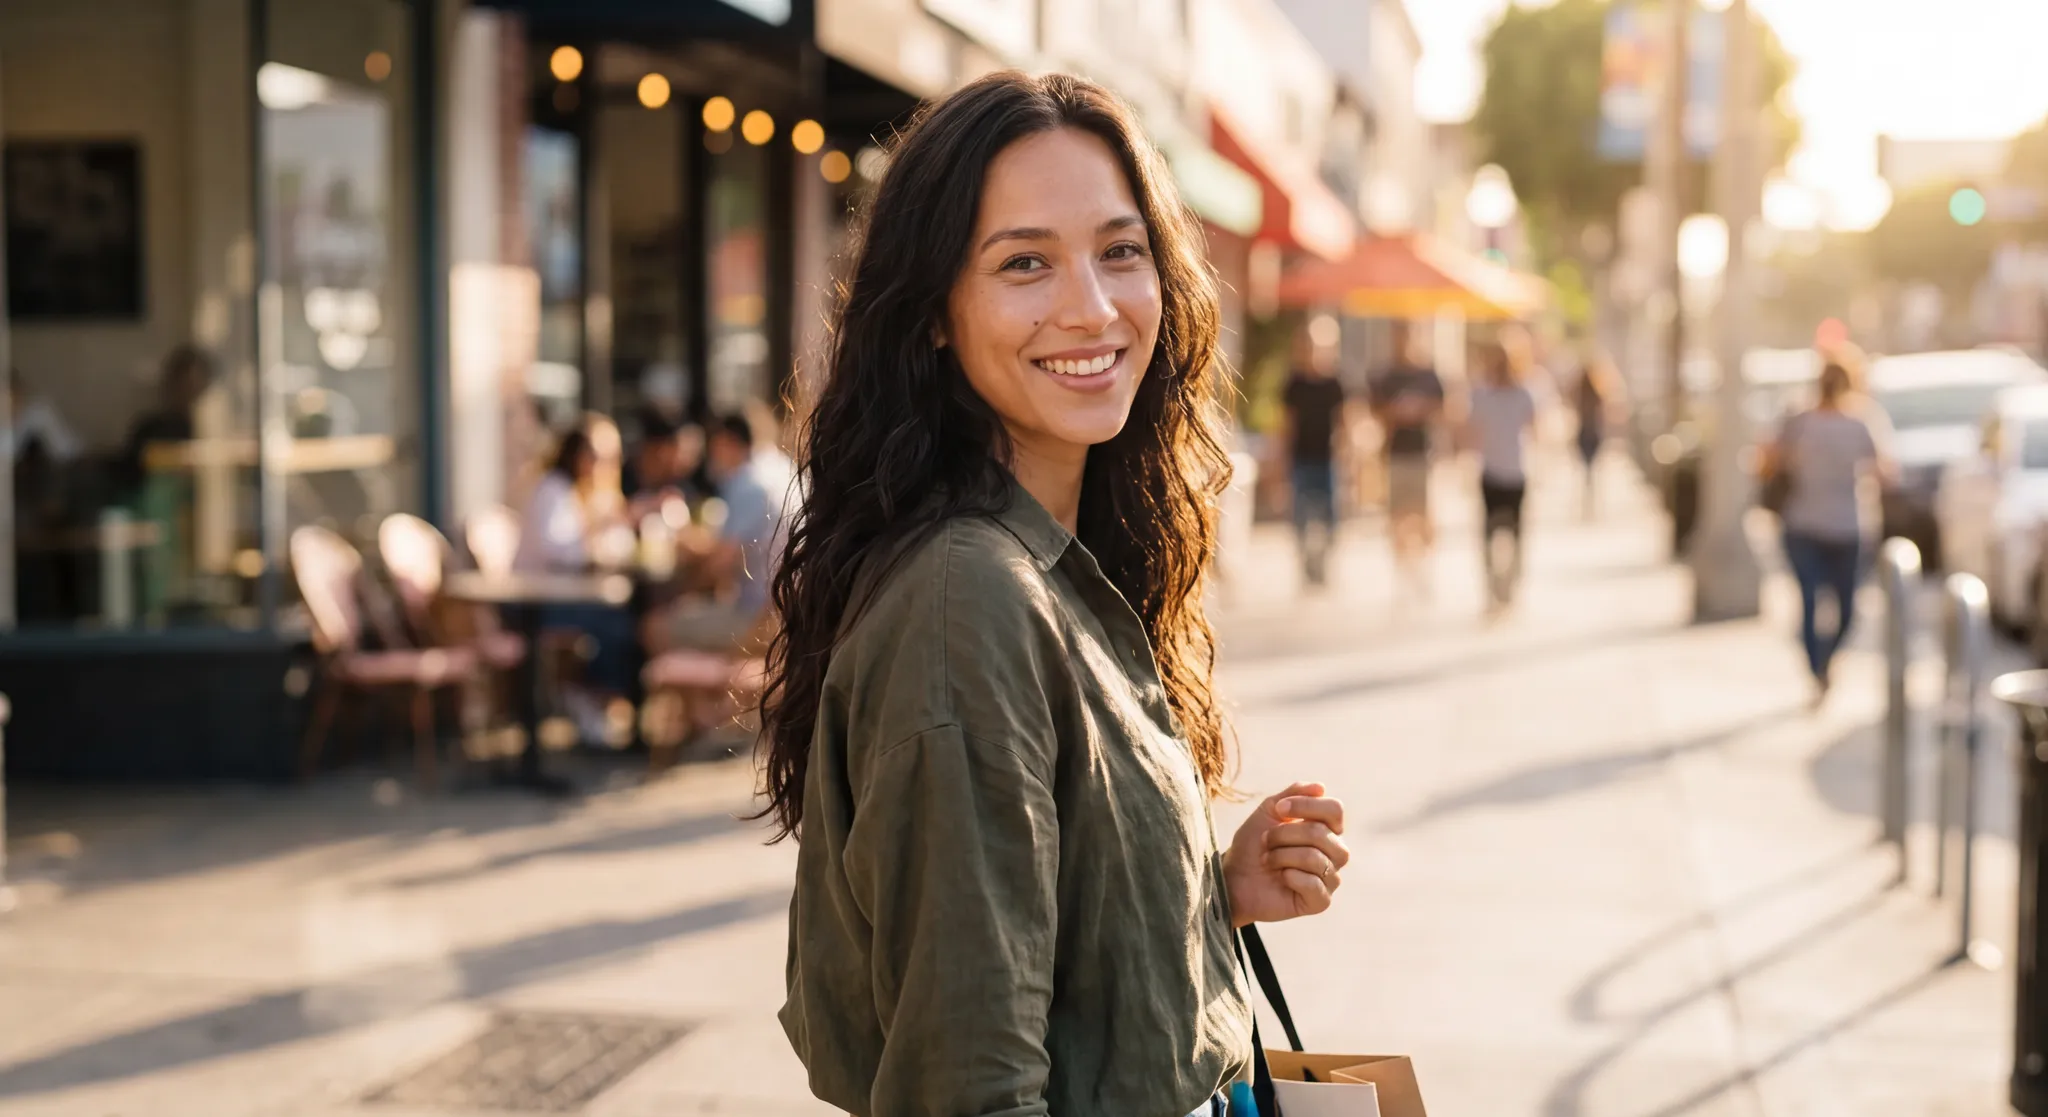
Generated using Nano Banana 2 Edit on fal.
We also want to put the description block on each, add a short quality line (photorealistic, sharp focus on the face, realistic skin, no text), and keep her the one thing that never changes.
Step 2: Caption for the face, not around it
This is where a character LoRA turns the style approach on its head.
For a style, you describe the content and let the look soak in unmentioned.
For a face, you flip it: you name a trigger and everything around her, the clothes, the pose, the setting, the light, and you never describe her face, because her face is the thing you want the trigger to mean.
The trigger is a short, made-up handle.
We'll use Vela.
Keep it rare so it doesn't collide with what the model already knows; "woman" would be useless, "Vela" is clean.
Use the exact same word in every caption and every prompt from here on.
On fal's playground, you don't have to caption by hand.
You can set Auto Captioning to Object/Character, put Vela in the Trigger Phrase field, and the trainer writes each caption in that convention for you.
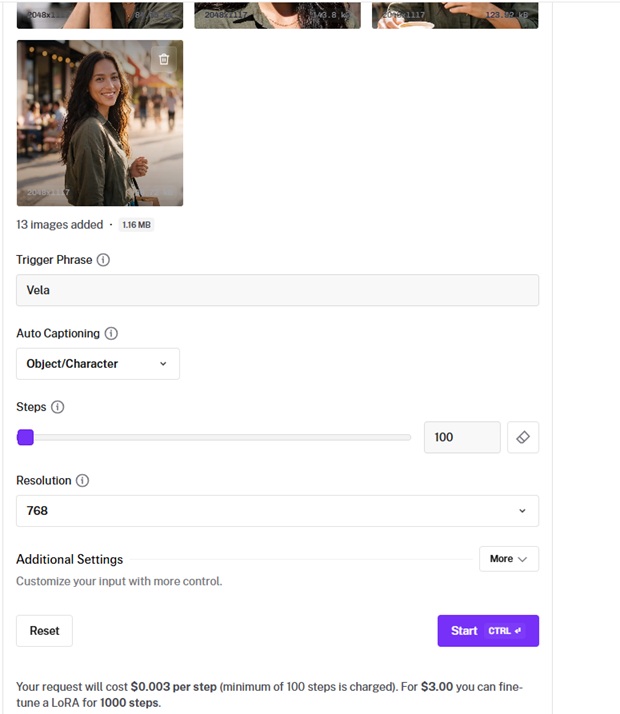
Style mode would do the opposite and chase a look, so it's the wrong switch for a person.
If you'd rather caption yourself, set Auto Captioning off and drop a text file beside each image, same filename, reading something like "Vela, a woman in a denim jacket, outdoors at golden hour."
You name her and the changing details, and not the features.
Step 3: Train, and how to read the dials
Most of the form you leave alone.
Rank and the trained layers are fixed for you; the trigger and captioning mode you set a moment ago, and that leaves one number that actually decides the outcome: steps.
Steps is what makes the likeness land.
Cost is linear at $0.003 each, so a 1,000-step run is $3.00.
The form defaults to 100, which is a smoke test, not a trained face.
For a character on a dozen images, I'd recommend starting at 1,000; faces often want a little more, so 1,000 to 1,500 is the working band.
Then you want to judge by the result, not the number.
Too few steps and she's only loosely herself, features shifting between generations.
Too many and she goes stiff, near-copies of your training shots, unable to take a new expression, with the old backgrounds and clothes creeping back in.
The number you want sits in between: unmistakably her, but still free to take an expression or an outfit she never had in training.
Resolution you can leave at 768.
A face gains more from 1,024 than a flat style does, so if the likeness looks soft up close, retrain there.
Learning rate stays at 0.0005, and you can forget it exists.
Turn Debug Dataset on for the first run.
It hands back the captions the trainer wrote, and you want to open them and confirm they tag Vela and describe her clothes and setting but never her face.
A caption that starts narrating her eyes means the trigger won't bind cleanly, and you've caught it before spending the run.
Press Start; the button shows the cost first, and when it finishes, download the LoRA file.
That file is what you load to generate.
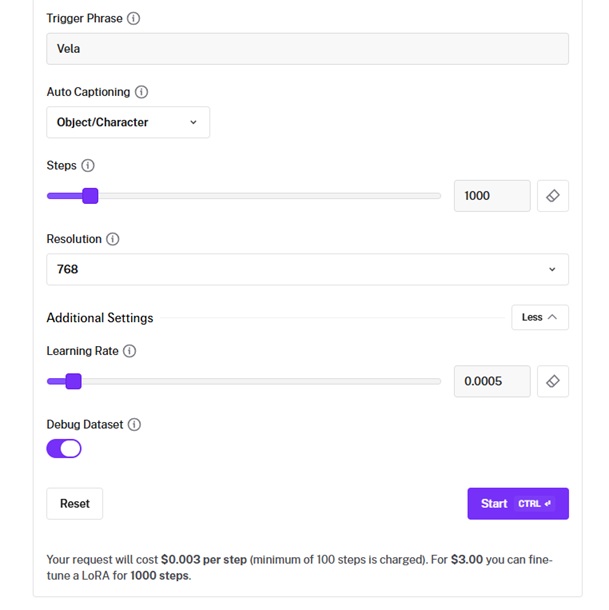
Note: The training will inevitably take some time.
This is not simple image generation that takes a few seconds.
In fact, I waited about 7 minutes to get the LoRA result.
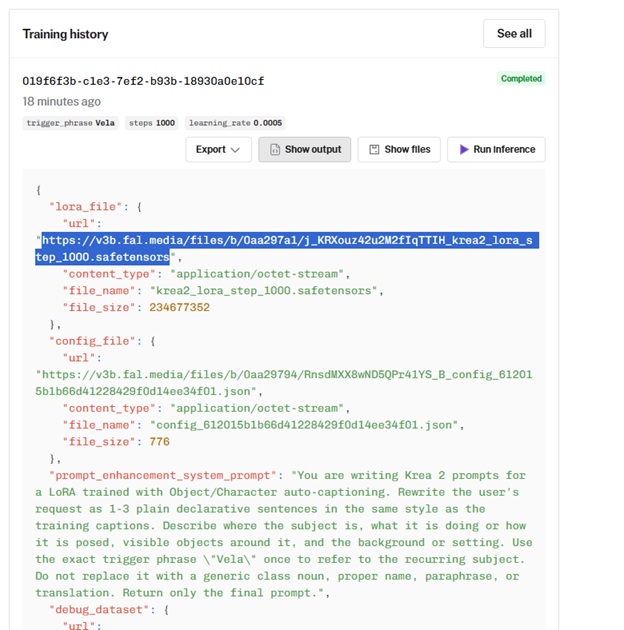
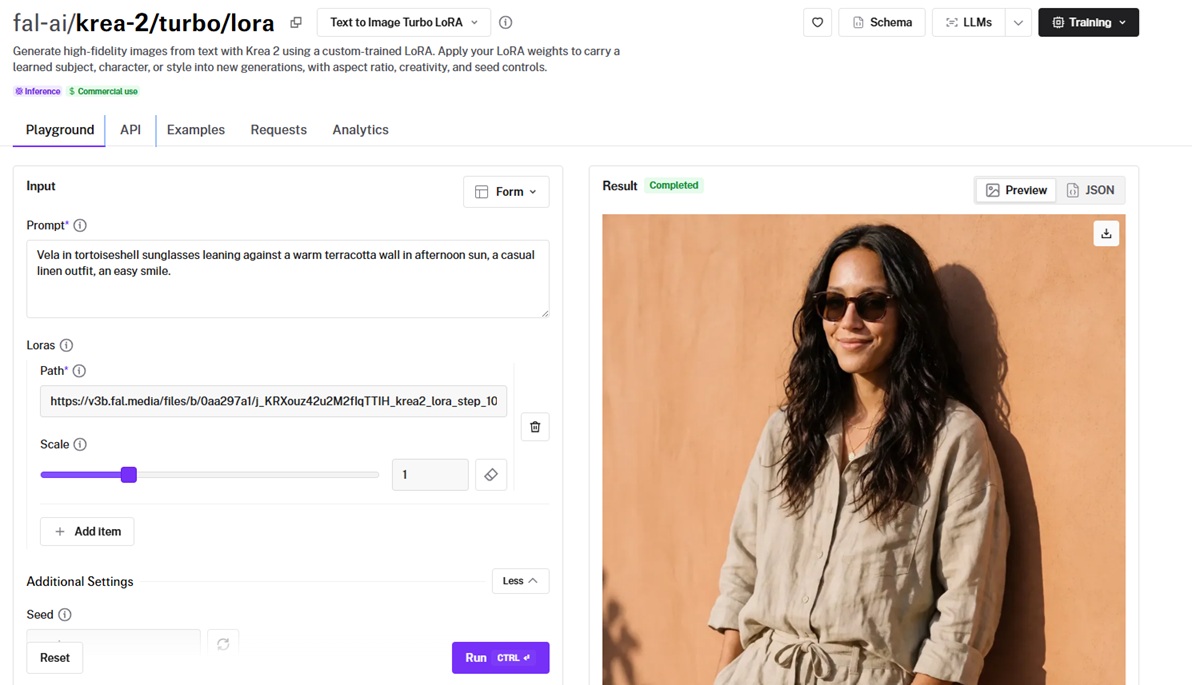
To use the text-to-image Turbo LoRA on fal, the easiest way to use this LoRA is to click on 'show output' and then copy the URL of the LoRA so you can paste it on Path under the Loras field.
Step 4: Put her to work
You want to load the LoRA on the fal-ai/krea-2/turbo/lora playground, add it under Loras, and write a prompt with Vela in it.
The quick test is a product described in words.
If her face holds while she also has to manage a pose and a product, the LoRA is good.
Everything here runs on that one endpoint: text in and a finished shot out, so describe the product right in the prompt and see if she survives it.
Prompt: Vela wearing beige over-ear headphones around her neck, glancing to the side with a relaxed expression, a deep teal studio wall behind her, soft even light.
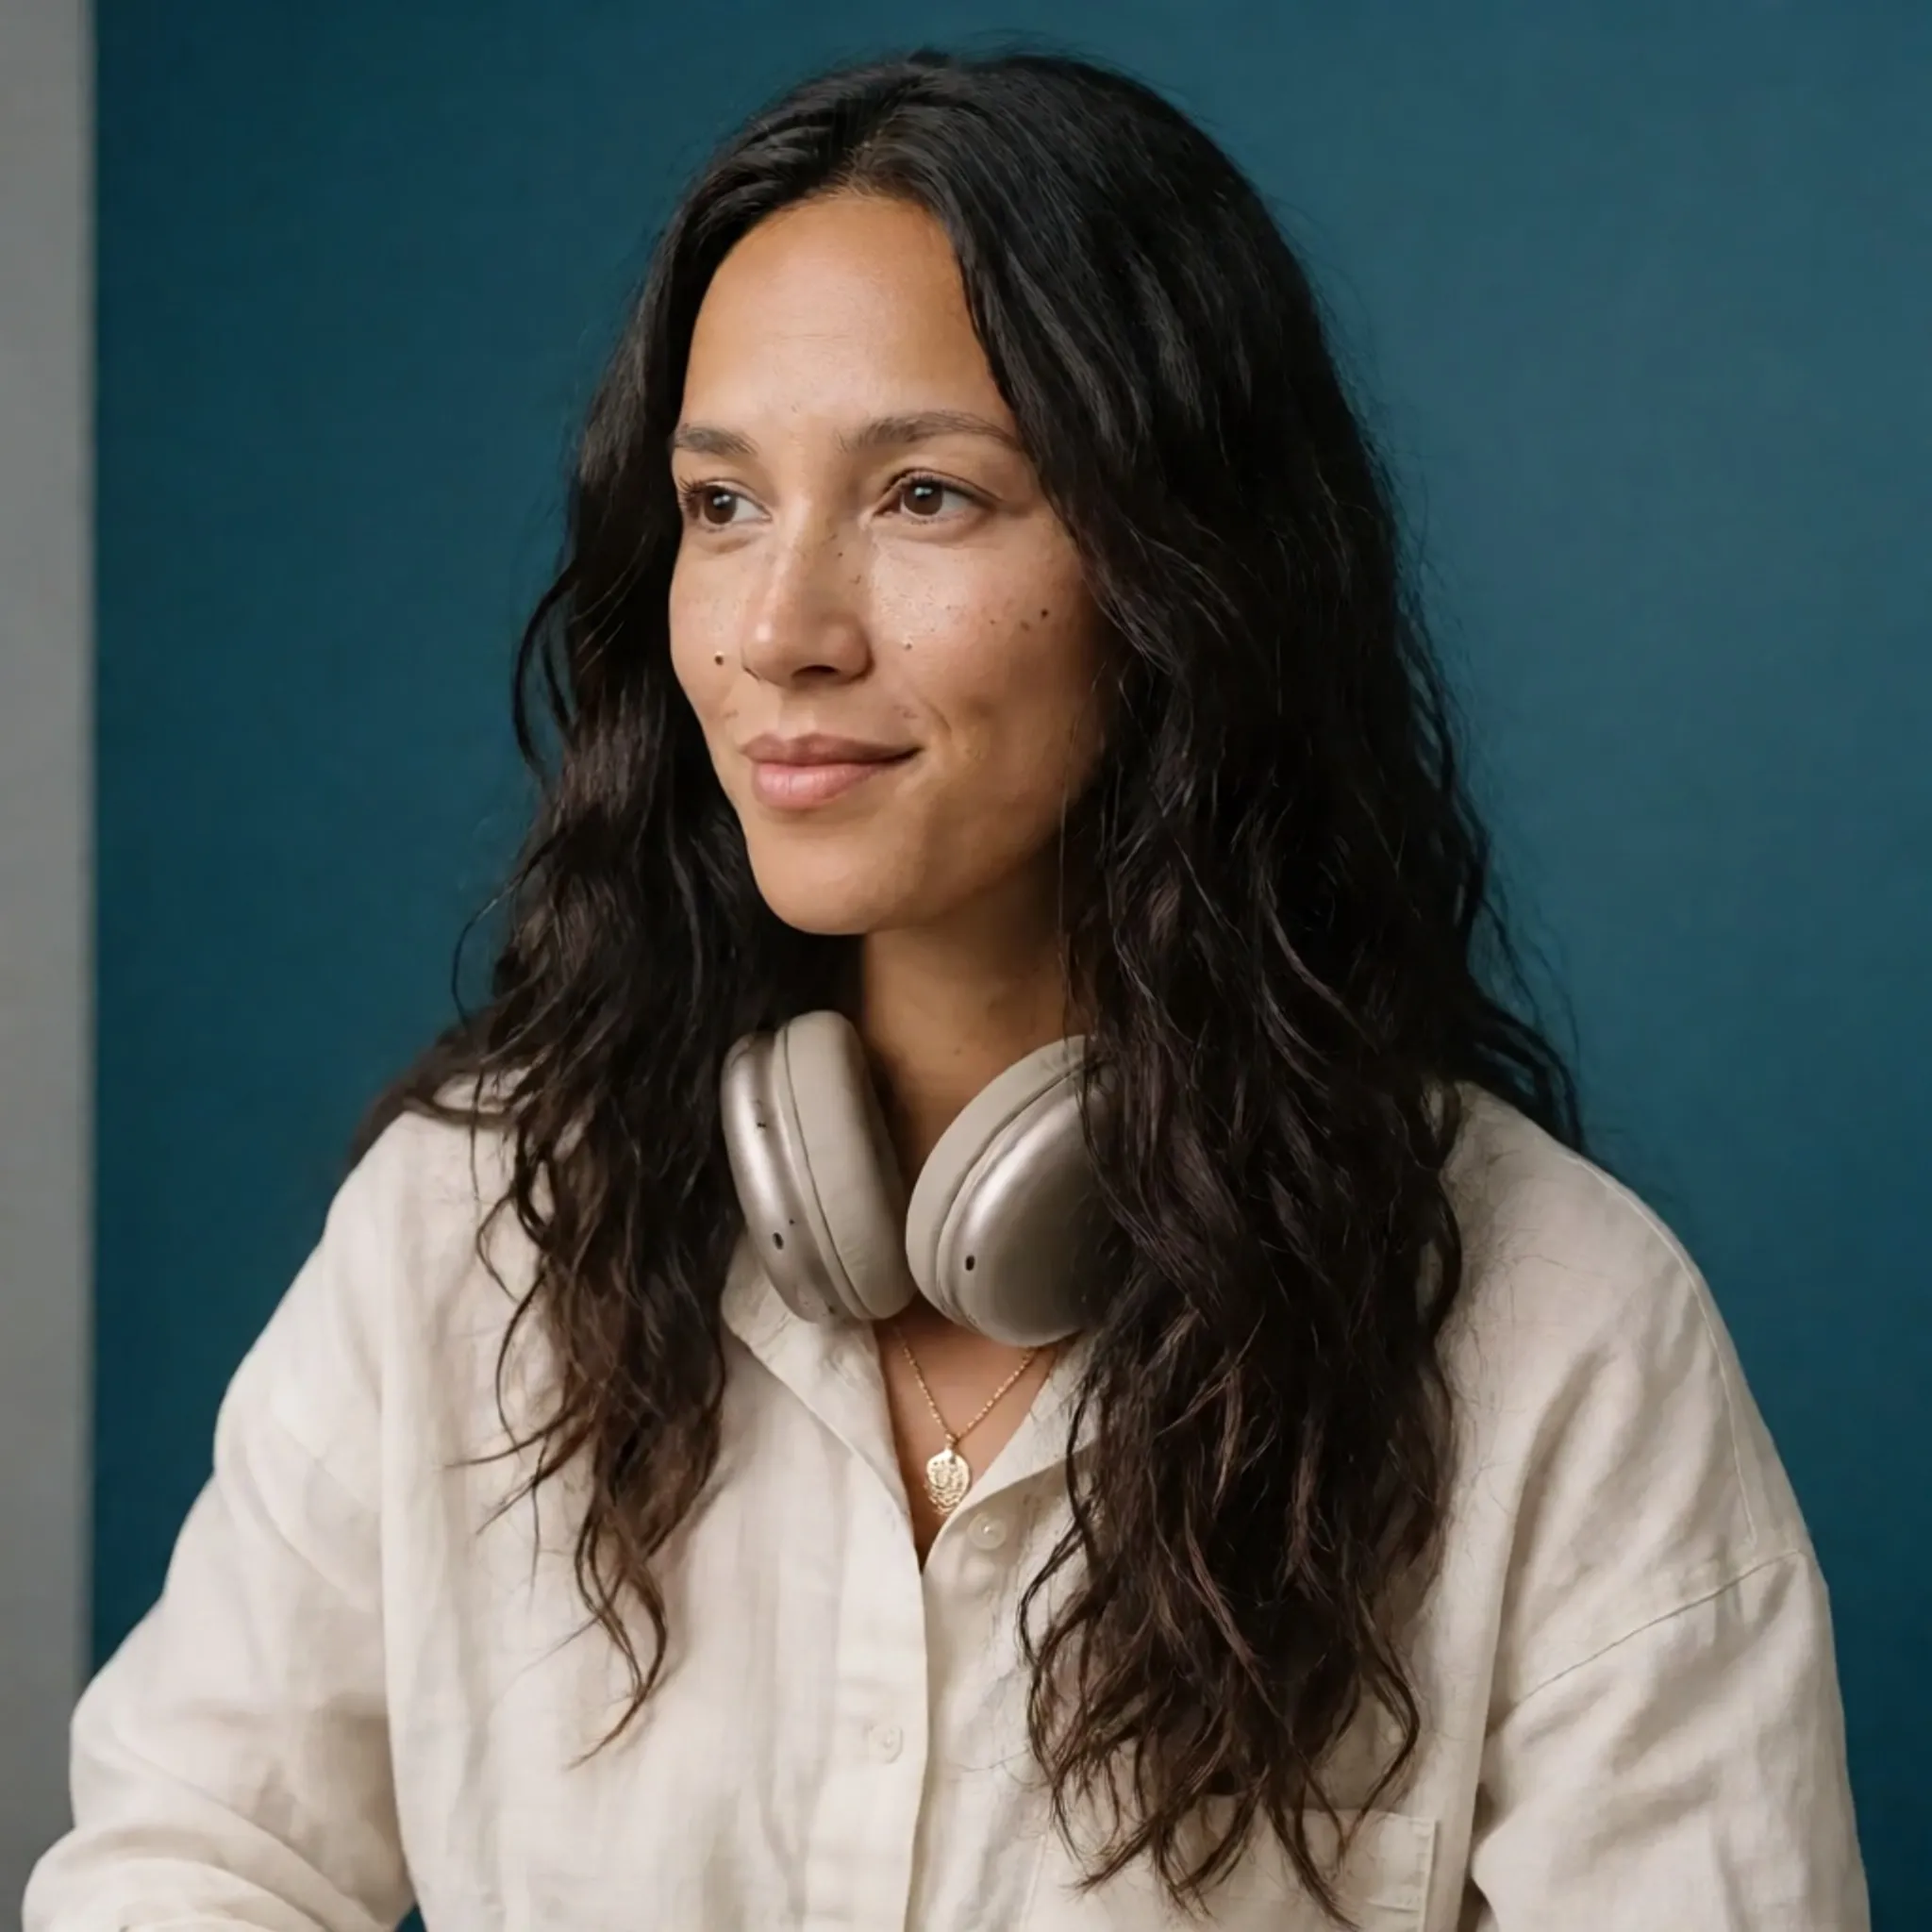
Generated using Krea 2 Turbo with a custom character LoRA on fal, an AI model from Krea.
Prompt: Vela in tortoiseshell sunglasses leaning against a warm terracotta wall in afternoon sun, a casual linen outfit, an easy smile.
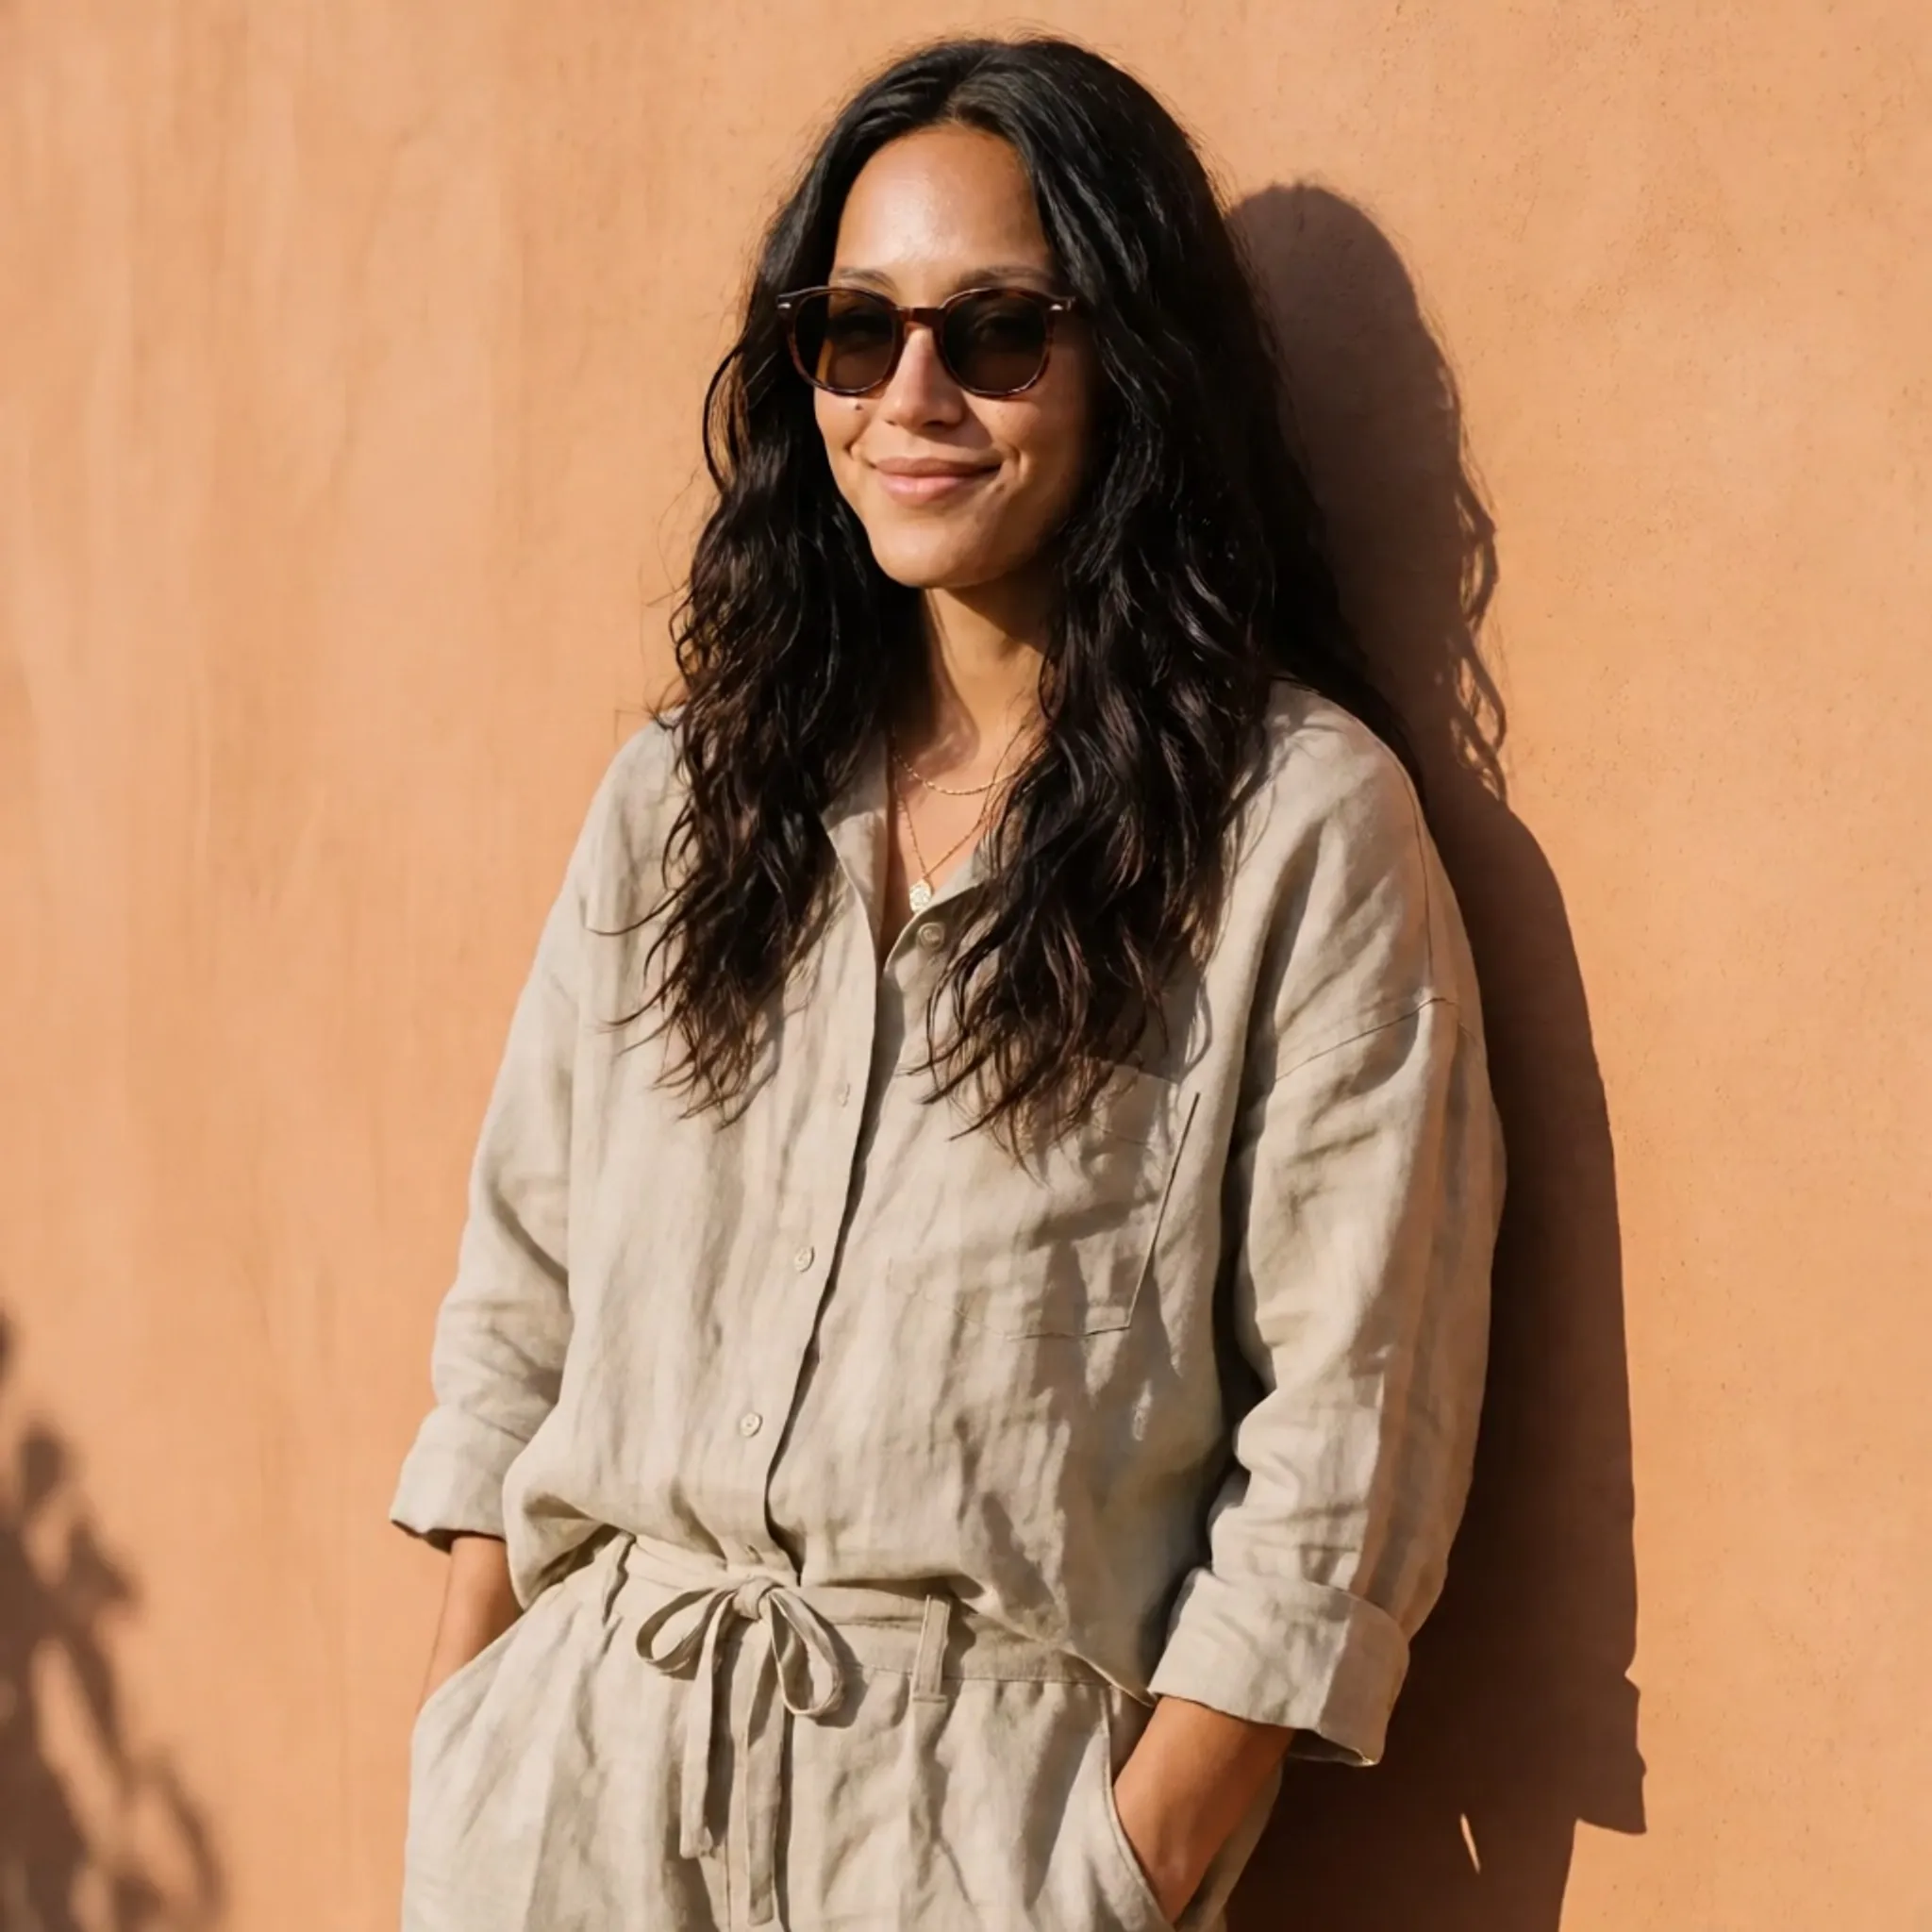
Generated using Krea 2 Turbo with a custom character LoRA on fal, an AI model from Krea.
Note: You can stack up to three LoRAs, so a face and a style trained separately can run together if you want Vela rendered in a look you also built.
Browse and generate styles on loratlas
If you'd rather see what trained Krea 2 styles look like before you build one, there's a good shortcut.
loratlas is a library of over 1,500 style LoRAs, all trained on Krea 2, built by one of our engineers.
You can browse the catalog, type a subject, and generate in any of those styles straight from your browser.
How it runs doubles as a clean demo of the open workflow.
A small daily allowance runs on fal's own key, so you can try styles without signing in at all.
Add your own fal key and generation runs straight from your browser to fal with no daily cap.
loratlas says the key stays in your browser and never reaches its servers.
Training your own style to submit back to the library runs on your own key too, at the same trainer pricing covered above.
It's the fastest way I've found to get a feel for how much range these LoRAs cover, and it's a decent inspiration board when you're deciding what to train yourself.
You'll be able to add the style name, trigger phrase, category, and description.
How much does Krea 2 cost on fal?
fal bills Krea 2 per megapixel for images and per step for training.
Turbo text-to-image runs $0.008 per megapixel.
Generation with a LoRA on the krea-2/turbo/lora endpoint runs $0.01 per megapixel.
Training runs $0.003 per step, with a minimum of 100 steps charged, so a 1,000-step LoRA comes to $3.00, and cost scales linearly from there.
Here's what a workflow would cost: about $3.00 to train the LoRA at 1,000 steps, a little more if you let the trainer auto-caption, then $0.01 per megapixel every time you use it after that.
Recently Added











Run Krea 2 on fal
You can open the playground for free, and nothing gets billed until you actually hit generate.
The way to get the most out of Krea 2 is not to keep rerolling and hoping.
You want to land one prompt you like, and when a certain look keeps pulling you back, train it into a LoRA so you can call it up in a couple of words after that.
Get started by creating your free fal account.
FAQs about Krea 2
Do I need to train a LoRA to use Krea 2?
No.
Turbo generates high-quality images out of the box from a text prompt.
A LoRA is only for when you want a specific, repeatable thing, a look or a particular face, that a prompt alone can't hold from one generation to the next.
How many images do I need to train a character?
Around a dozen of the same face, and consistency matters far more than the count.
They should vary in angle, expression, lighting, and framing so the LoRA learns the person and not a pose, but the face has to stay the same one throughout, which is the hard part and the reason you generate them all from a single anchor.
Can I use more than one LoRA at once?
Yes, up to three at a time.
That's how you run a trained face and a trained style together, so your character comes out in a look you also built.
![How To Use Happy Horse 1.1: Prompts & Workflows [2026]](https://refinery.fal.media/url/https%3A%2F%2Fv3b.fal.media%2Ffiles%2Fb%2F0aa19894%2FclLqI9V4Uw-DPcJRXp9la.jpg/tr:w-1280,q-80/clLqI9V4Uw-DPcJRXp9la.webp)