GPT Image 2 is available on fal with text-to-image and edit endpoints. Three quality tiers (low, medium, high) with flexible output dimensions up to 3840px. Start at low quality and upscale for cost efficiency. The model rewards concrete scene briefs over adjective stacks.
This guide walks through where to run GPT Image 2, what each parameter actually controls, prompting tactics that pull the most out of it, and the use cases where it earns its spot as one of the best AI image generation models out there.
TL;DR
GPT Image 2 is available on fal. All you have to do is create a free account and then use the playground on a pay-as-you-go basis.
The text-to-image endpoint is openai/gpt-image-2. The editing endpoint is openai/gpt-image-2/edit, with optional mask support for precise inpainting and outpainting.
Three quality tiers exist (low, medium, high). I'd suggest you start low because the cost gap between tiers can be significant, and the output often holds up.
Output dimensions are flexible. For custom sizes, four constraints apply: both edges must be multiples of 16, the longest edge maxes at 3840px, the aspect ratio stays under 3:1, and the total pixel count lands between 655,360 and 8,294,400.
The model rewards prompts written as briefs rather than wishlists. I noticed that concrete details outperform adjective stacks every time.
Prompt: A six-cell grid arranged 3 by 2 on an off-white background, thin dividers between cells, each cell showing a different image style. Top row: a photoreal close-up portrait of a bearded man in soft window light, an isometric illustration of a small pastel bakery storefront, a clean infographic with three labeled stages reading exactly "GRIND", "BLOOM", and "EXTRACT" in bold sans-serif. Bottom row: a watercolor of a quiet alley with hanging laundry, a product shot of a glass candle jar with a paper label reading exactly "NORTH WICK CO." in hand-set serif, a flat-design mountain poster with the word "EXPLORE" centered at the bottom in thin geometric sans-serif. A single caption beneath the grid reads exactly: "GPT IMAGE 2". All in-image text must render exactly as specified. Balanced palette, no watermark, no other text.
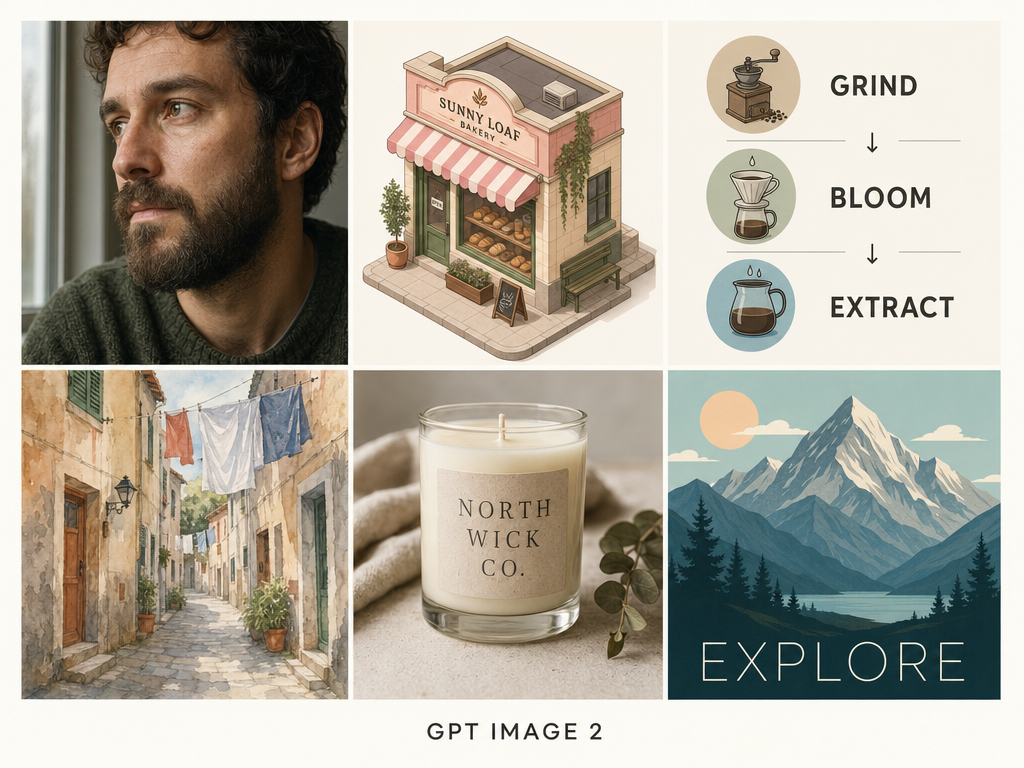
Generated using GPT Image 2 on fal, an AI model from OpenAI.
Where to access GPT Image 2 right now
GPT Image 2 is live on fal and has 2 endpoints: text-to-image and edit.
Both endpoints are production-ready:
The playground lets you test the model interactively without code.
The API handles integration into your stack.
The same fal API key already covers more than a thousand other production-ready models on the platform, so a workflow that chains GPT Image 2 with an upscaler, a video model, or any other downstream step ships under one integration and one bill.
How to use GPT Image 2 on fal
I'm going to show you how you can use GPT Image 2 in 2 ways: with the playground, and via the API.
How to use GPT Image 2 in the fal playground
The playground is the fastest path from "I want to try this model" to a generated image.
Step 1: Open the model page
Head to the playground of GPT Image 2, and the playground loads at the top of the page.
You'll see a prompt field on the left and a result panel on the right.
Step 2: Write your prompt
The prompt field accepts plain text.
Here are some prompt tips:
Concrete details work better than mood words.
Write a brief that names what's in the scene, where the light comes from, and any literal text that needs to be rendered.
For text inside the image, put it in quotes and add a clause that says it should appear exactly as written.
Step 3: Set your quality tier
The quality dropdown sits below the prompt.
There are three options: low, medium, and high. The default is high.
If I were you and I was iterating on a prompt and didn't need final-grade output yet, I would drop to low first and step up once the prompt itself is dialed in.
Step 4: Open additional settings before you click run
You can click "Additional Settings" to expose image size, number of images, output format, and sync mode.
The image size selector accepts presets or custom width and height values.
For custom sizes, both edges have to be multiples of 16, the longest edge maxes at 3840px, the aspect ratio caps at 3:1, and total pixels need to land between 655,360 and 8,294,400.
Step 5: Hit run
Generation kicks off, status updates appear under the result panel, and the finished image lands in the preview when it's done.
You can switch between the rendered image and the JSON response via the toggle above the result.
Step 6: Iterate or download
Once you have a result, the action buttons offer five next steps directly from the playground:
Edit the image.
Upscale it.
Turn it into a video.
Share it.
Download saves the file locally.
If the prompt didn't quite land, you can adjust it in the same field and run again; previous results stay accessible in the request history.
With the playground, there is no need for code, no API key setup, and no client that you should be installing.
You write a prompt, set your options, and hit run:
falMODEL APIs
The fastest, cheapest and most reliable way to run genAI models. 1 API, 100s of models
How to use GPT Image 2 with fal's API
For anything beyond exploration, you'll want the API. The playground sits on top of the same model and parameters, so any prompt that works there ports directly into a code call.
Step 1: Get your fal API key
Sign up at fal and create an API key in the developer dashboard.
You can then set it as an environment variable so the client picks it up without any extra wiring.
export FAL_KEY="YOUR_API_KEY"
Step 2: Install the JavaScript client
npm install --save @fal-ai/client
The client wraps the queue protocol behind a single subscribe call, so polling and result fetching happen automatically.
Step 3: Submit a generation request
import { fal } from "@fal-ai/client";

const result = await fal.subscribe("openai/gpt-image-2", {
  input: {
    prompt: "Your prompt here",
    image_size: "landscape_4_3",
    quality: "high",
    num_images: 1,
    output_format: "png",
  },
  logs: true,
  onQueueUpdate: (update) => {
    if (update.status === "IN_PROGRESS") {
      update.logs.map((log) => log.message).forEach(console.log);
    }
  },
});

console.log(result.data.images[0].url);
The response carries an array of generated images, each with a downloadable URL, dimensions, and content type.
Step 4: For long-running jobs, switch to the queue API
Production workloads should not block on a synchronous call. Submit the request, get back a request_id, and either poll for status or have fal hit a webhook when the result lands.
Step 5: Iterate
Run the prompt, look at what came back, adjust, run again.
Most of the practical work with GPT Image 2 will most likely happen in the iteration loop rather than the first call.
What are the best prompting tactics for GPT Image 2?
We've published a dedicated GPT Image 2 prompting guide that goes deep into templates and worked examples, so this section sticks to the tactics most likely to change your output quality from the first generation.
Concrete details outperform adjective stacks.
A prompt that piles on words like "cinematic, beautiful, ultra-detailed, masterpiece" gives the model nothing physical to render.
While a prompt that says "overhead fluorescent light pooling on wet concrete, light fog at ankle height, 35mm focal length, shallow focus on the foreground" gives it five distinct things to draw.
I want you to notice how the shift from mood adjectives to physical specifics is where your results will get noticeably better.
Here's how that looks in practice:
Prompt: A photograph of a Lisbon tram interior shortly after sunrise. Worn varnished wood panels along the walls, a brass handrail running the length of the car with visible fingerprint smudges, four passengers visible from the rear of the carriage. Light enters through the windows on the right side at a low angle, casting long warm rectangles across the wooden floor and catching dust particles in the air. The seats are upholstered in faded green leather with cracking on the armrests. Shot at hip height looking forward toward the driver's cabin, 35mm lens, slight motion blur on the floor where the tram is moving. Neutral color balance, no styling, no watermark.
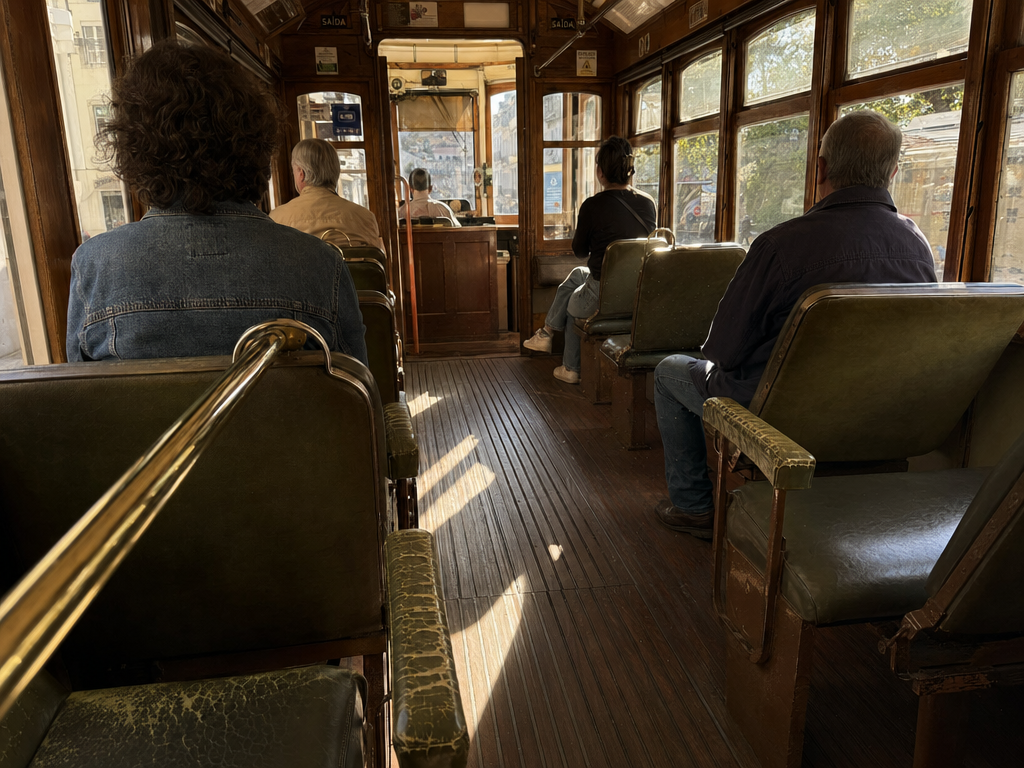
Generated using GPT Image 2 on fal, an AI model from OpenAI.
Literal text needs explicit handling.
Anything that should appear as readable copy in the image, whether that's a sign, a label, a UI title, or a poster headline, should sit inside quotes in your prompt.
Then describe its placement and typography separately.
Add a clause stating the text should appear once and only as written.
Without that clause, the model will sometimes spell variants of the same phrase or duplicate the line elsewhere in the layout.
Here's an example of this in practice:
Prompt: A vintage enamel pharmacy sign mounted on a tiled white wall, chipped at the corners, slight rust bleed along one mounting bolt. The sign reads exactly: "APOTHEKE - SEIT 1894". Below it on a smaller second line: "DR. M. KAUFMANN". The typeface is a heavy condensed sans-serif in dark green on a cream background. The text appears once and only as written, with no other text on the sign or surrounding wall. Side light from camera right creates a faint shadow under the sign. Soft focus on the tiled wall, sharp focus on the sign face. No watermark, no other lettering anywhere in frame.
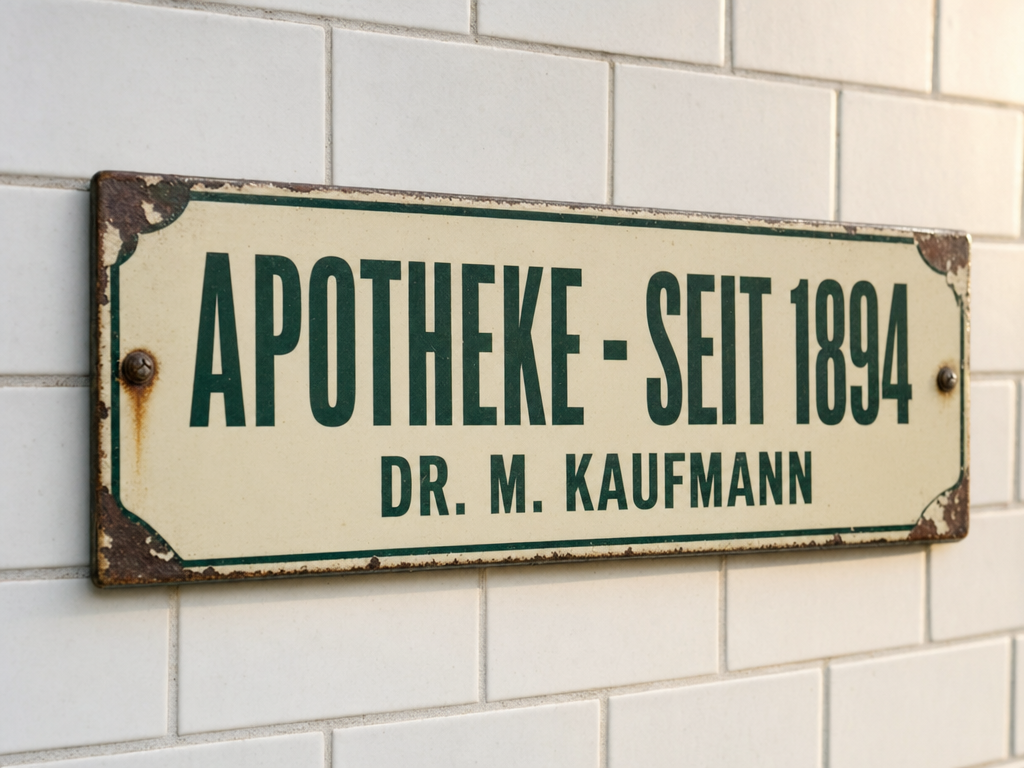
Generated using GPT Image 2 on fal, an AI model from OpenAI.
A constraint list is not optional.
What you don't want in the image needs to be on the page just as much as what you do.
Watermarks, extra logos, additional people, unintended text, stock-photo polish: every one of these can appear unprompted unless ruled out explicitly.
The constraint list works best as the closing paragraph of every prompt.
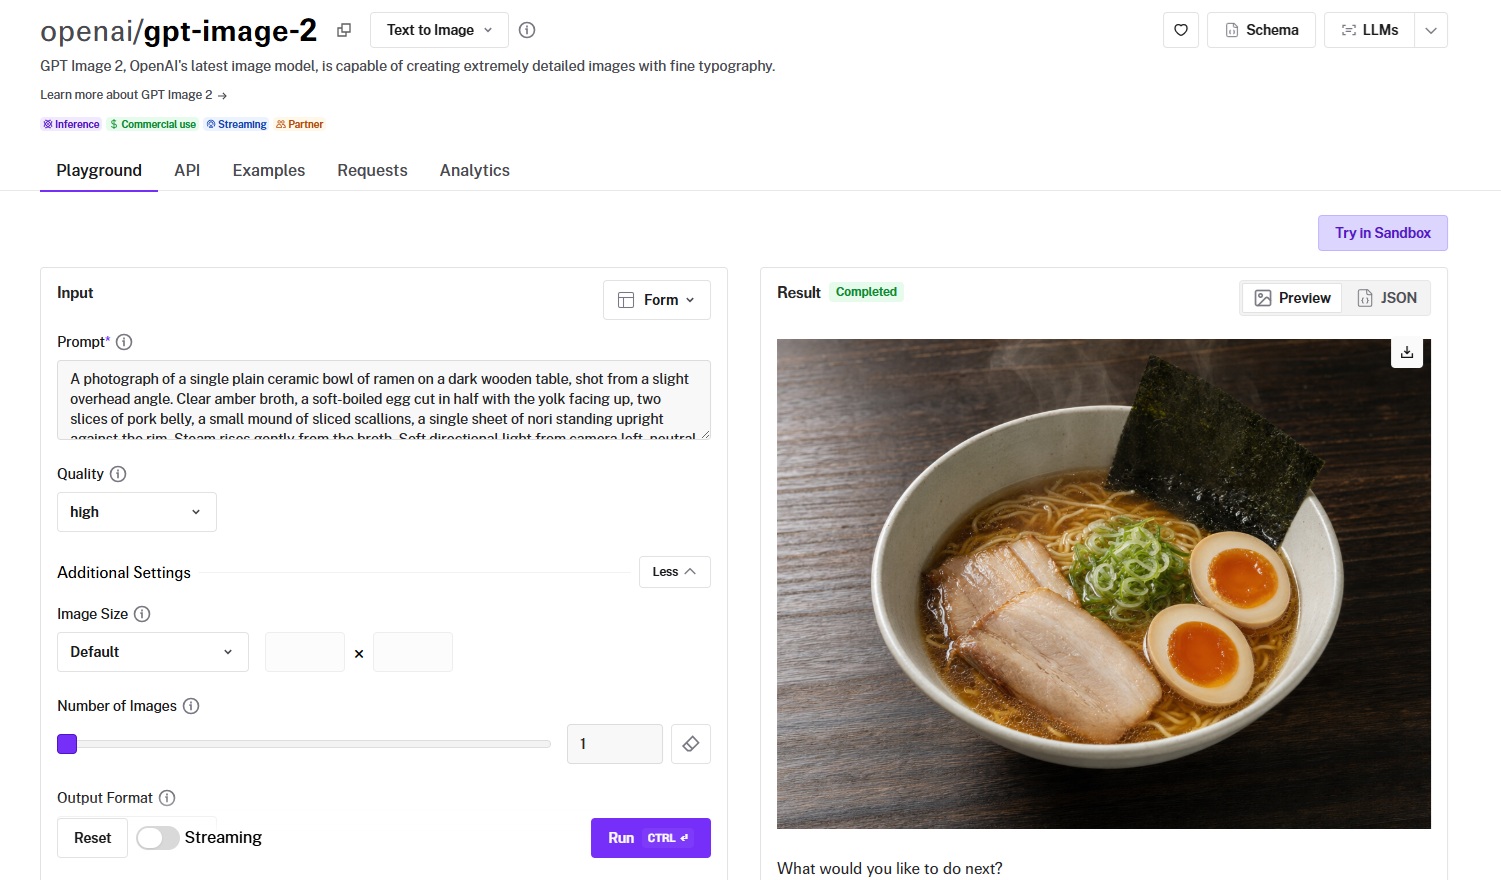
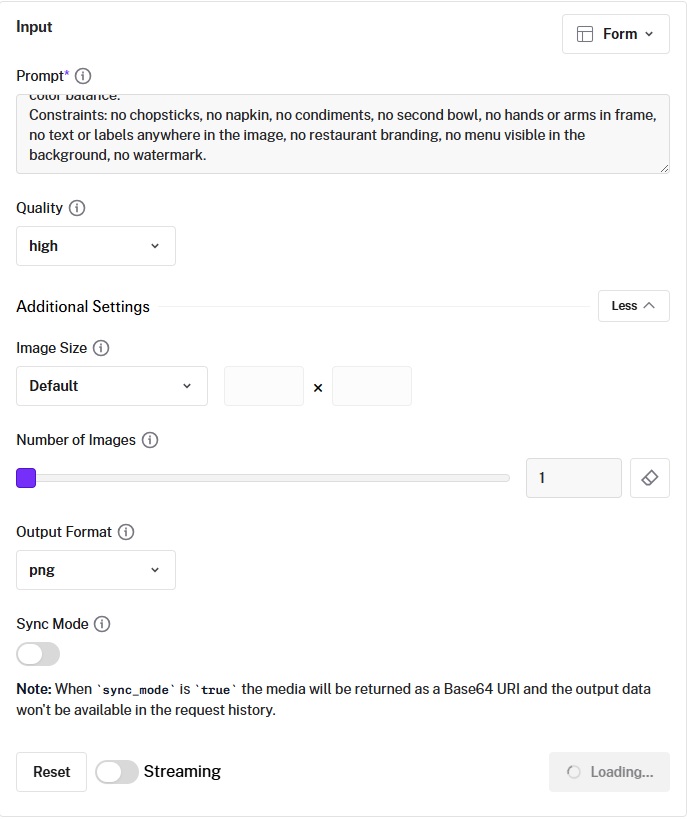
Prompt: A photograph of a single plain ceramic bowl of ramen on a dark wooden table, shot from a slight overhead angle. Clear amber broth, a soft-boiled egg cut in half with the yolk facing up, two slices of pork belly, a small mound of sliced scallions, a single sheet of nori standing upright against the rim. Steam rises gently from the broth. Soft directional light from camera left, neutral color balance.
Constraints: no chopsticks, no napkin, no condiments, no second bowl, no hands or arms in frame, no text or labels anywhere in the image, no restaurant branding, no menu visible in the background, no watermark.
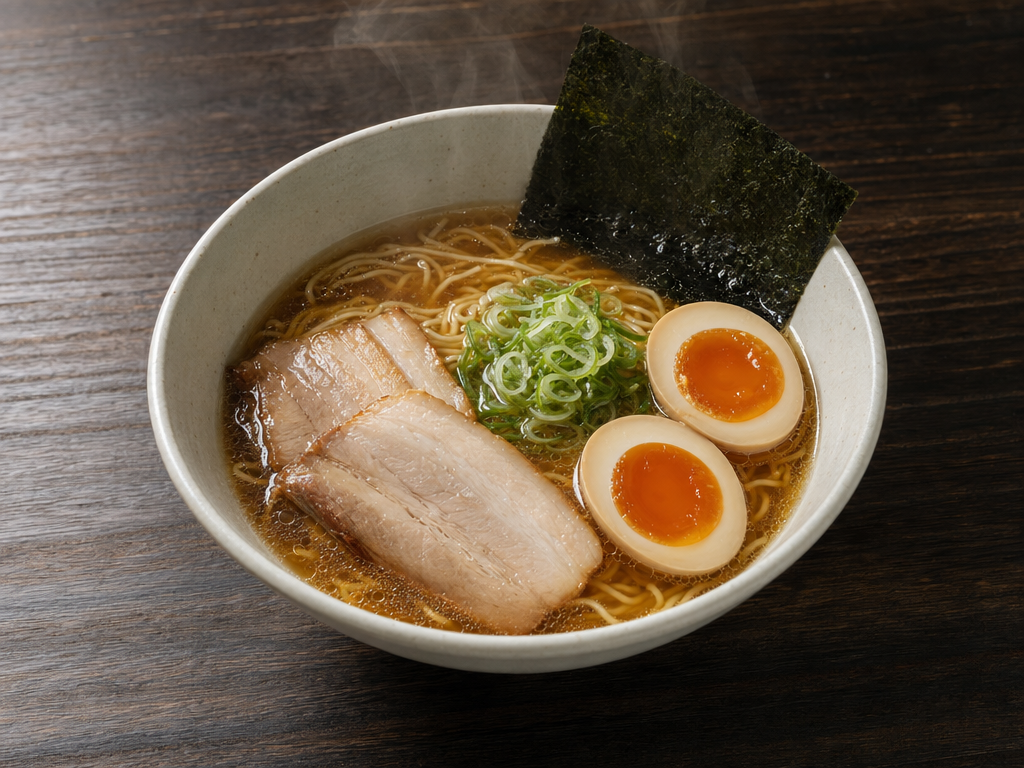
Generated using GPT Image 2 on fal, an AI model from OpenAI.
For edits, pair the change with the preservation.
The edit endpoint produces cleaner results when the prompt names both halves of the operation.
A request like "swap the background for a forest at dusk" alone tends to drift; the same request with "the subject's pose, expression, lighting on the face, and foreground props all stay identical to the source image" produces a much tighter result.
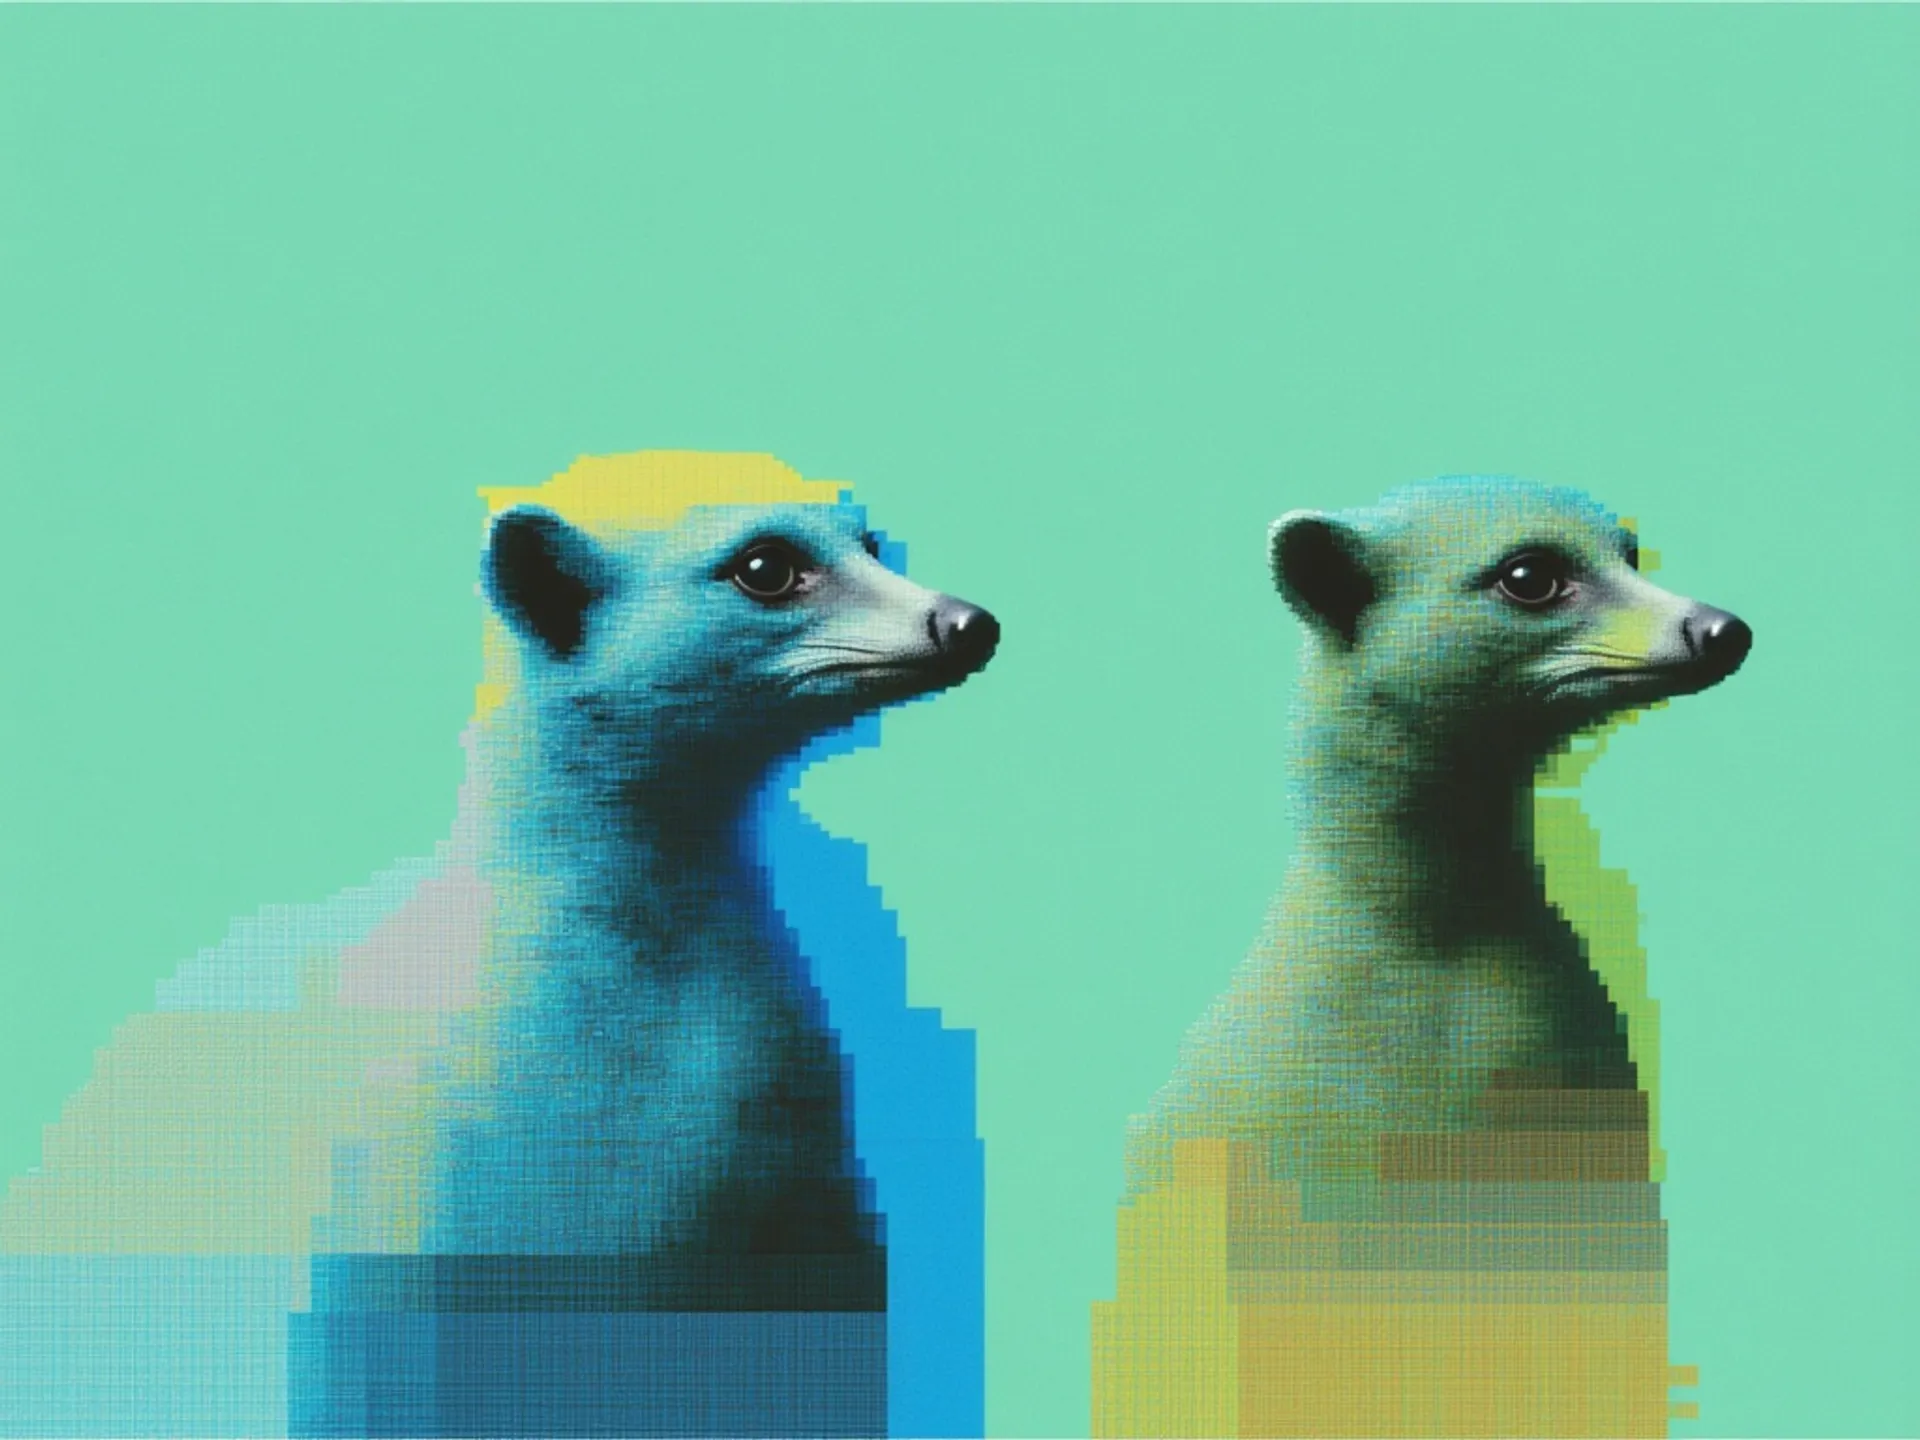
Prompt: Wrap the double-decker bus from the first image with the exact branding design from the second image as a full bus livery. Keep the street scene, people, and background unchanged.
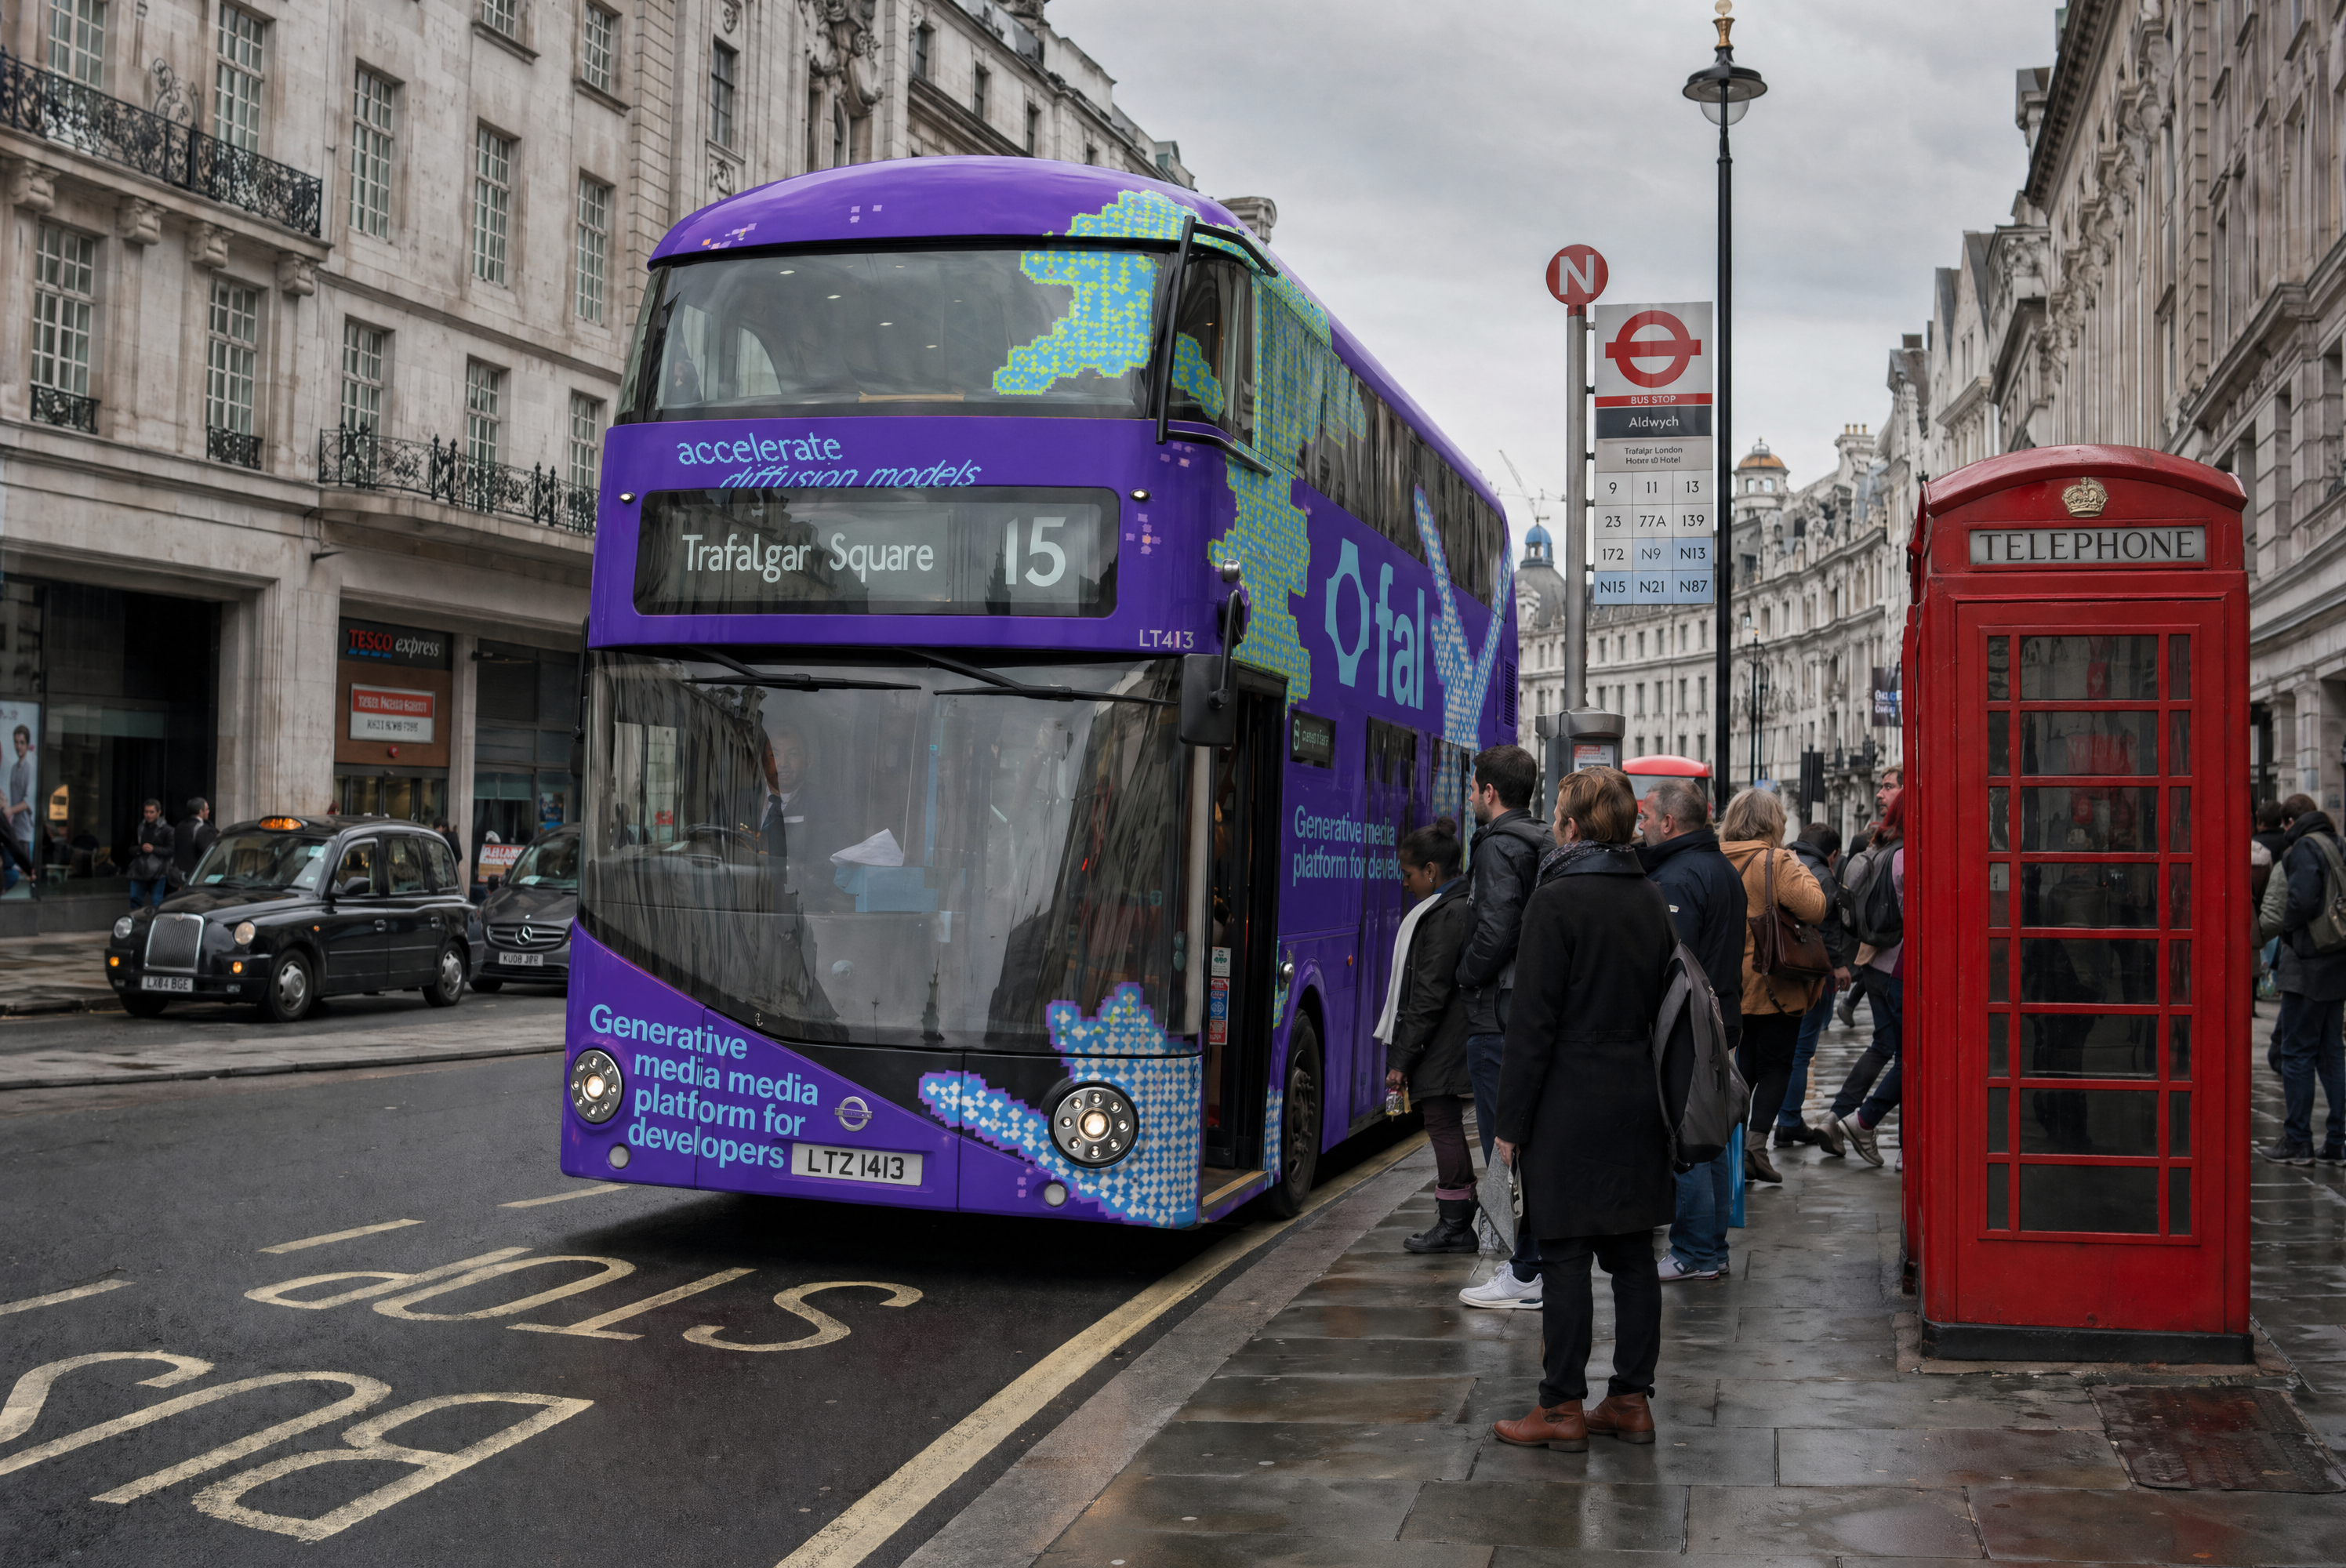
Generated using GPT Image 2 Edit on fal, an AI model from OpenAI.
Our prompt template
Here's how our recommended prompt structure looks:
Scene: Describe where this happens, time of day, background, and the environment.
Subject: Who or what is the main focus in your image?
Important details: Materials, clothing, texture, lighting, camera angle, lens feel, composition, and the mood.
Use case: Is this for an editorial photo, product mockup, poster, UI screen, infographic, or concept frame?
Constraints: Add bonus info for constraints, such as no watermark, no logos, no extra text, preserve face, or preserve layout.
What does each parameter do in GPT Image 2?
Six knobs control the output, plus an optional seventh for routing through your own OpenAI quota.
The prompt does most of the work and gets its own section below; everything else is below.
For dimensions, image_size accepts either a preset name or an object with explicit width and height.
The presets cover the common cases: square_hd (1024 by 1024), square (512 by 512), portrait_4_3 (768 by 1024), portrait_16_9 (576 by 1024), landscape_4_3 (1024 by 768), and landscape_16_9 (1024 by 576).
Custom sizes work as long as both edges are multiples of 16, the longest edge maxes at 3840px, the aspect ratio stays under 3:1, and the total pixel count lands between 655,360 and 8,294,400.
"image_size": {
  "width": 1920,
  "height": 1080
}
Anything above 2K is flagged as experimental by OpenAI, with results becoming inconsistent at those sizes.
The cleanest workaround is to generate at a manageable resolution and pass the output through fal's upscaler instead of pushing the model to 4K natively.
This would also be a cost reduction.
quality accepts low, medium, or high. The default is high.
The cost gap between tiers is significant, and OpenAI's own guidance is to start at low and only step up if your specific use case actually demands it.
Pairing low with an upscaler is a pattern worth considering for high-volume workloads where unit cost actually matters on the bottom line.
num_images is how many variants to return per call. Defaults to one.
output_format is png by default, with jpeg and webp also supported.
sync_mode returns the image directly as a base64 data URI rather than a hosted URL, and skips writing it to your request history. Useful when you don't want fal storing the file on its end.
openai_api_key is the BYOK option. Pass your own OpenAI key and the call routes through your OpenAI account and quota instead of fal's. fal's pricing doesn't apply to BYOK calls.
const result = await fal.subscribe("openai/gpt-image-2", {
  input: {
    prompt: "...",
    openai_api_key: "YOUR_OPENAI_KEY",
  },
});
What is GPT Image 2's pricing?
GPT Image 2 is billed by tokens. There are three things that drive the cost:
The quality tier.
The output resolution.
How complex the prompt is, since longer or more reasoning-heavy prompts consume more text tokens before the image generation step kicks in.
Here are the per-image costs across canonical sizes:
| Resolution | Low | Medium | High |
|---|---|---|---|
| 1024 x 768 | $0.01 | $0.04 | $0.15 |
| 1024 x 1024 | $0.01 | $0.06 | $0.22 |
| 1024 x 1536 | $0.01 | $0.05 | $0.17 |
| 1920 x 1080 | $0.01 | $0.04 | $0.16 |
| 2560 x 1440 | $0.01 | $0.06 | $0.23 |
| 3840 x 2160 | $0.02 | $0.11 | $0.41 |
Do note that underlying token rates apply when costs are calculated in detail.
Text tokens cost $5.00 per 1M input, $1.25 per 1M cached, and $10.00 per 1M output.
Image tokens run at $8.00 per 1M input, $2.00 per 1M cached, and $30.00 per 1M output.
Recently Added


Try GPT Image 2 on fal
The fastest way to get a feel for the model is to open the GPT Image 2 playground and run a few prompts against your actual use case before integrating it into your stack.
For production, the JavaScript client handles the queue protocol, retries, and result delivery.
The same fal key covers every other model on the platform, so chaining GPT Image 2 with an upscaler, a video model, or any other downstream step is a one-integration job.
GPT Image 2 Frequently Asked Questions
What is GPT Image 2?
GPT Image 2 is OpenAI's flagship image generation model, released on April 21, 2026.
It succeeds GPT Image 1.5 in OpenAI's lineup.
The headline gains over GPT Image 1.5 sit in three areas: text rendering inside images, photorealistic surface detail, and adherence to long multi-clause prompts.
When should I use low quality versus high quality?
OpenAI's own recommendation that I can confirm is to start at low and only step up if the use case actually requires it.
For high-volume workflows where unit economics matter, like product shot variations, social asset batches, or design exploration, low quality combined with fal's upscaler covers most ground at a fraction of the per-image cost.
You can reach for high when you need pristine surface detail, dense small text, or anything heading straight to a printed format. medium is the in-between for cases where low falls short but high is overkill.
What are the resolution and aspect ratio rules?
These rules apply when you specify a custom size; the named presets ship as-is.
Both edges of the output have to be multiples of 16. The longest single edge cannot exceed 3840px.
The aspect ratio (long edge to short edge) caps at 3:1, which rules out very narrow banner or pillar formats.
Total pixel count must land between 655,360 (about 1024 by 640) and 8,294,400 (about 4K).
Anything above 2K is flagged by OpenAI as experimental, so for output above that threshold, the cleaner approach is to generate at a smaller size and run the result through fal's upscaler rather than pushing the model to 4K natively.
Can I use my own OpenAI API key?
Yes. Pass openai_api_key as part of the input, and the call routes through your OpenAI account instead of fal's. This is the BYOK path.
fal's quota and pricing don't apply when BYOK is in use, which makes it most useful for teams that already have an OpenAI billing relationship and want to consolidate image generation usage there while still benefiting from fal's pipeline orchestration for other models.
const result = await fal.subscribe("openai/gpt-image-2", {
  input: {
    prompt: "...",
    openai_api_key: "YOUR_OPENAI_KEY",
  },
});