> ## Documentation Index
> Fetch the complete documentation index at: https://fal.ai/docs/llms.txt
> Use this file to discover all available pages before exploring further.
# Using fal within an n8n workflow
> This guide will demonstrate, step-by-step, how to use fal within an n8n workflow.
## Prerequisites
* An n8n account ([https://n8n.io/](https://n8n.io/))
* A fal account ([https://fal.ai/dashboard](https://fal.ai/dashboard))
* A fal API key (generated from your account dashboard)
## Workflow Overview
This n8n workflow consists of three main HTTP requests:
Send a POST request to initiate content generation
Poll the status of your request using GET
Fetch the final generated content
## Step 1: Create Your Workflow
In n8n, create a new workflow
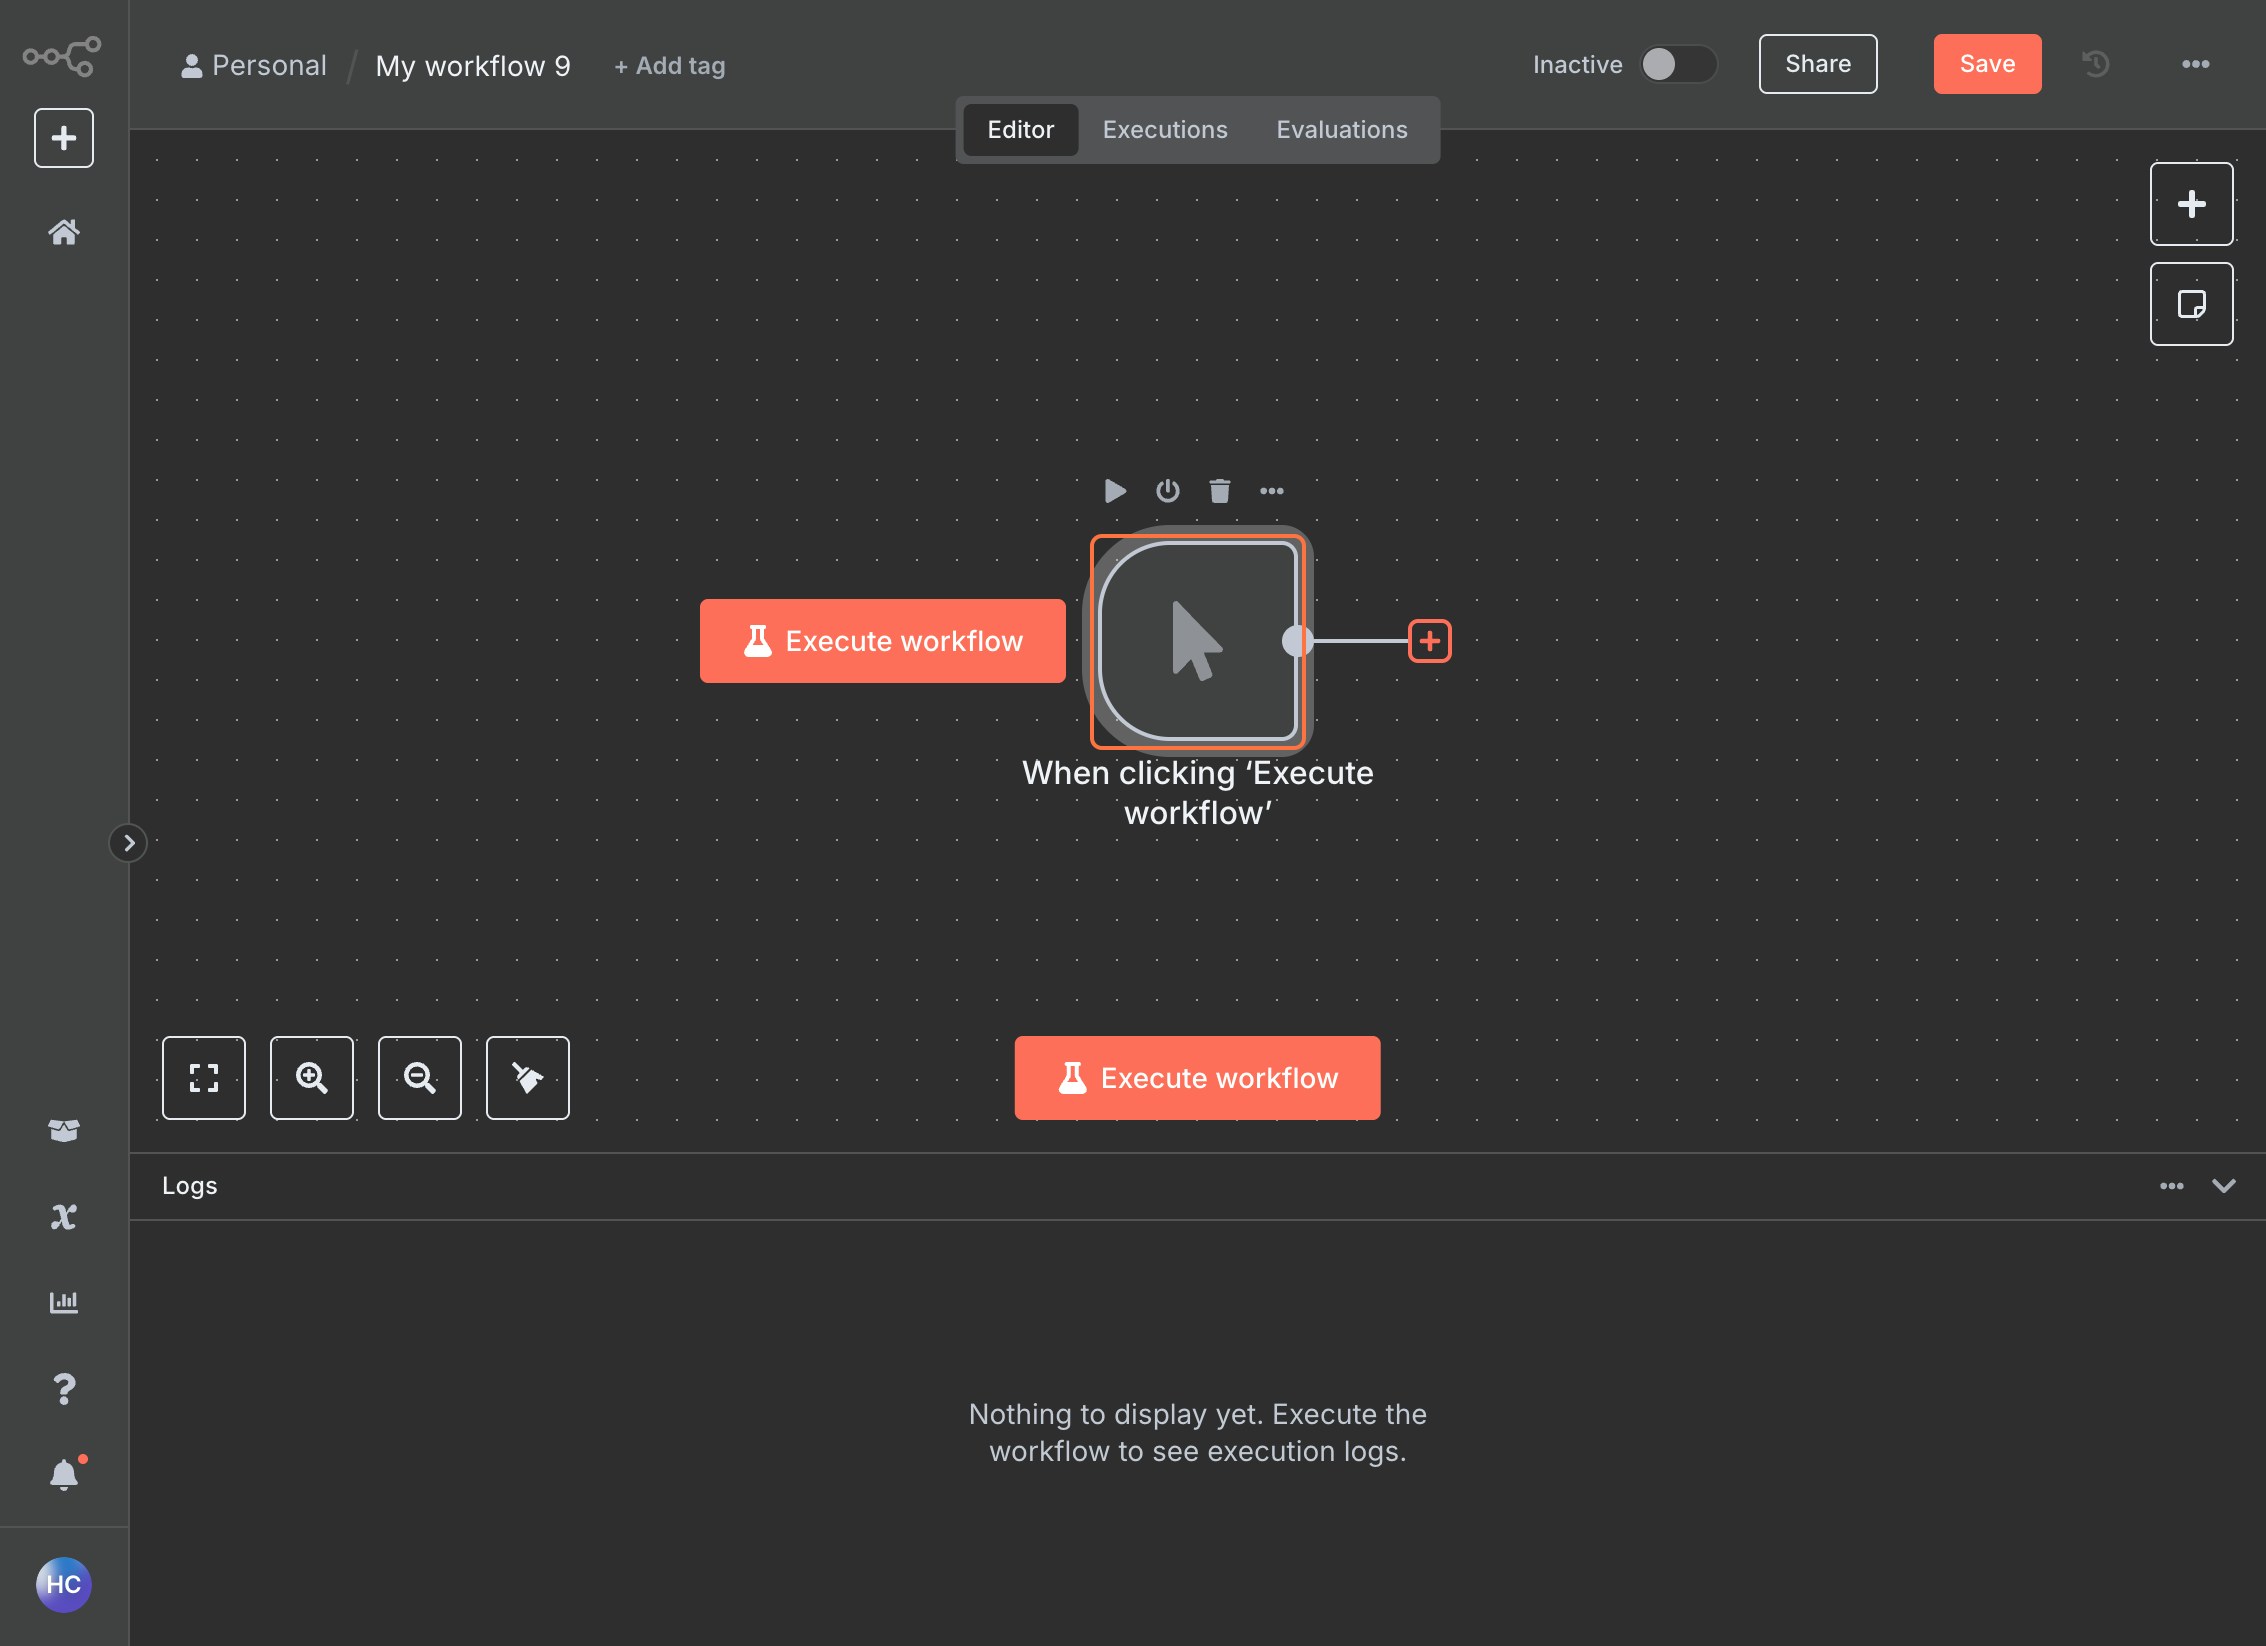
Start with a **Manual Trigger** node to initiate the workflow manually
 ## Step 2: Submit Request (POST)
### Add HTTP Request Node
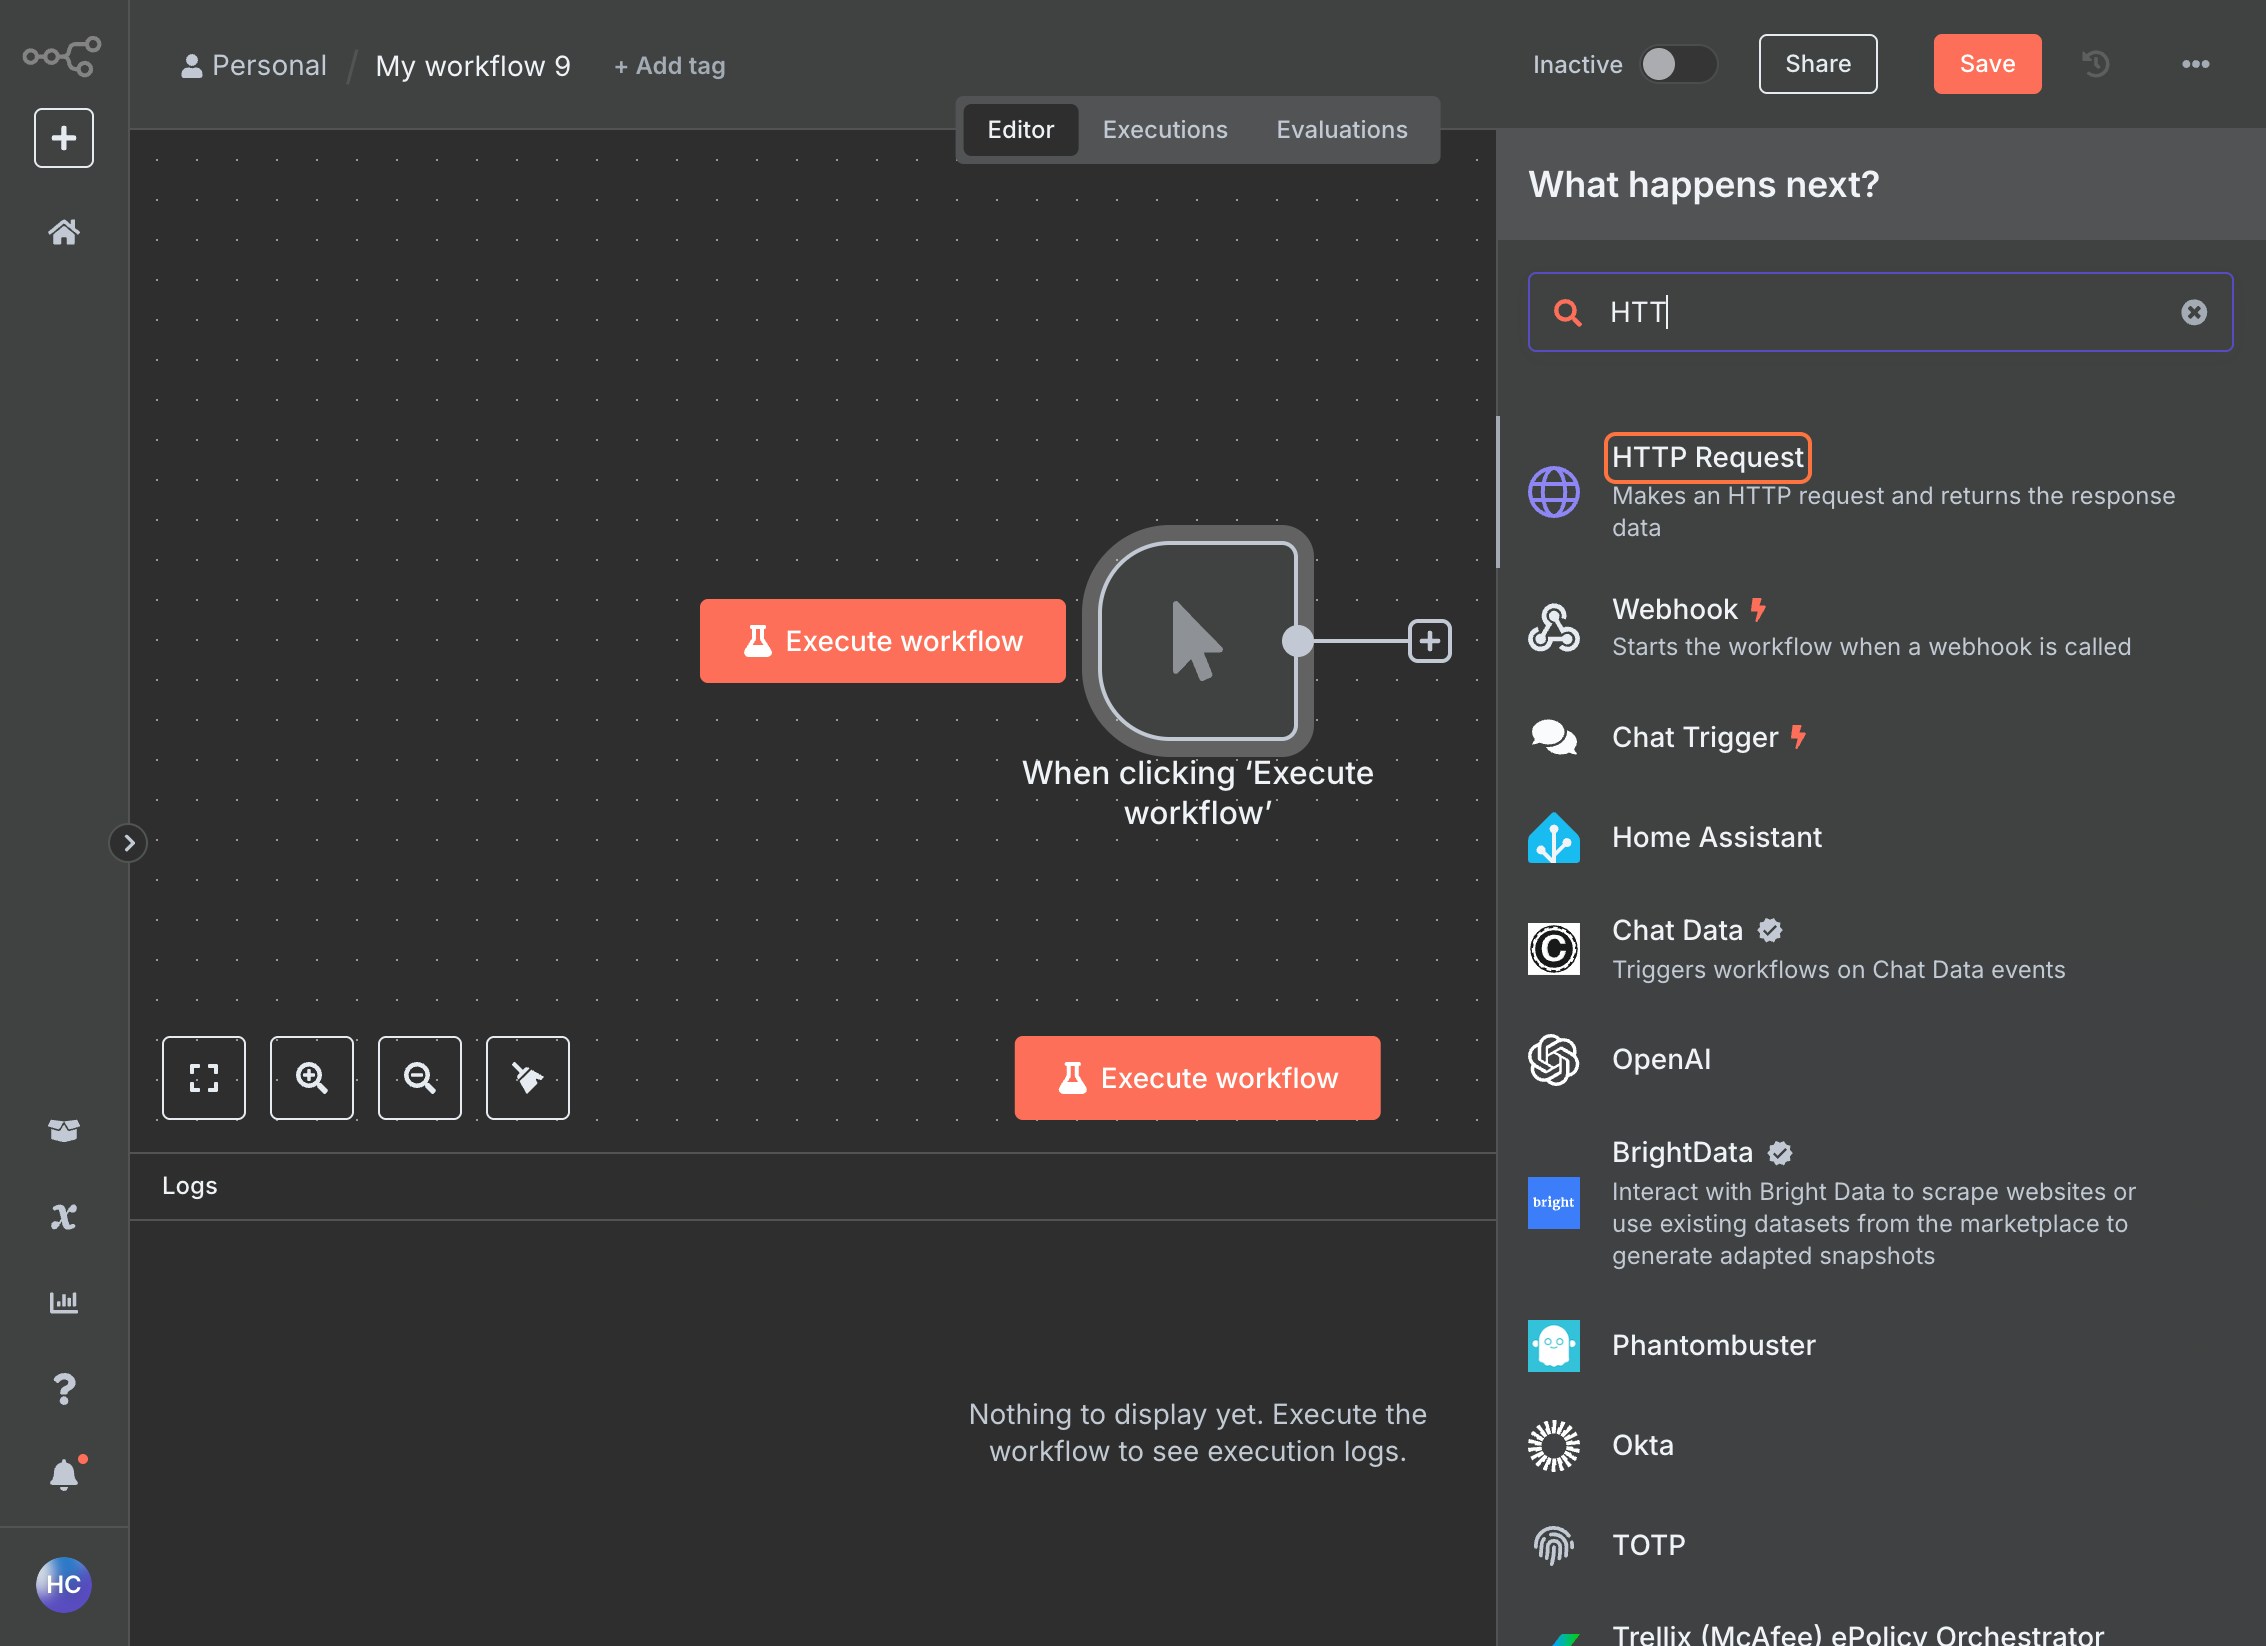
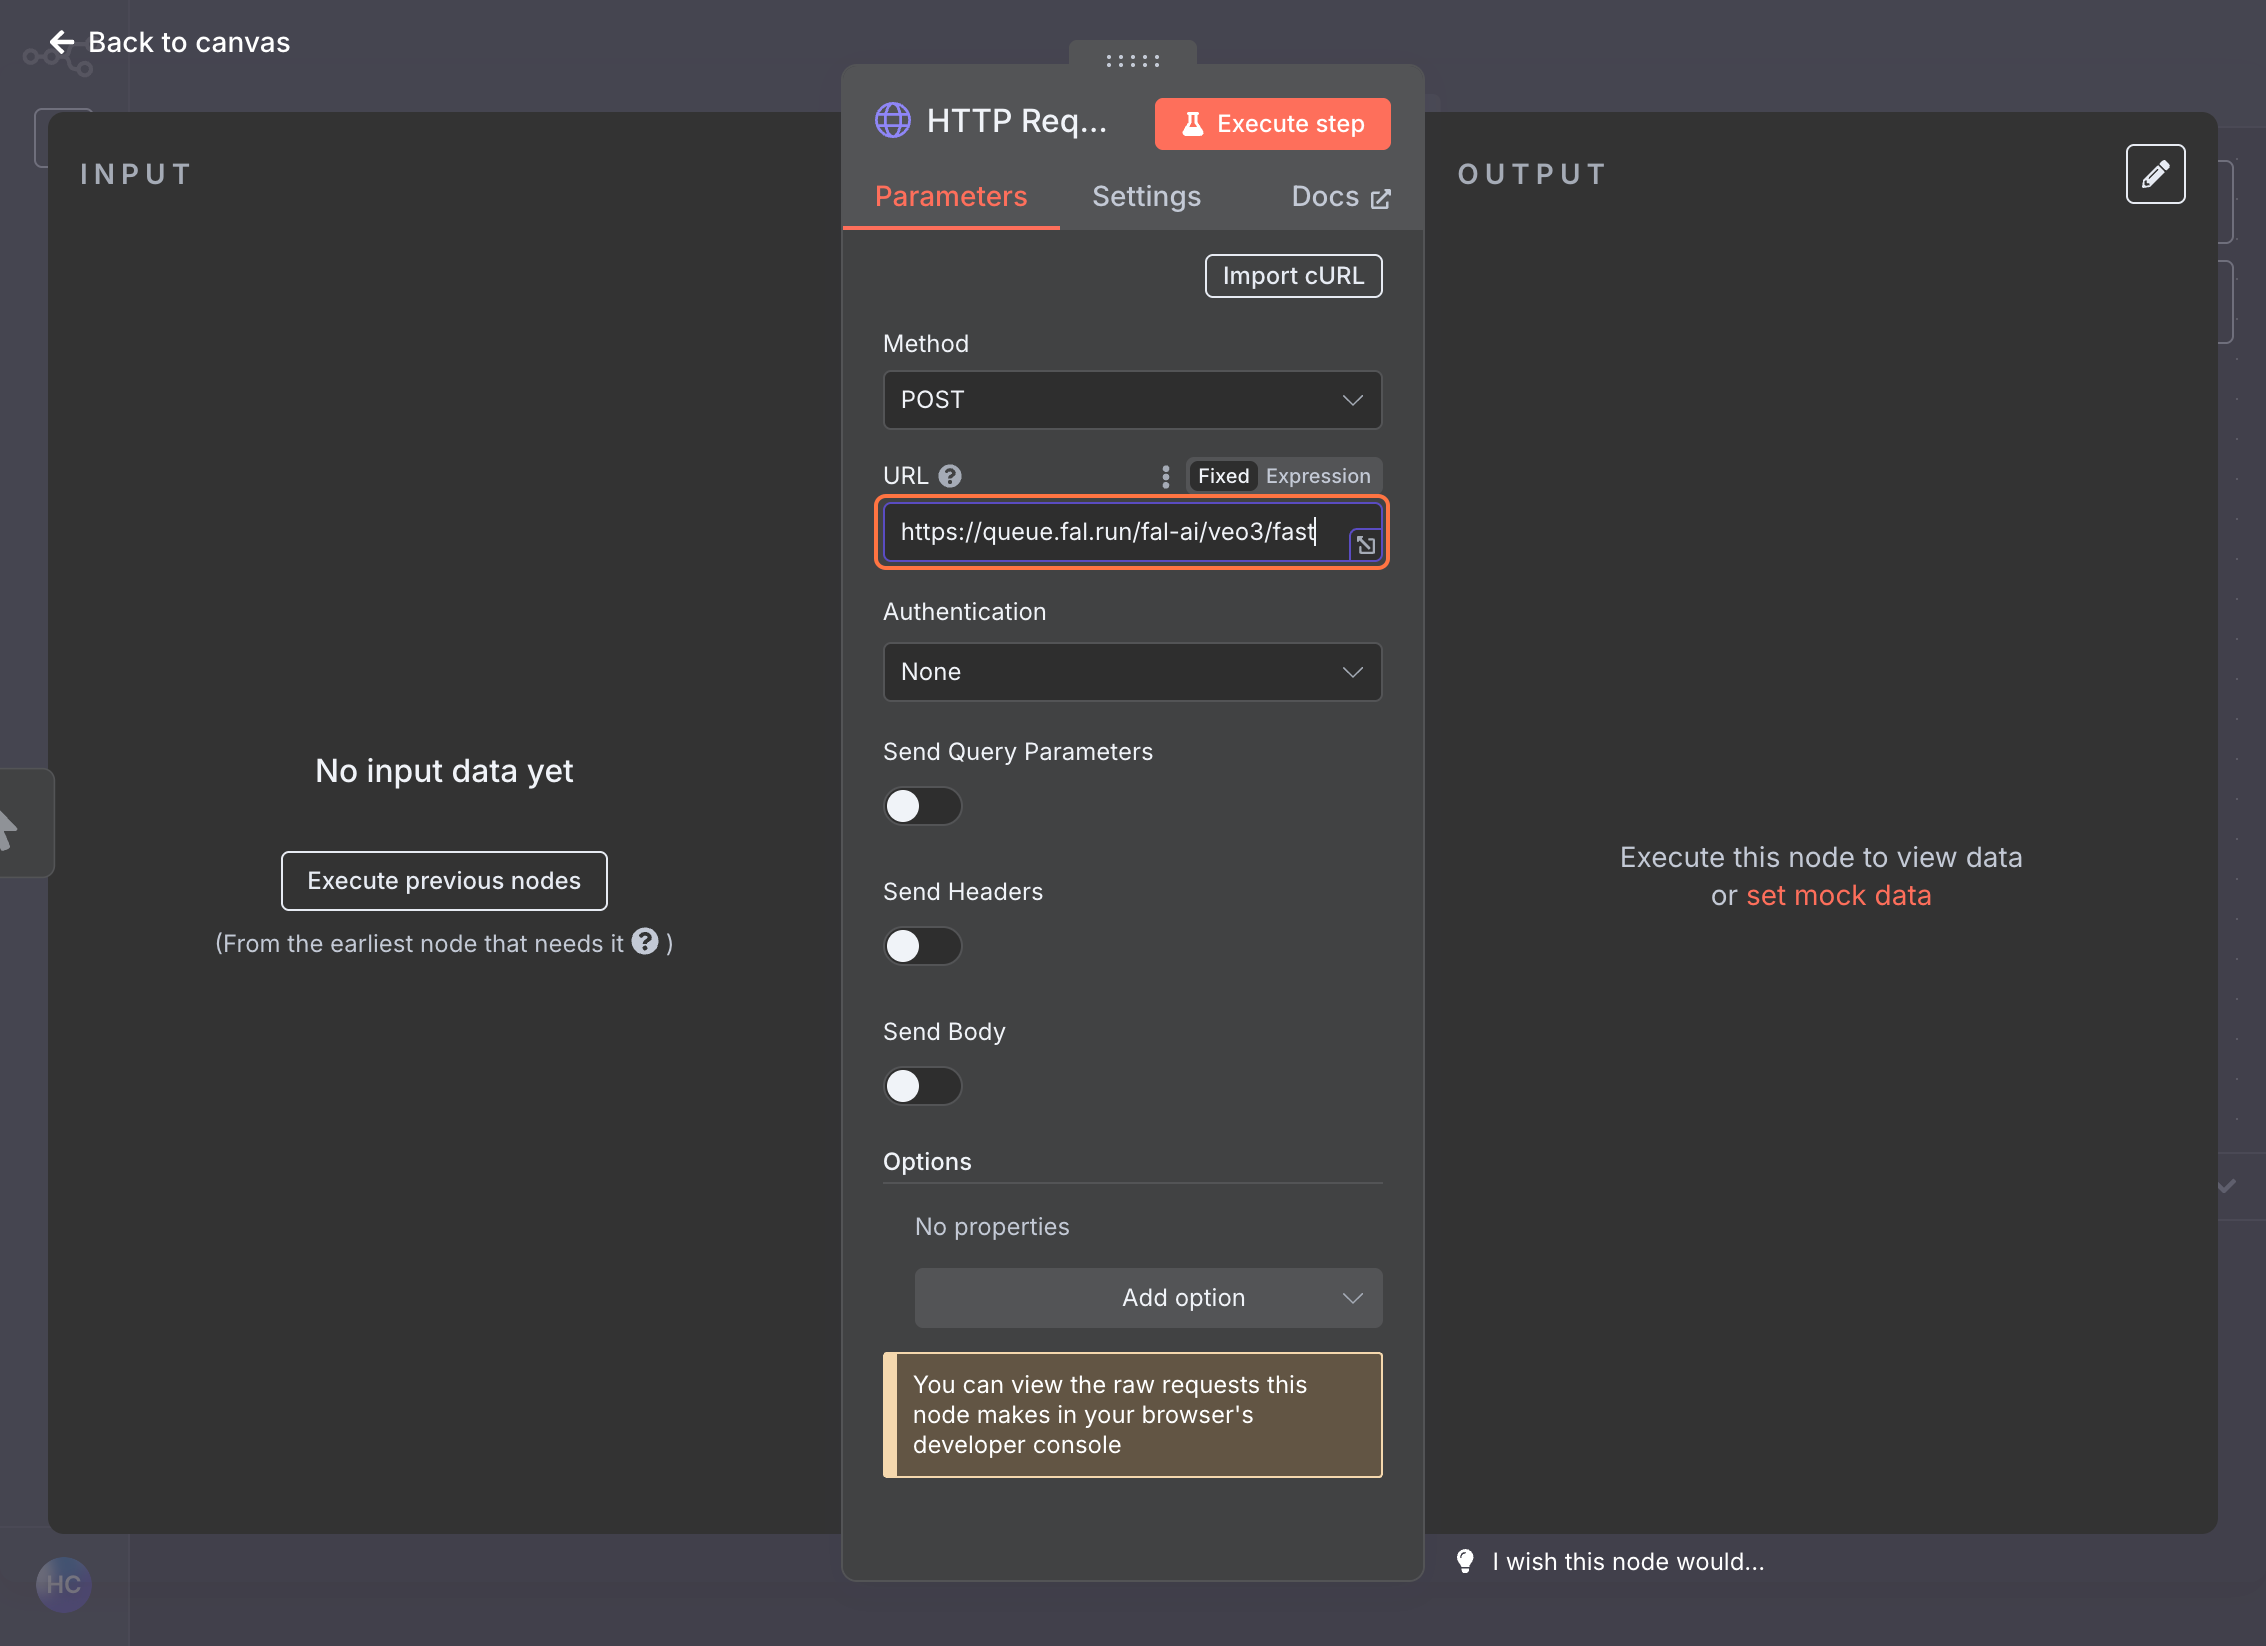
Add an **HTTP Request** node after your trigger
Set the **Method** to `POST`
## Step 2: Submit Request (POST)
### Add HTTP Request Node
Add an **HTTP Request** node after your trigger
Set the **Method** to `POST`
 ### Configure the URL
Navigate to [fal.ai](https://fal.ai/dashboard) and select your desired model (e.g., `fal-ai/veo3/fast`)
### Configure the URL
Navigate to [fal.ai](https://fal.ai/dashboard) and select your desired model (e.g., `fal-ai/veo3/fast`)
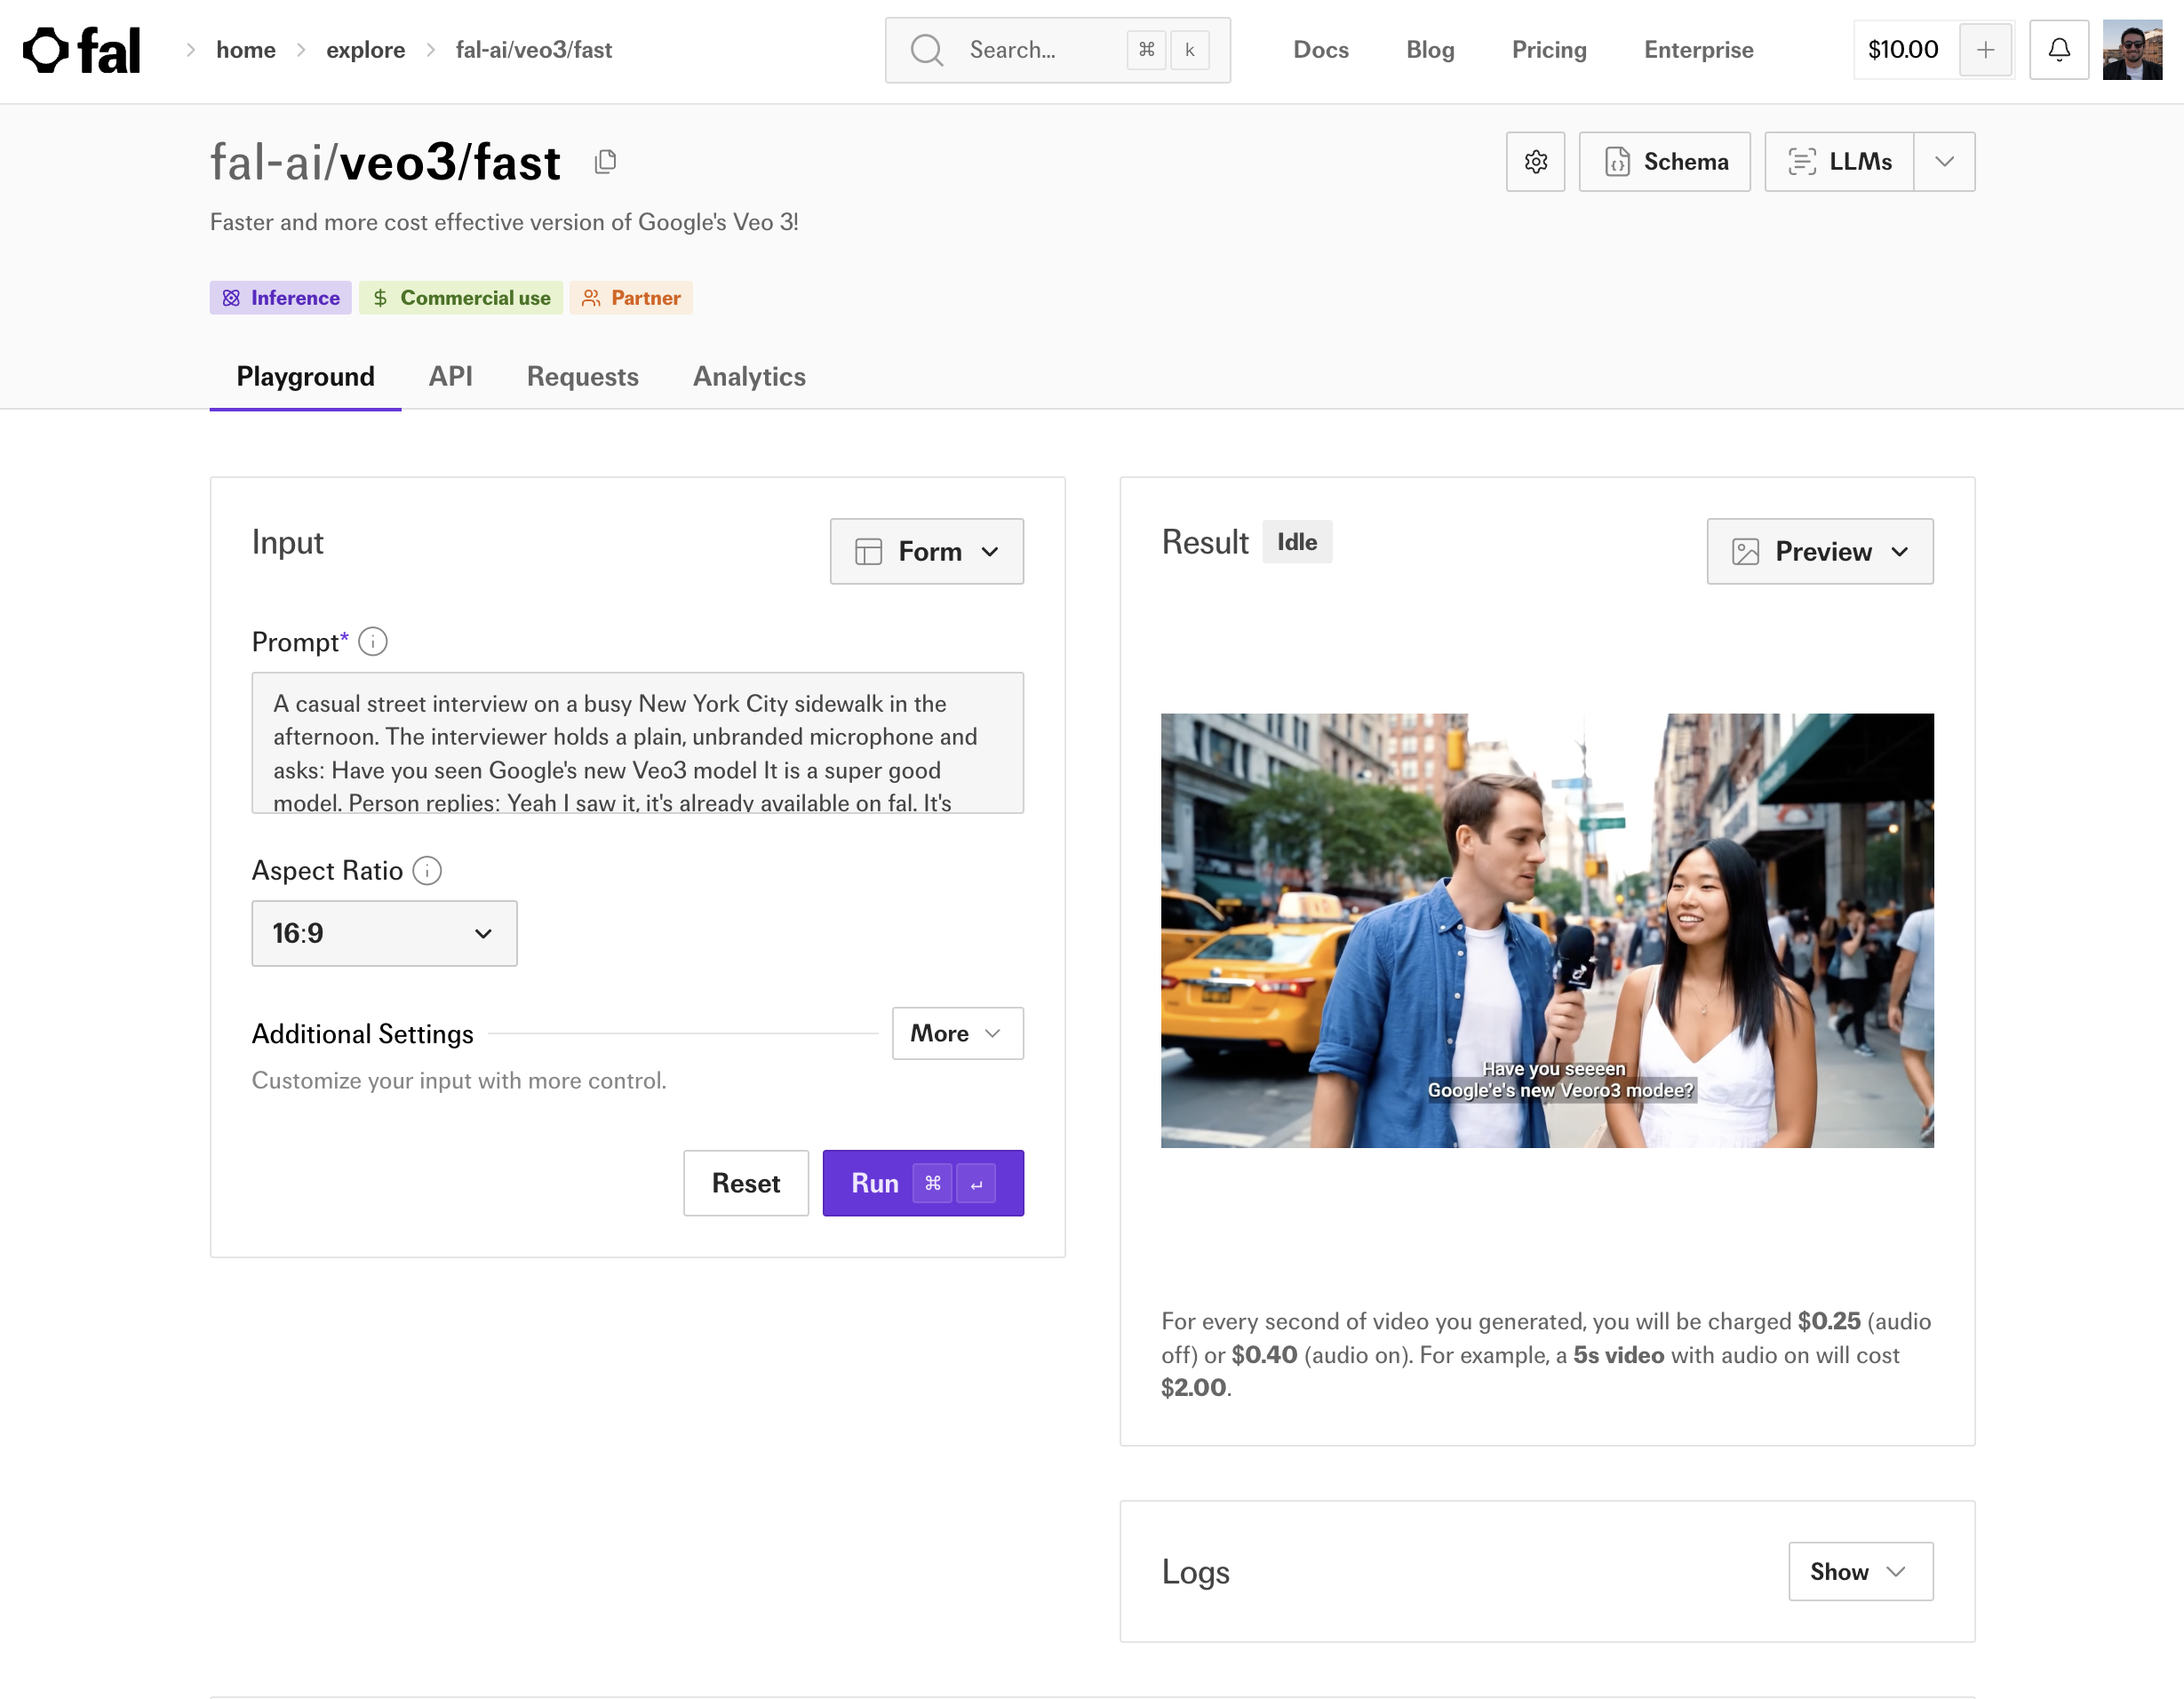 Click on the **API** tab, select "HTTP (cURL)" and "Submit a request". Copy and save the URL and data JSON as those will be needed for later.
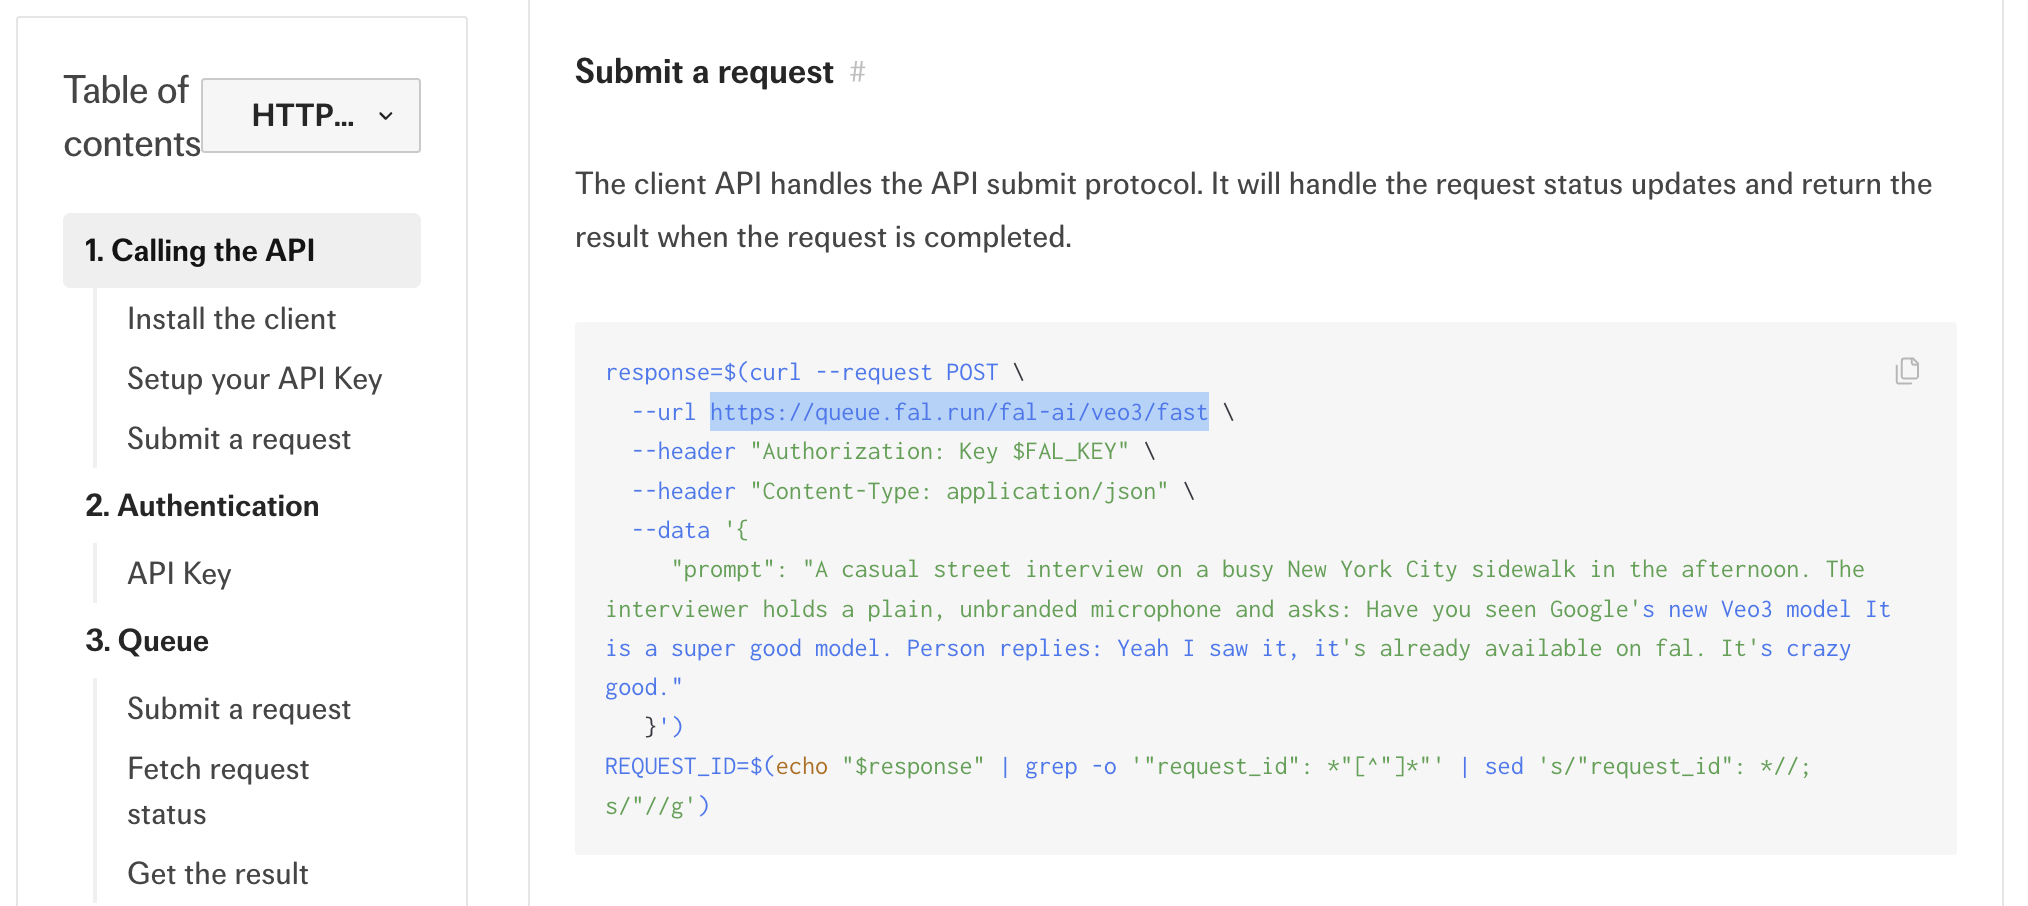 Copy the URL (e.g., `https://queue.fal.run/fal-ai/veo3/fast`) and paste it into the URL field in n8n
 ### Set Up Authentication
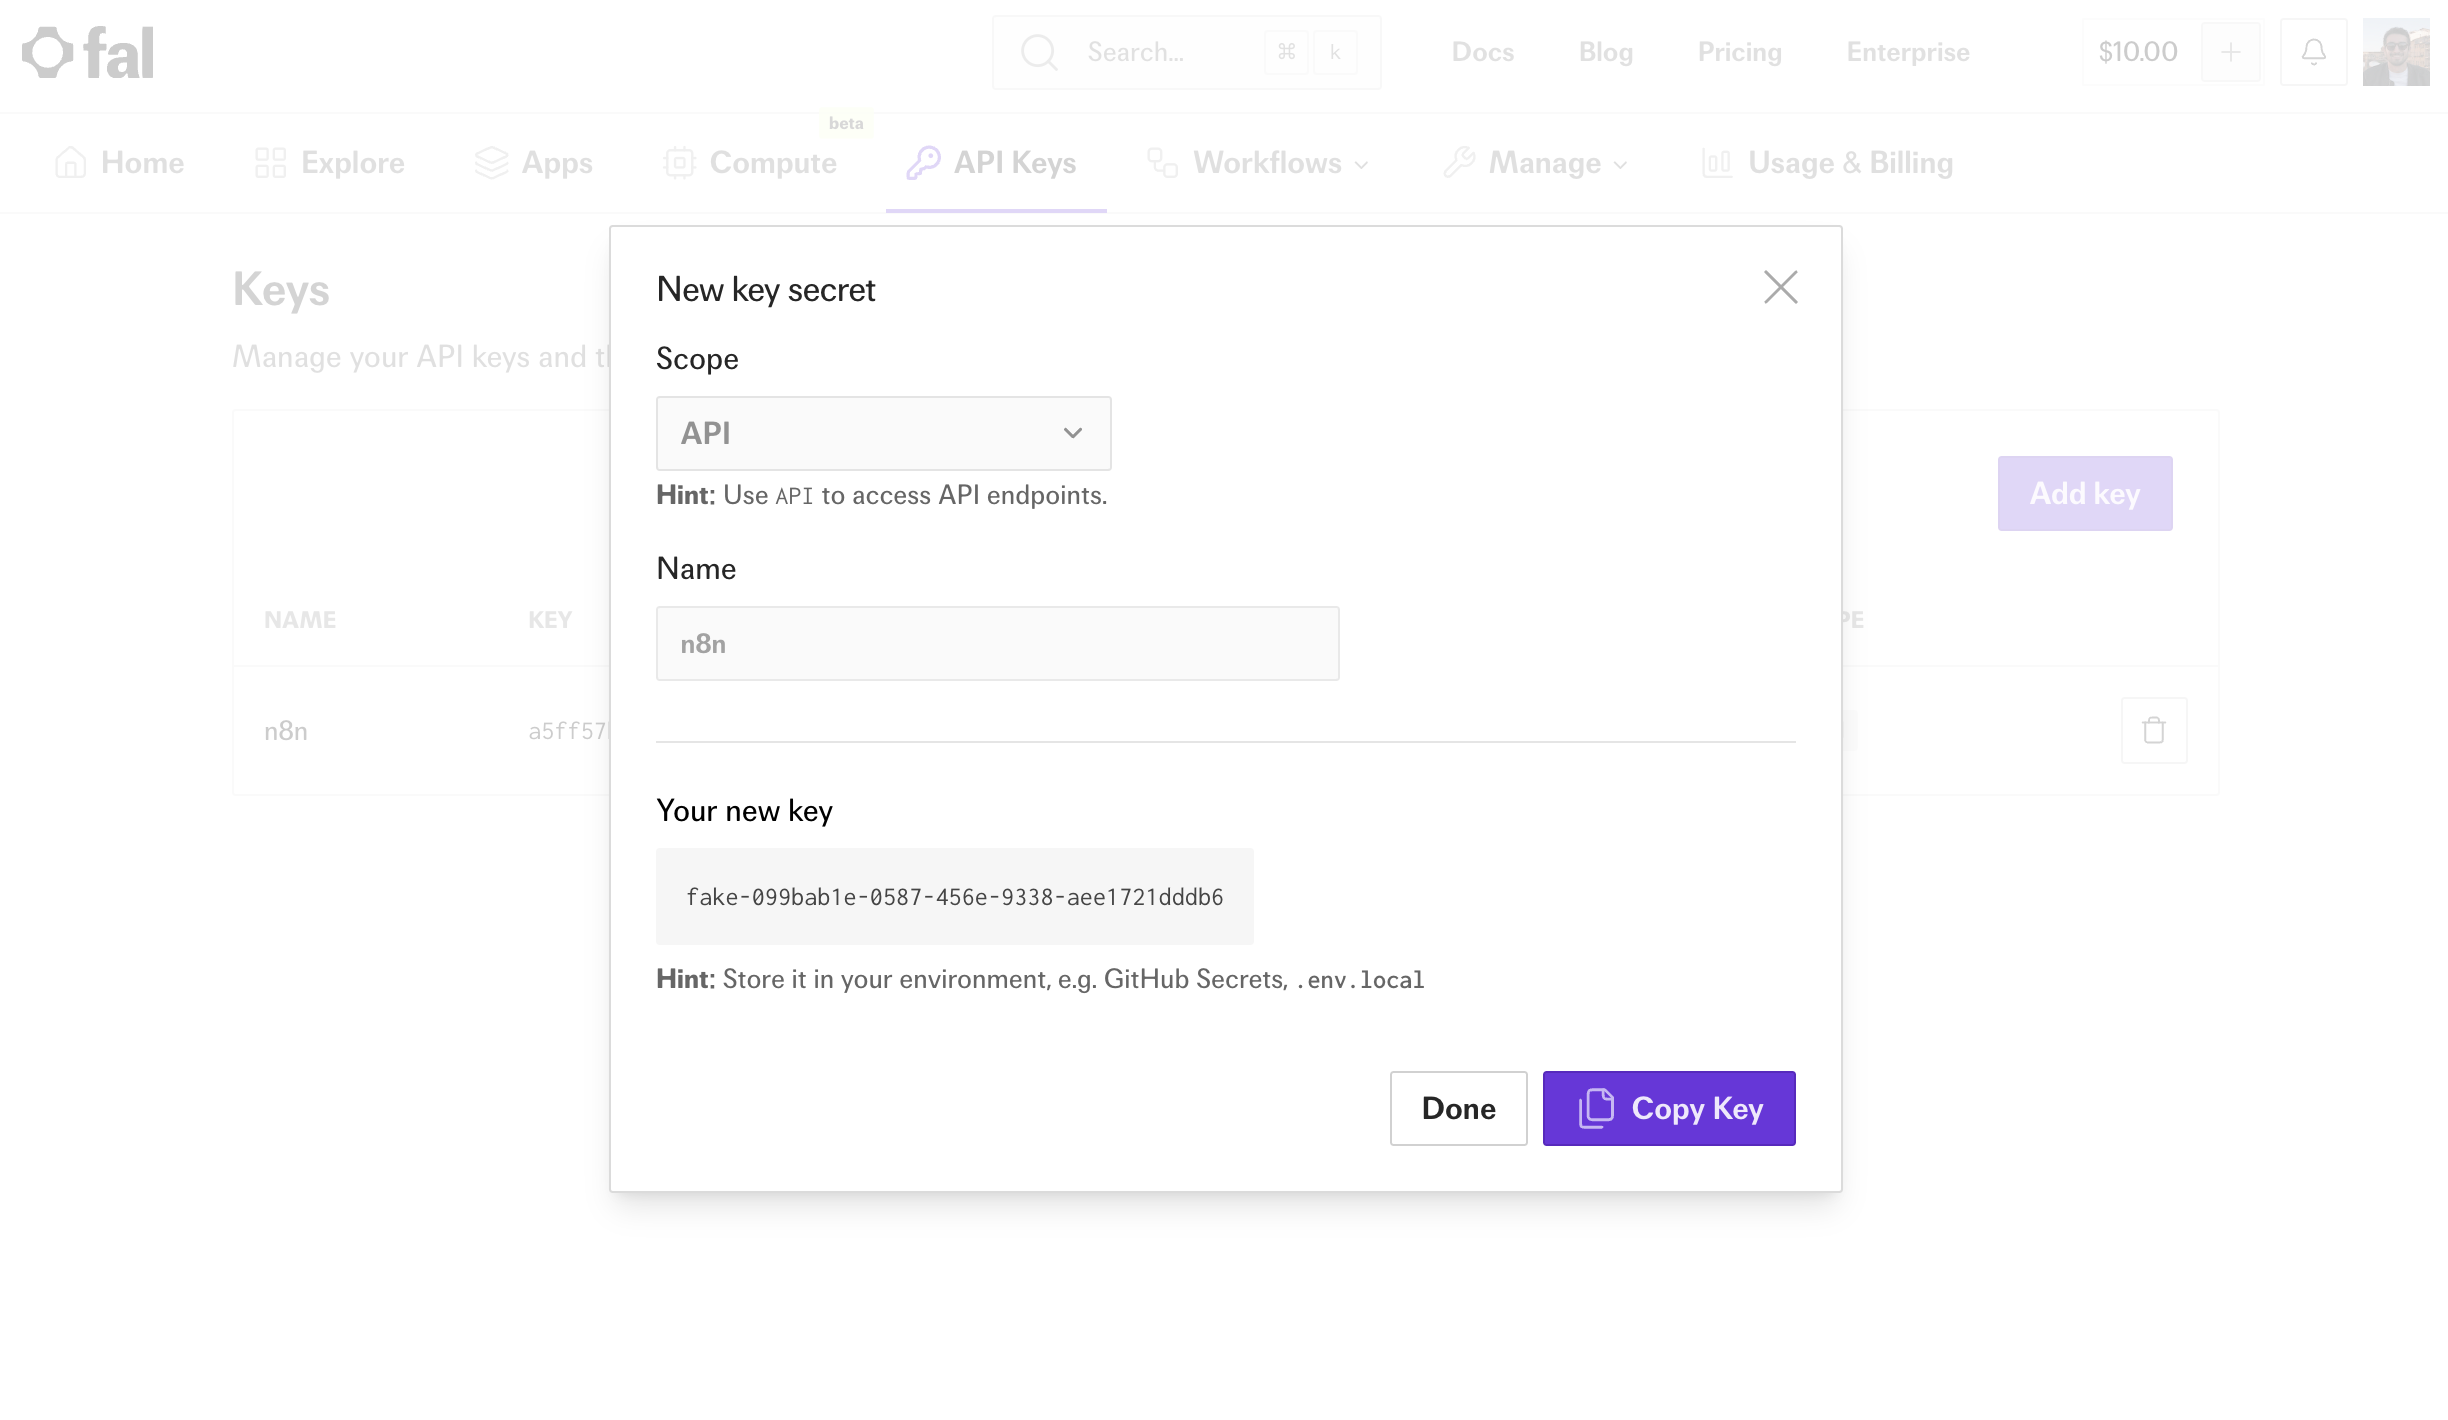
Navigate to [fal.ai API Keys](https://fal.ai/dashboard/keys), create a new key and copy its value.
### Set Up Authentication
Navigate to [fal.ai API Keys](https://fal.ai/dashboard/keys), create a new key and copy its value.
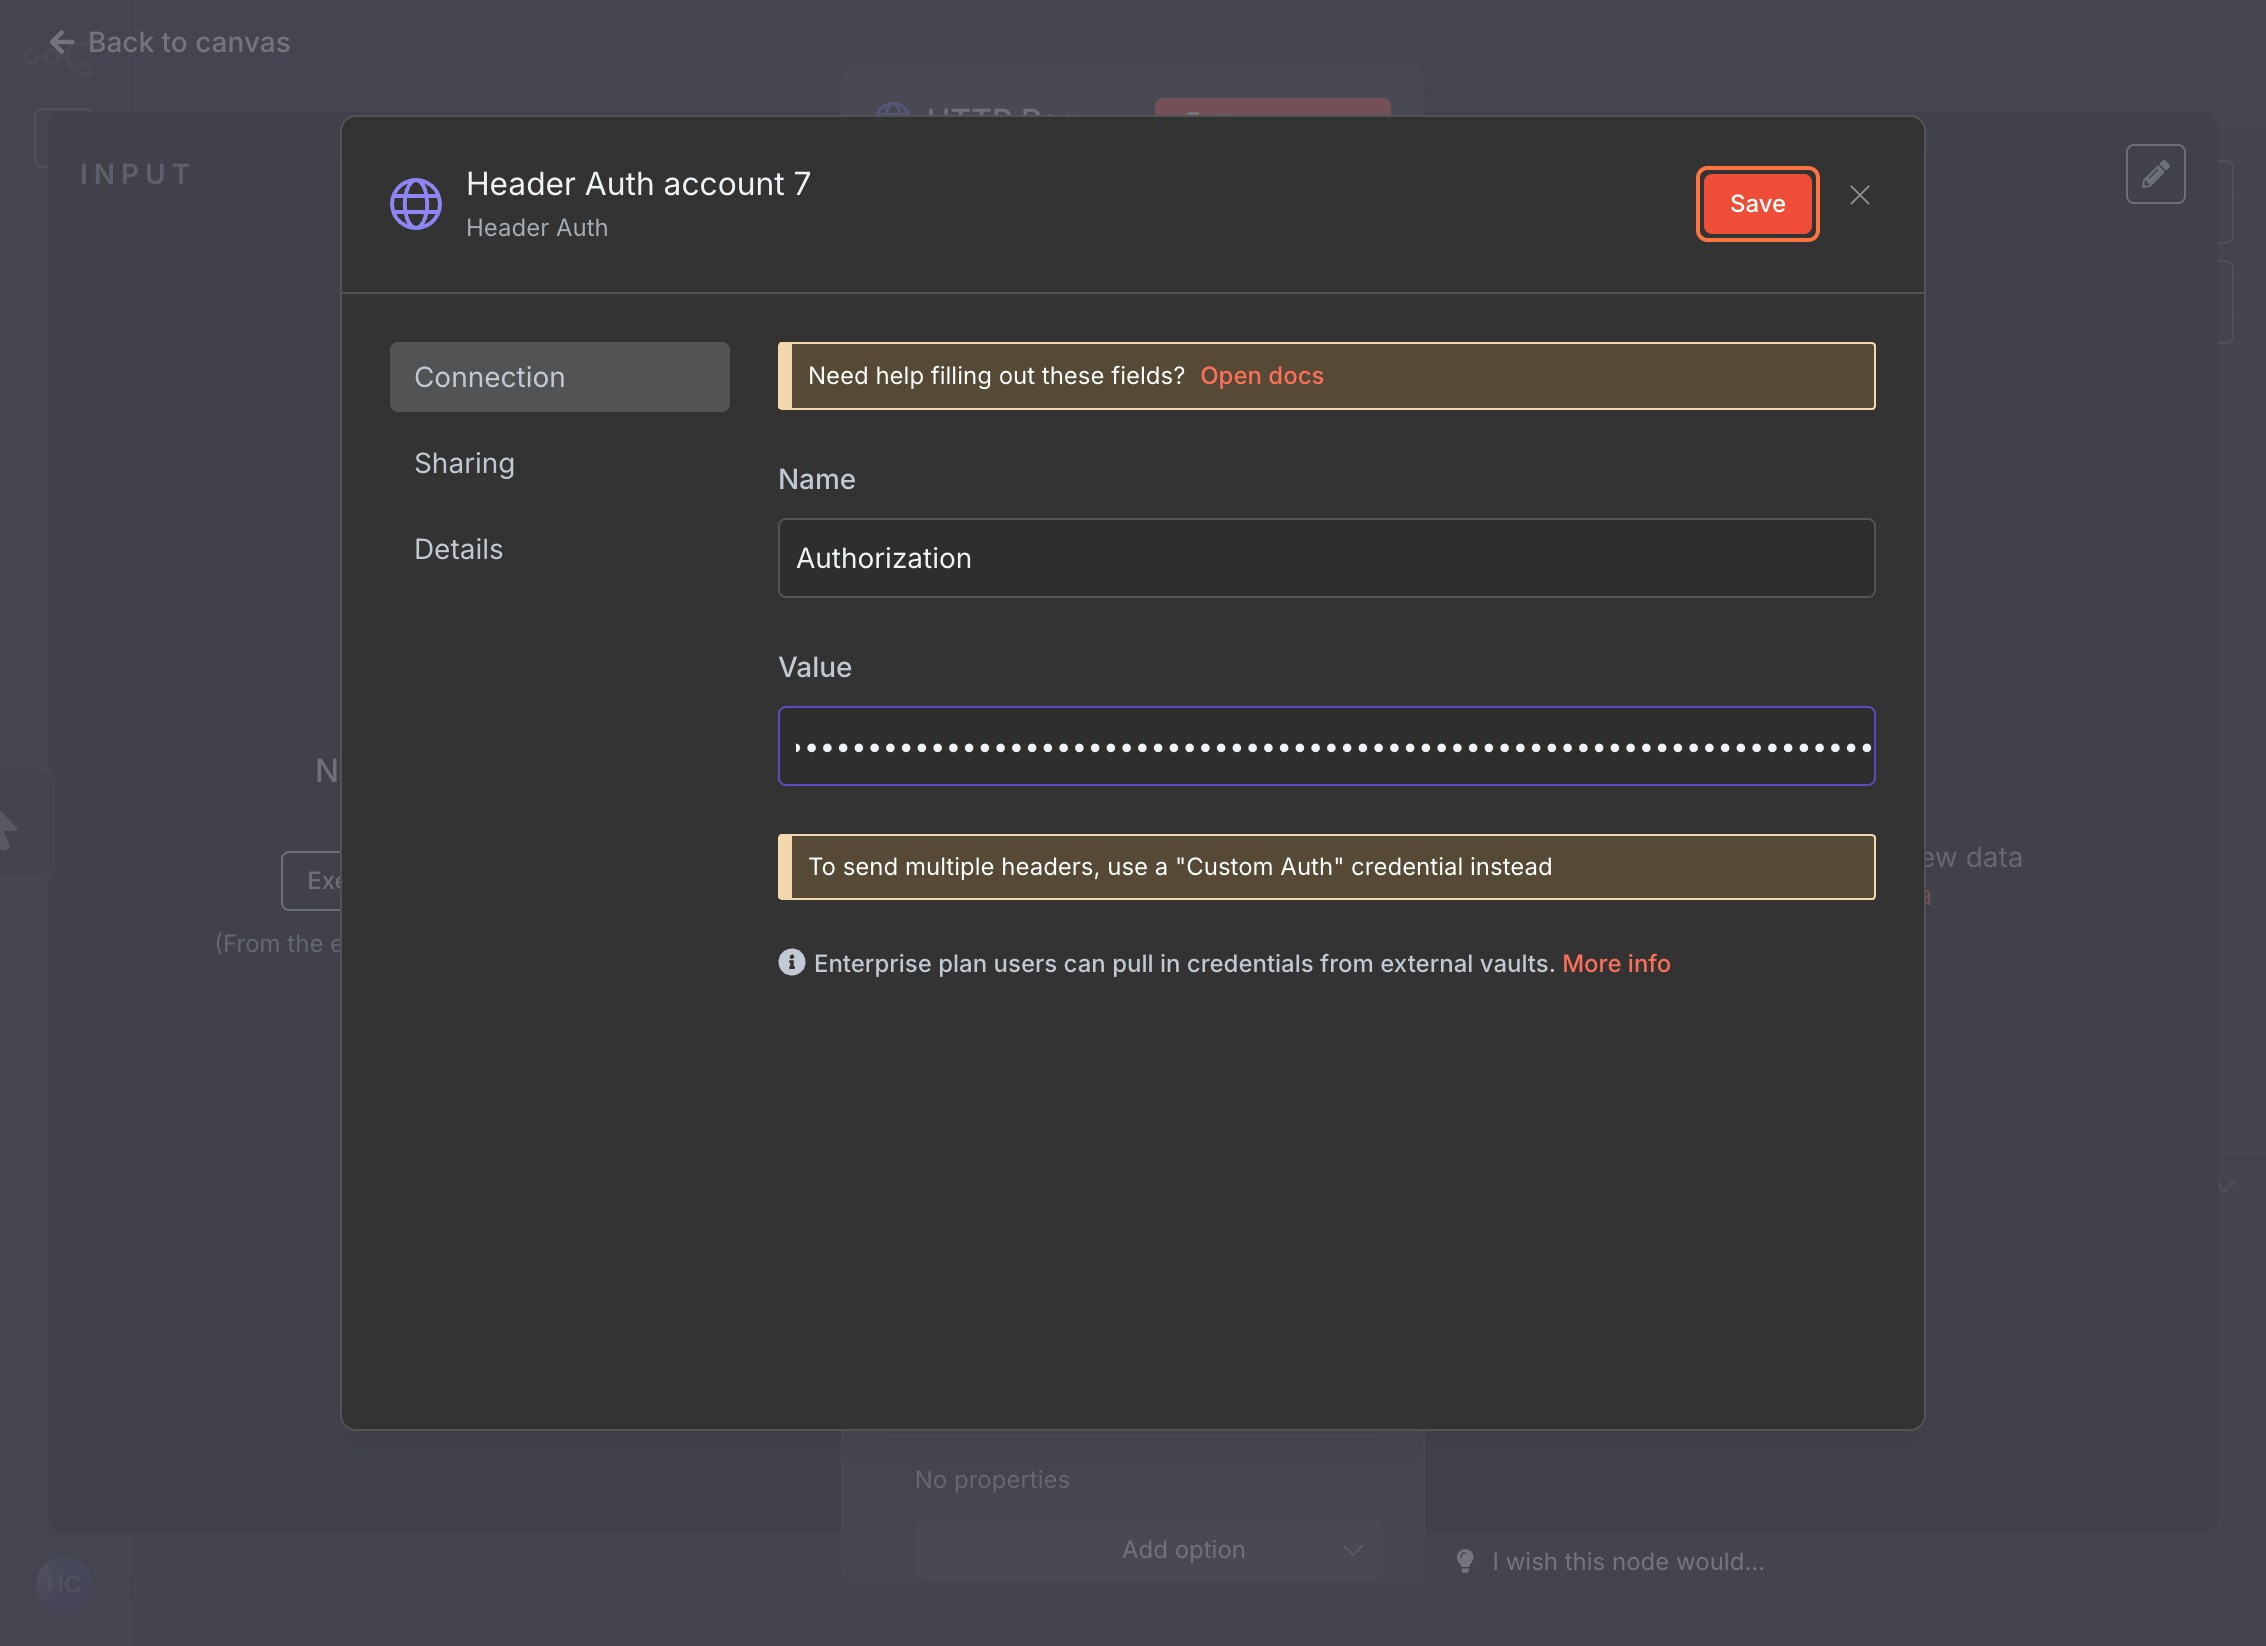
 Back in n8n, in the **Authentication** section, select **Generic Credential Type**
Choose **Header Auth** from the dropdown
Click **+ Create new credential**
Set:
* **Name**: `Authorization`
* **Value**: `Key YOUR_FAL_KEY`
Save the credential and close
Back in n8n, in the **Authentication** section, select **Generic Credential Type**
Choose **Header Auth** from the dropdown
Click **+ Create new credential**
Set:
* **Name**: `Authorization`
* **Value**: `Key YOUR_FAL_KEY`
Save the credential and close
 ### Configure Request Body
Toggle **Send Body** to `ON`
Set **Body Content Type** to `JSON`
Choose **Specify Body** as `USING JSON`
### Configure Request Body
Toggle **Send Body** to `ON`
Set **Body Content Type** to `JSON`
Choose **Specify Body** as `USING JSON`
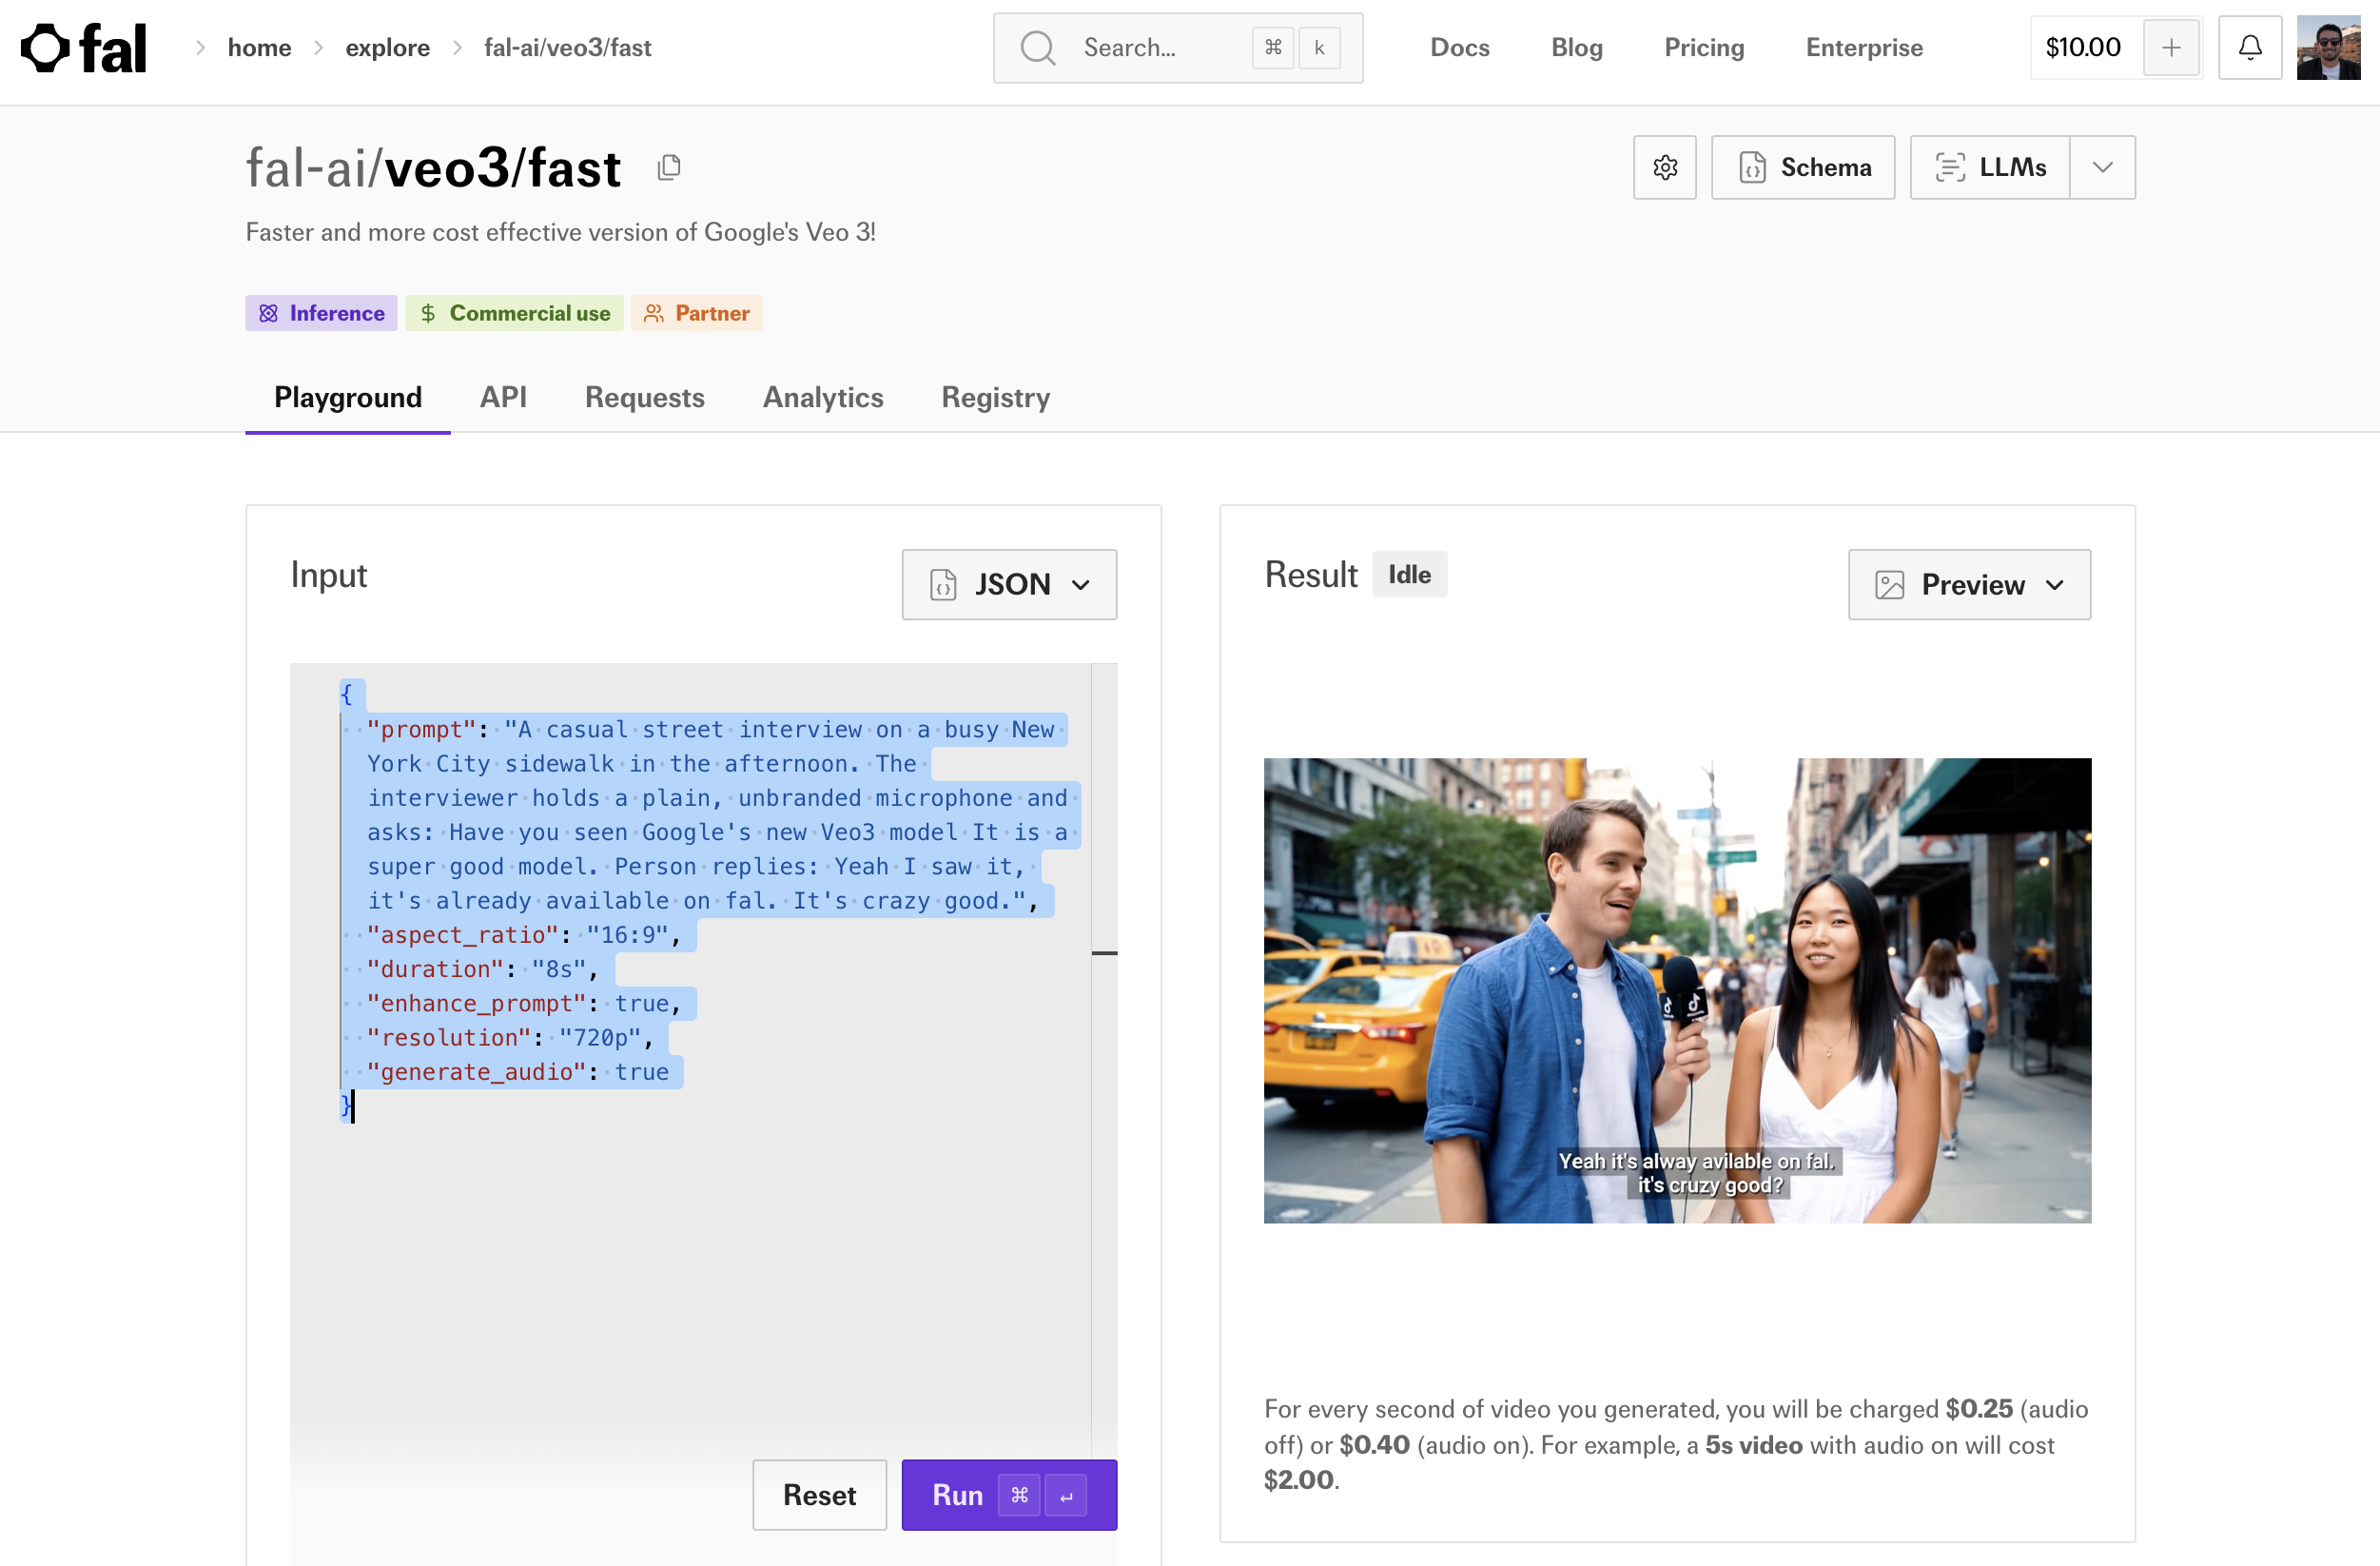
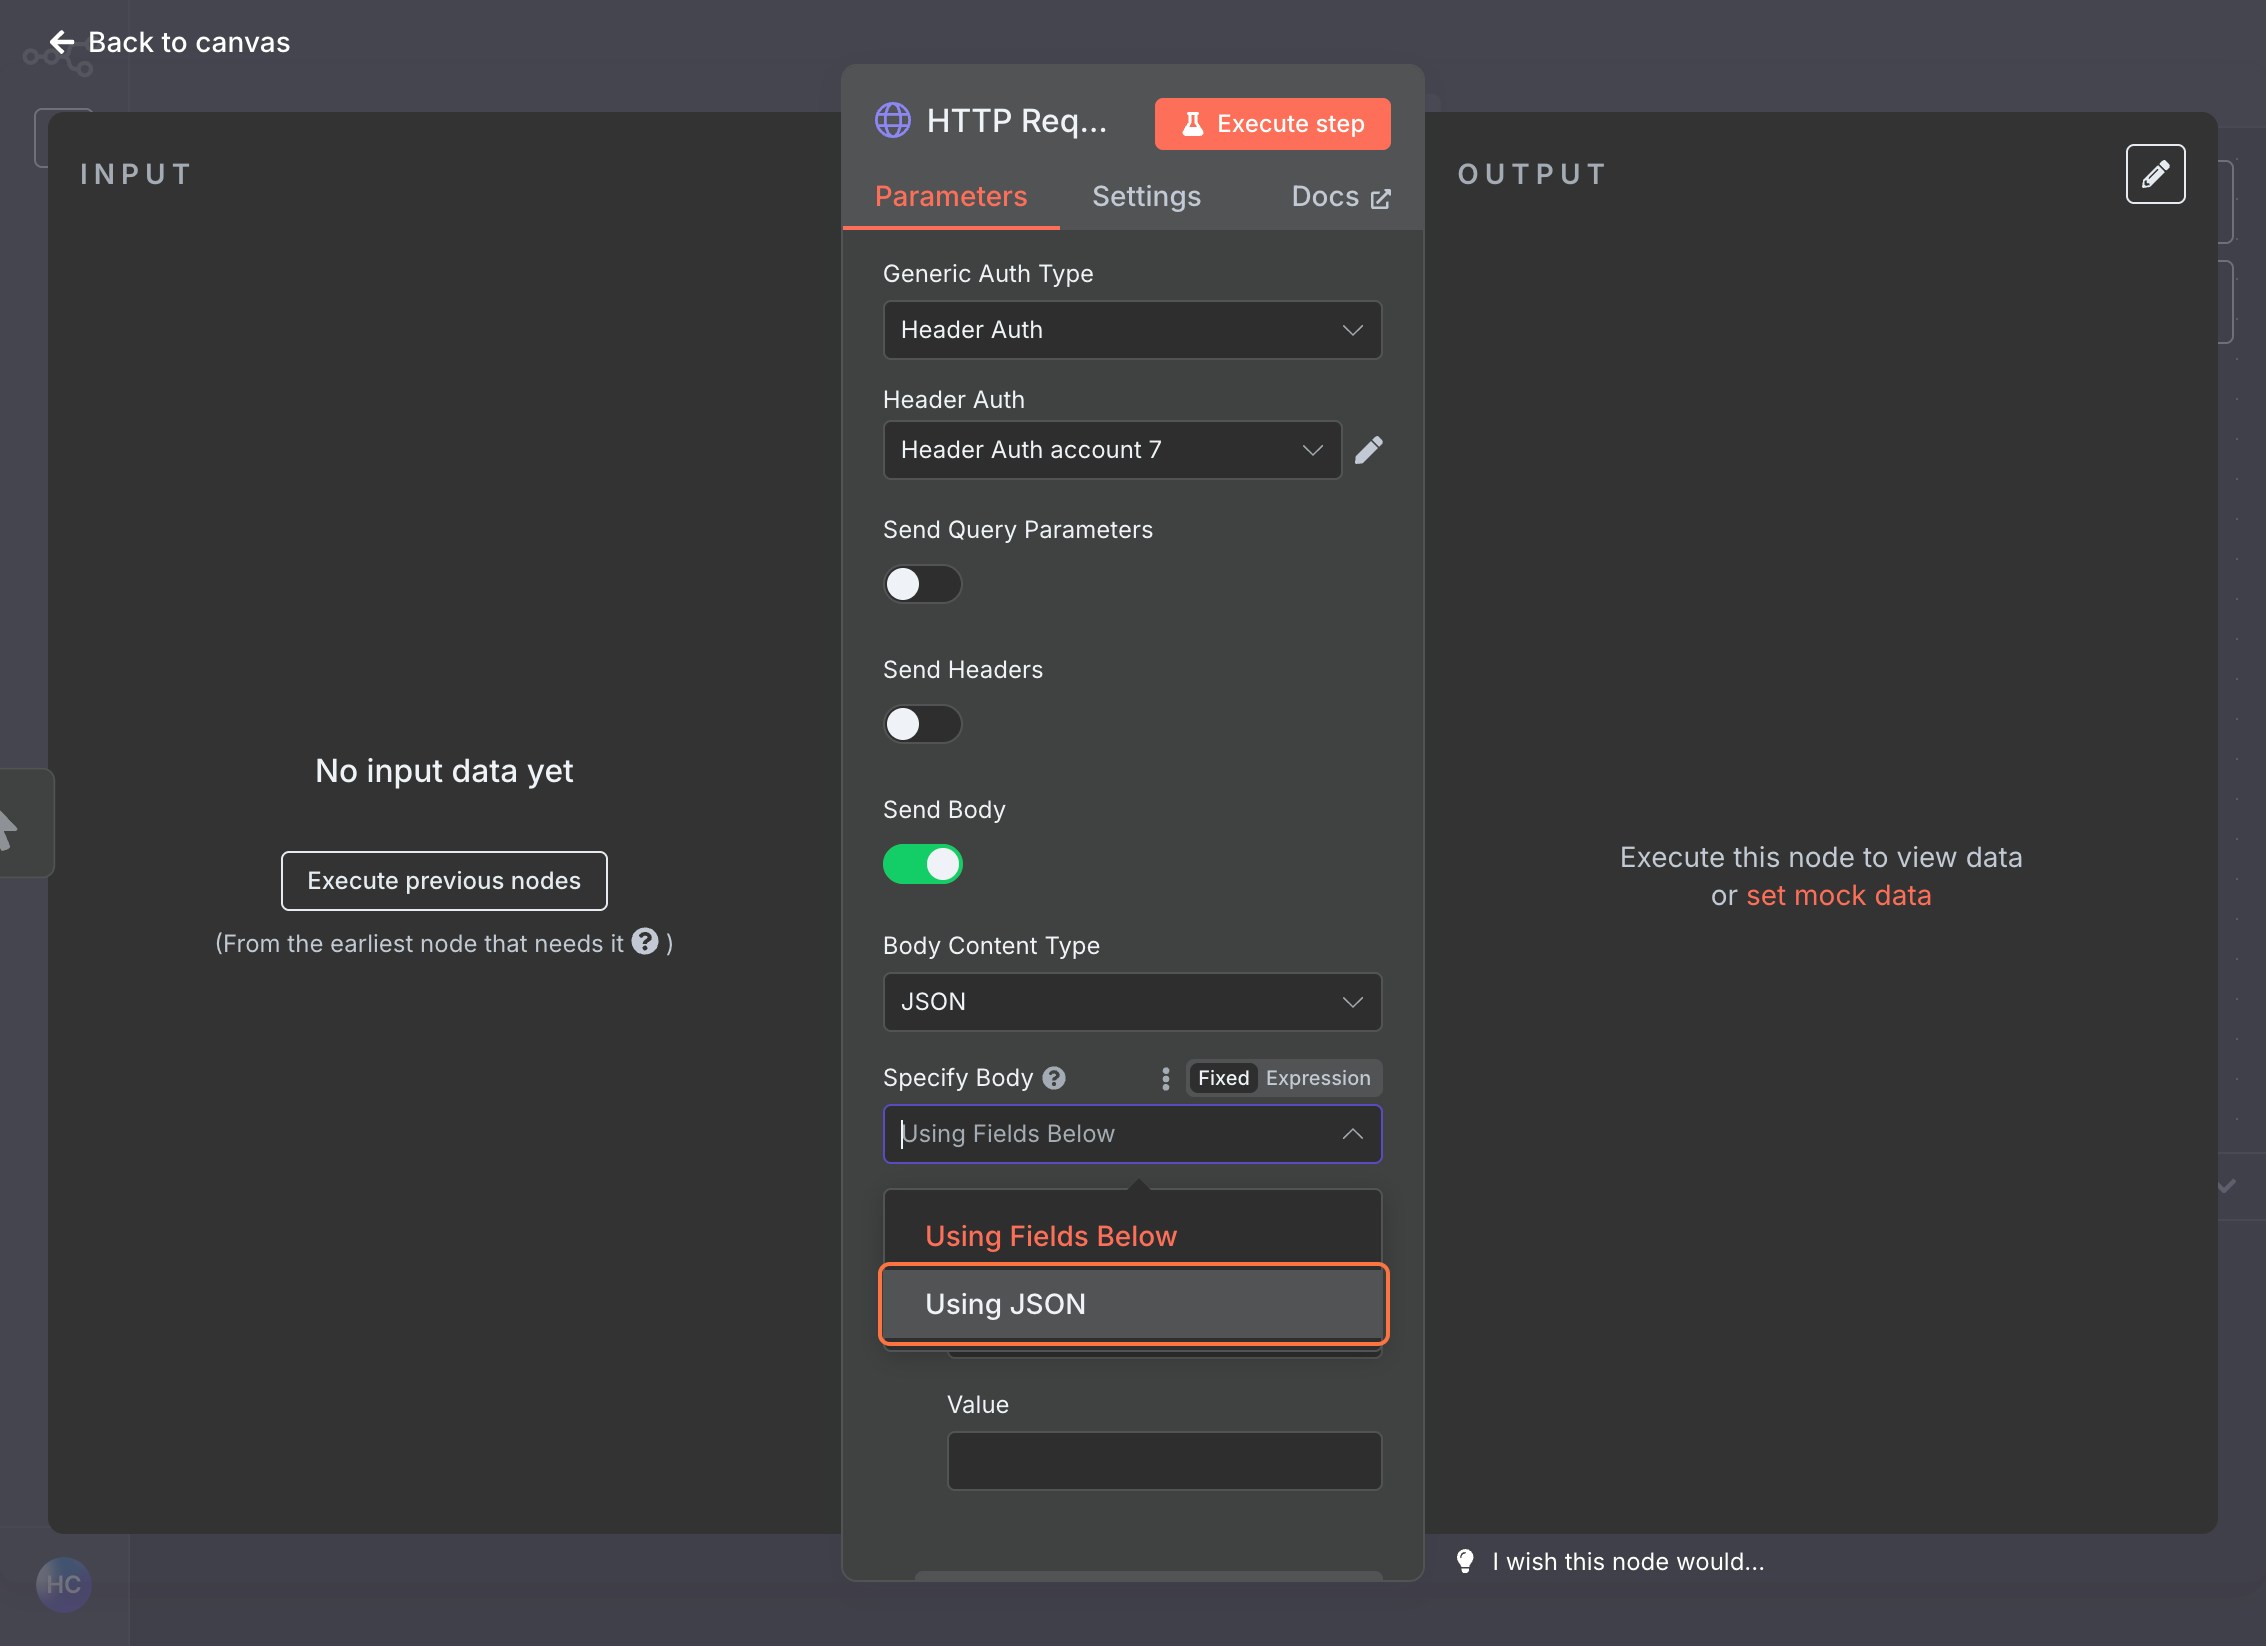 In fal, go again to the model page, select **JSON** from dropdown and copy the payload
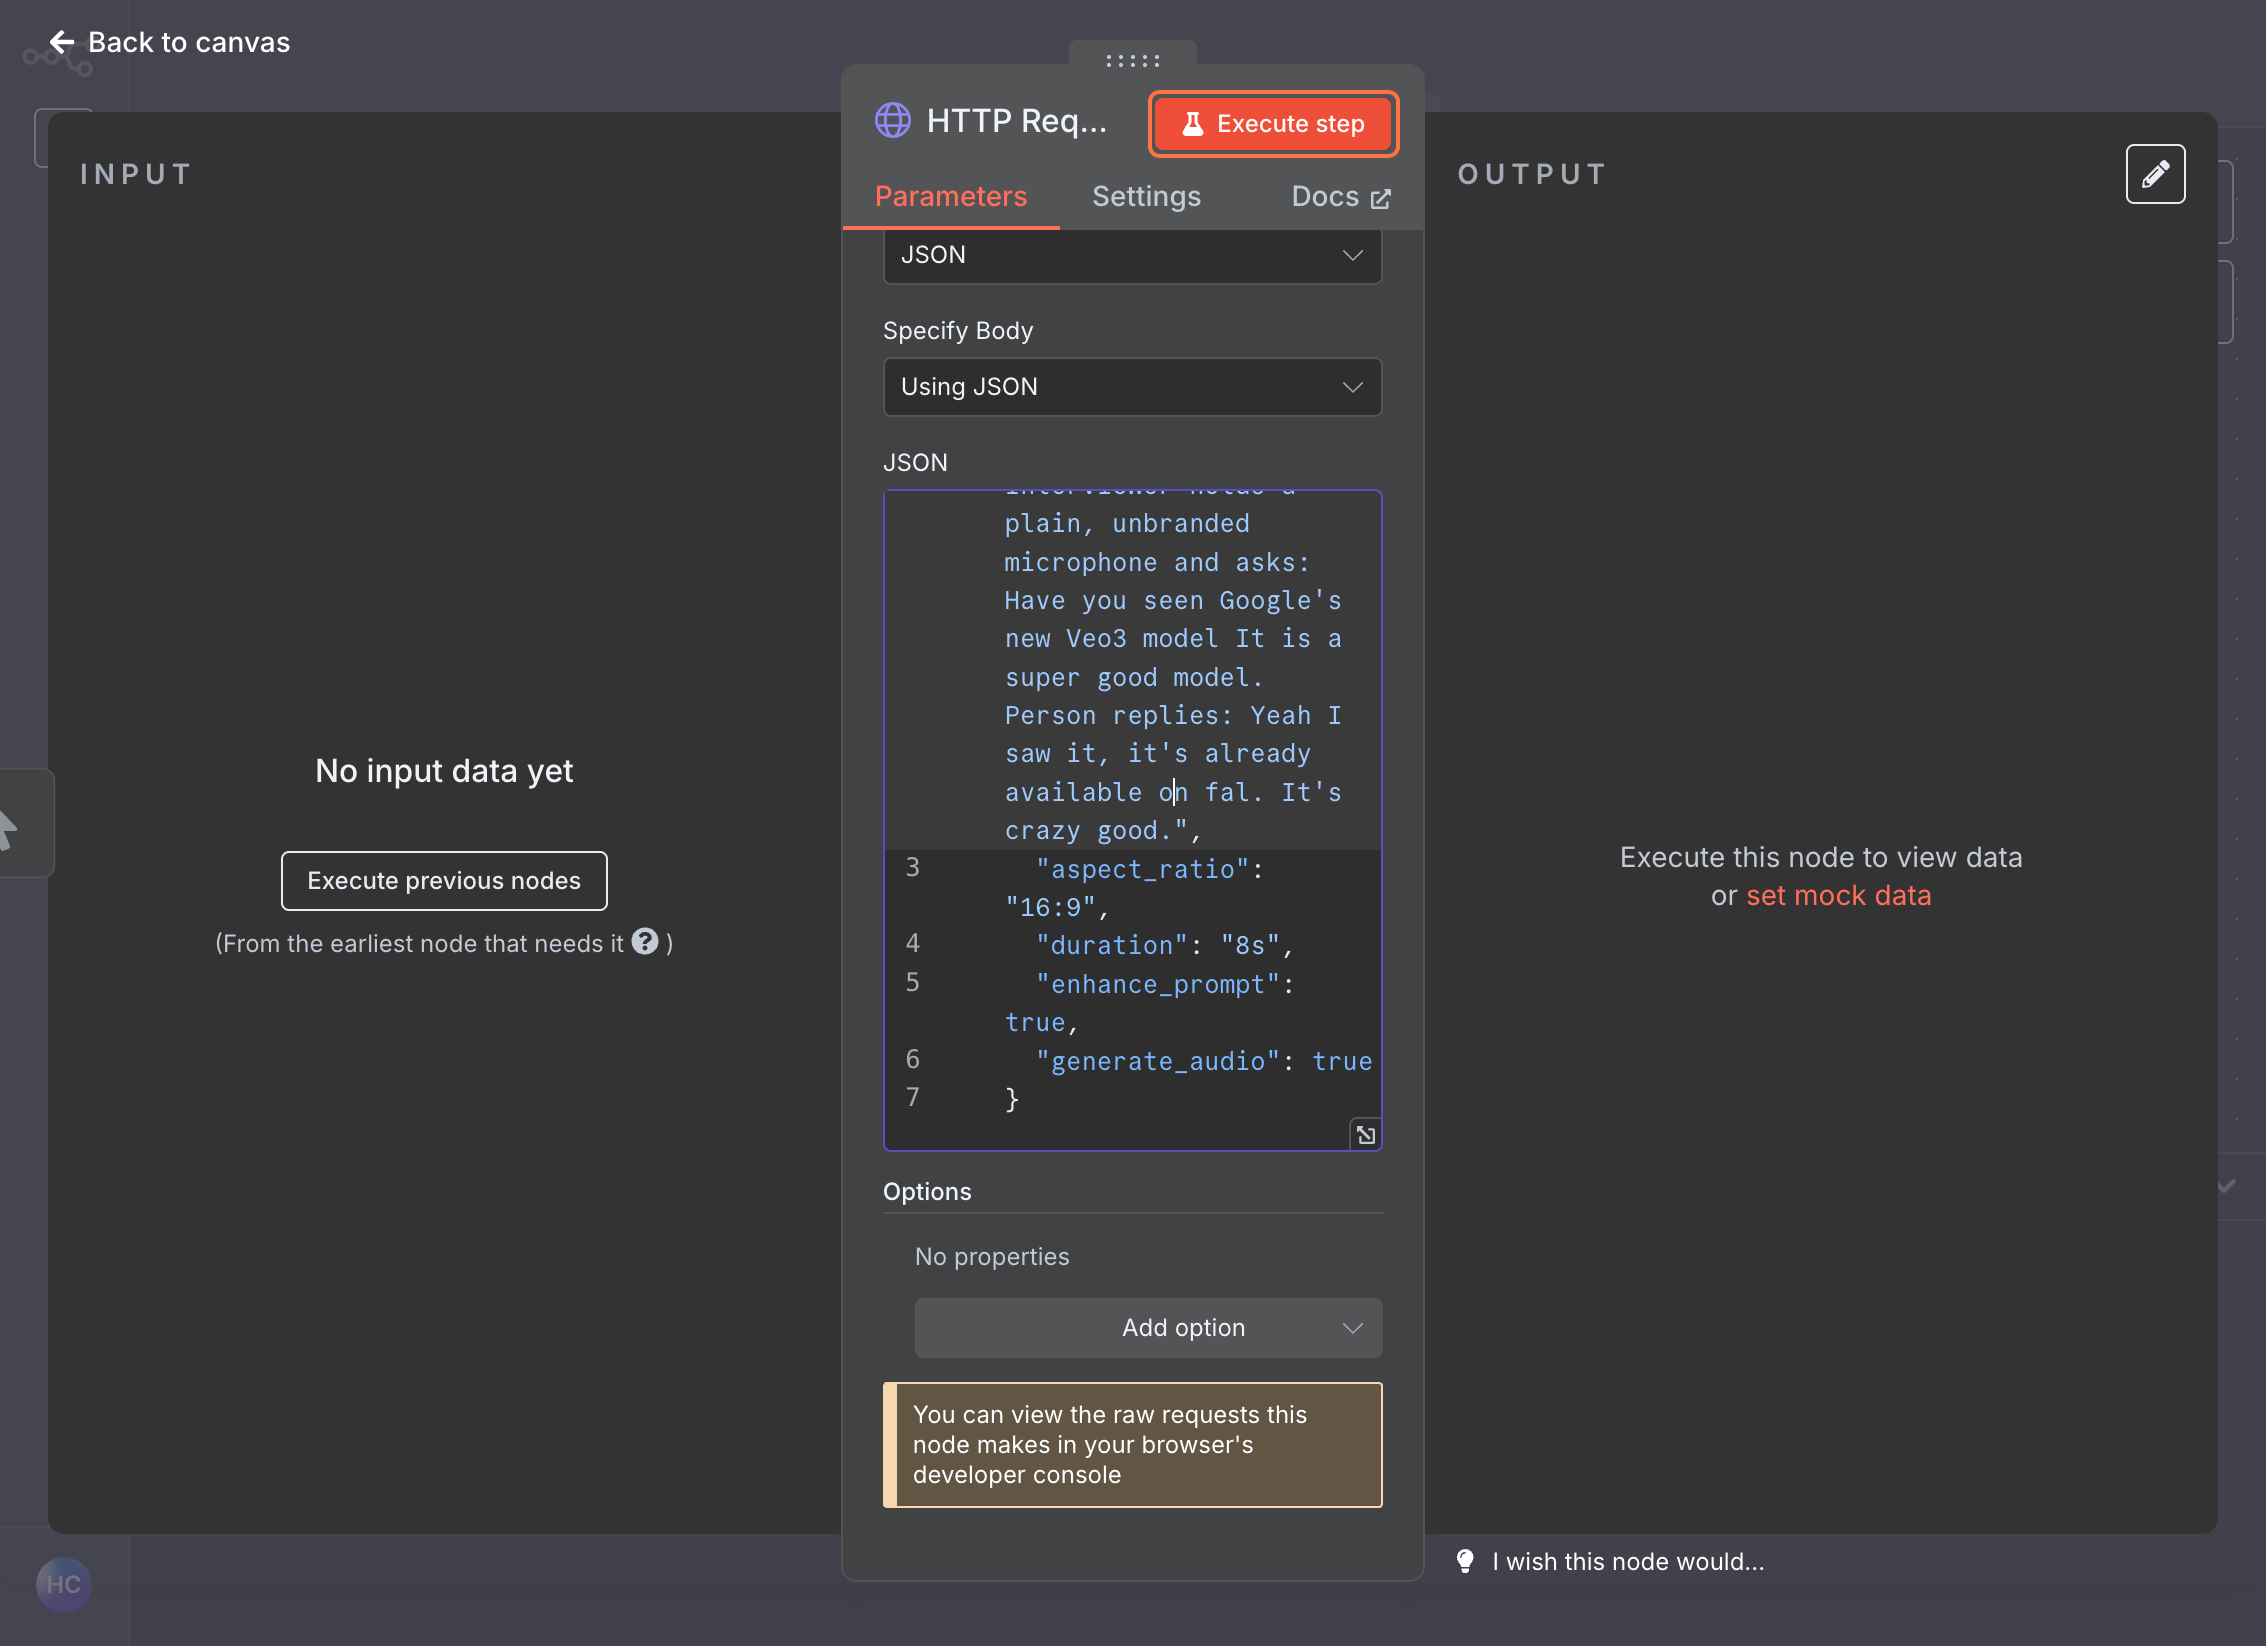
 Copy the JSON payload and paste it into n8n's JSON text box
 ### Execute the Node
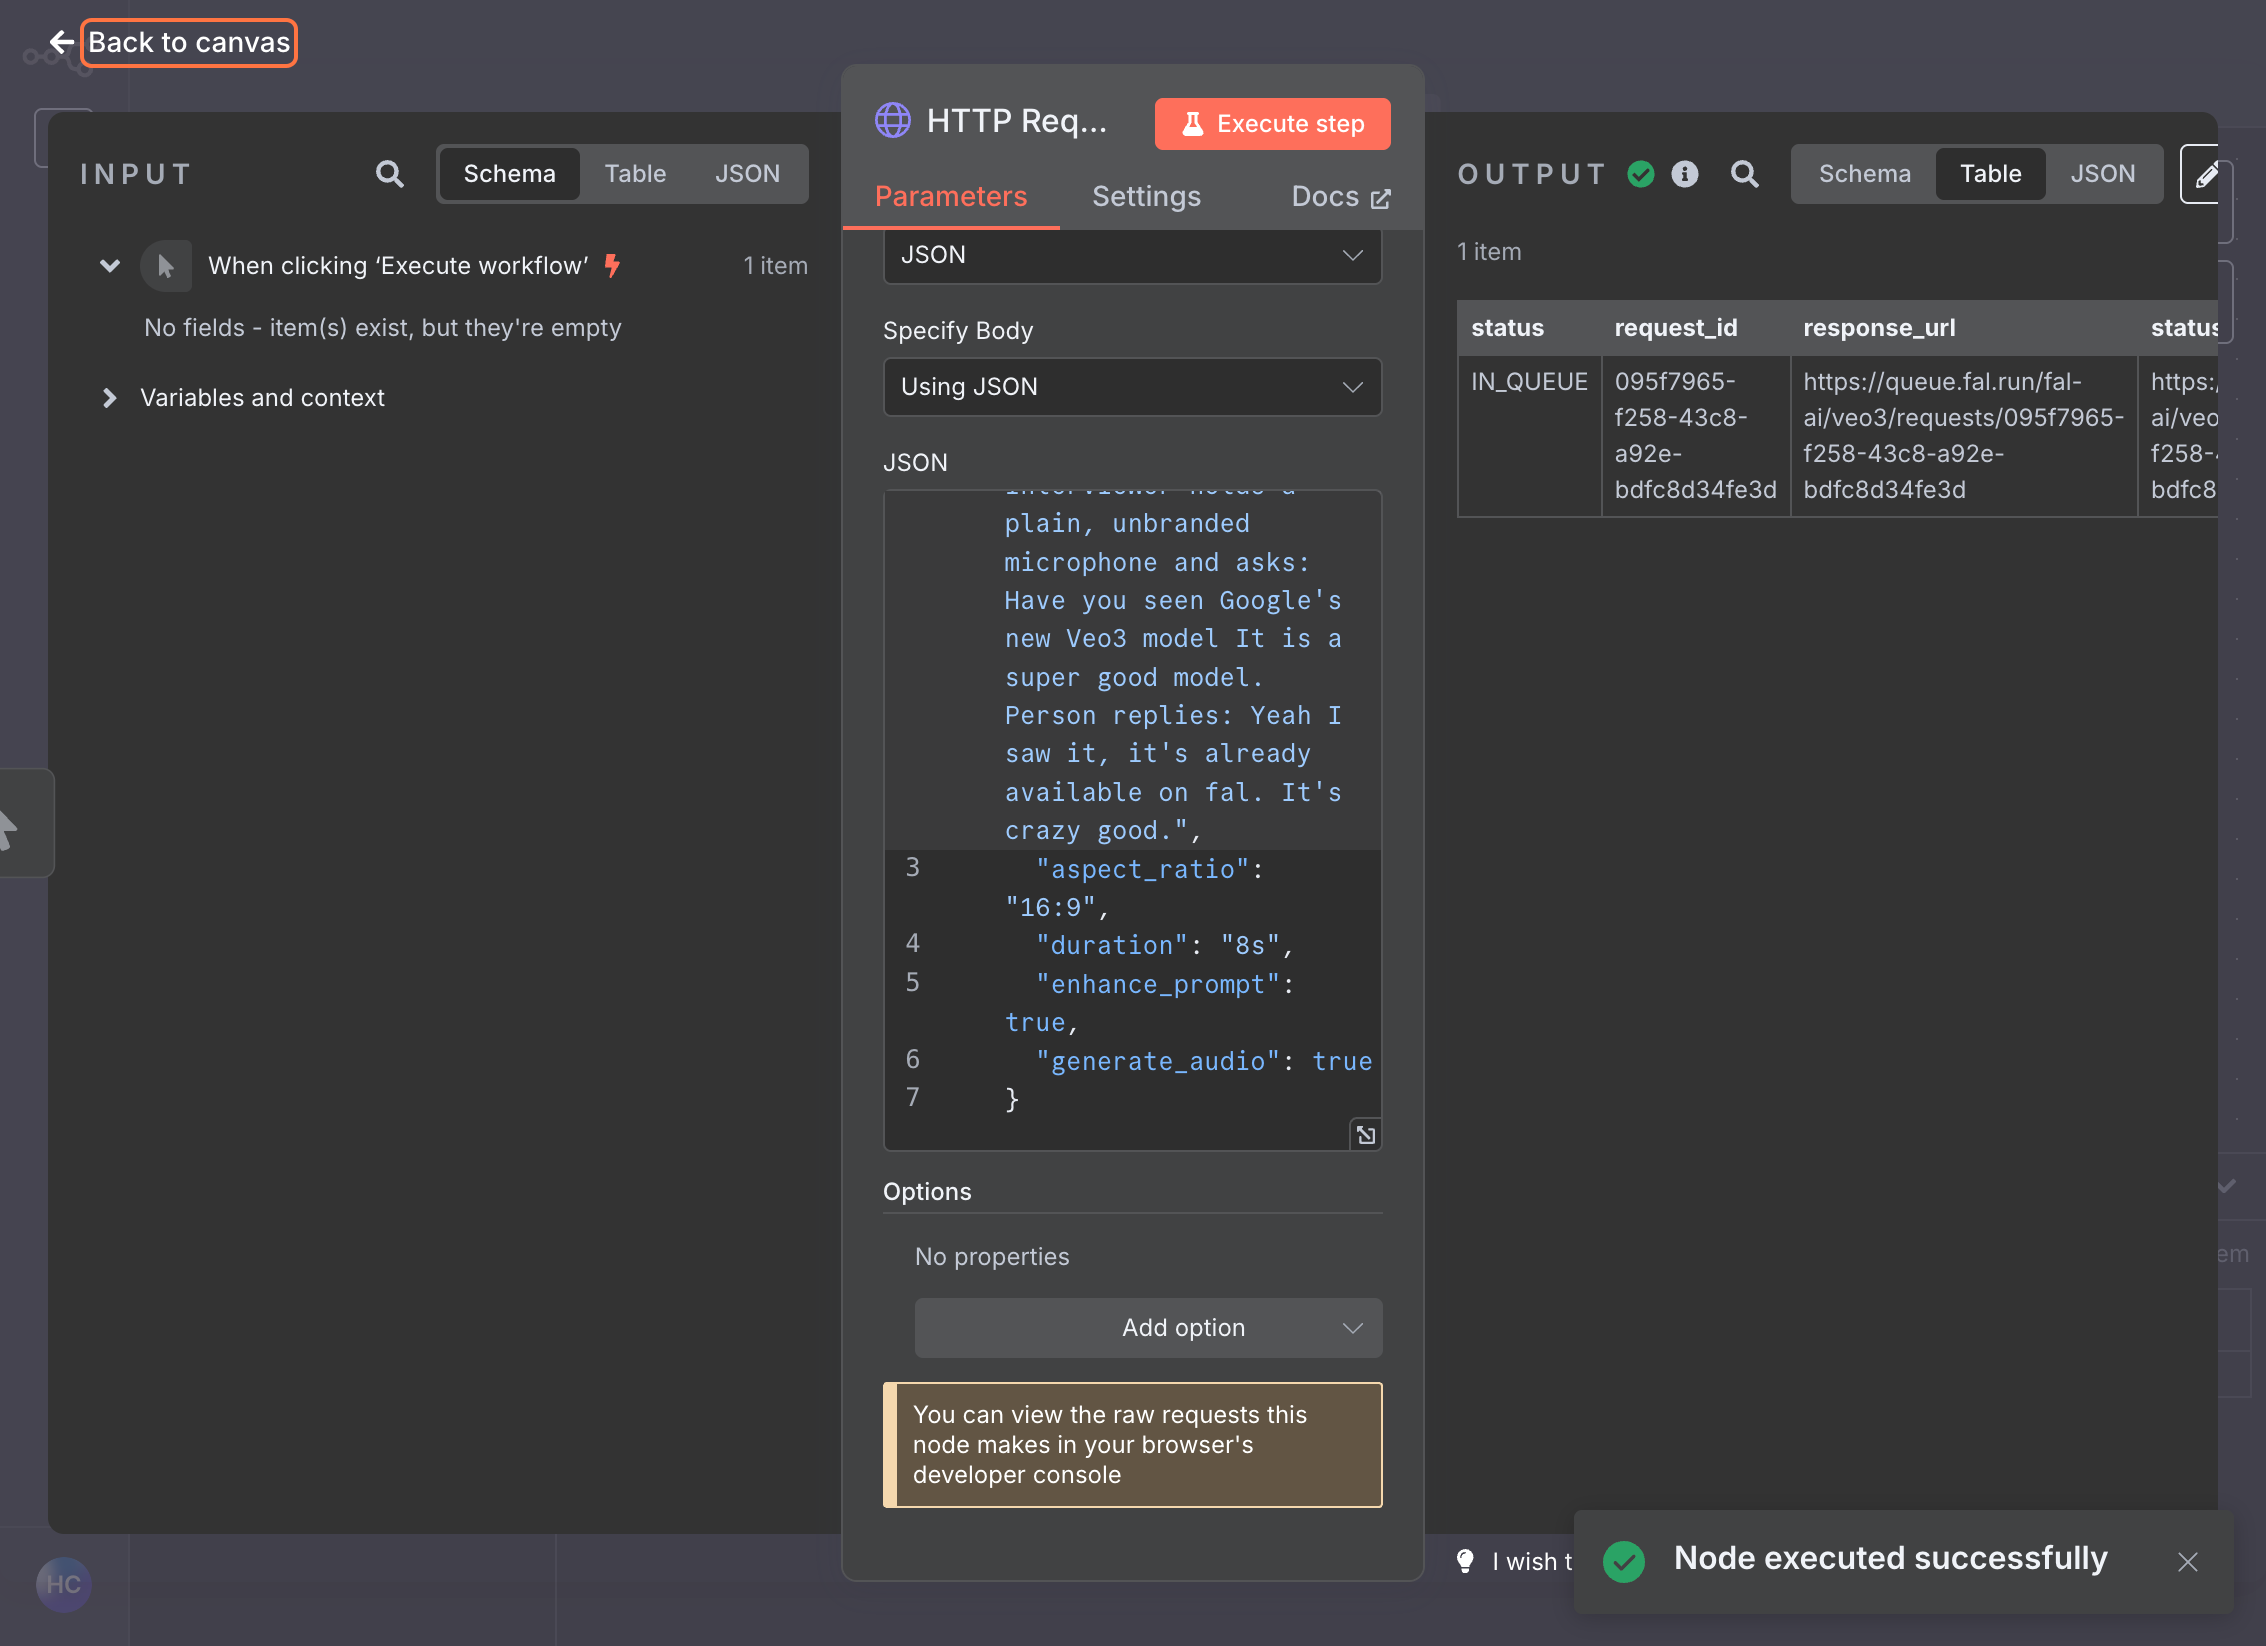
Click **Execute Node** to test the request. You should receive a response with a request ID.
### Execute the Node
Click **Execute Node** to test the request. You should receive a response with a request ID.
 ## Step 3: Check Status (GET)
### Add Second HTTP Request Node
Click on the first HTTP Request node and add another **HTTP Request** node
Set the **Method** to `GET`
### Configure Status Check URL
In fal, go to your model's **API** section and find the **GET** URL for status checking
## Step 3: Check Status (GET)
### Add Second HTTP Request Node
Click on the first HTTP Request node and add another **HTTP Request** node
Set the **Method** to `GET`
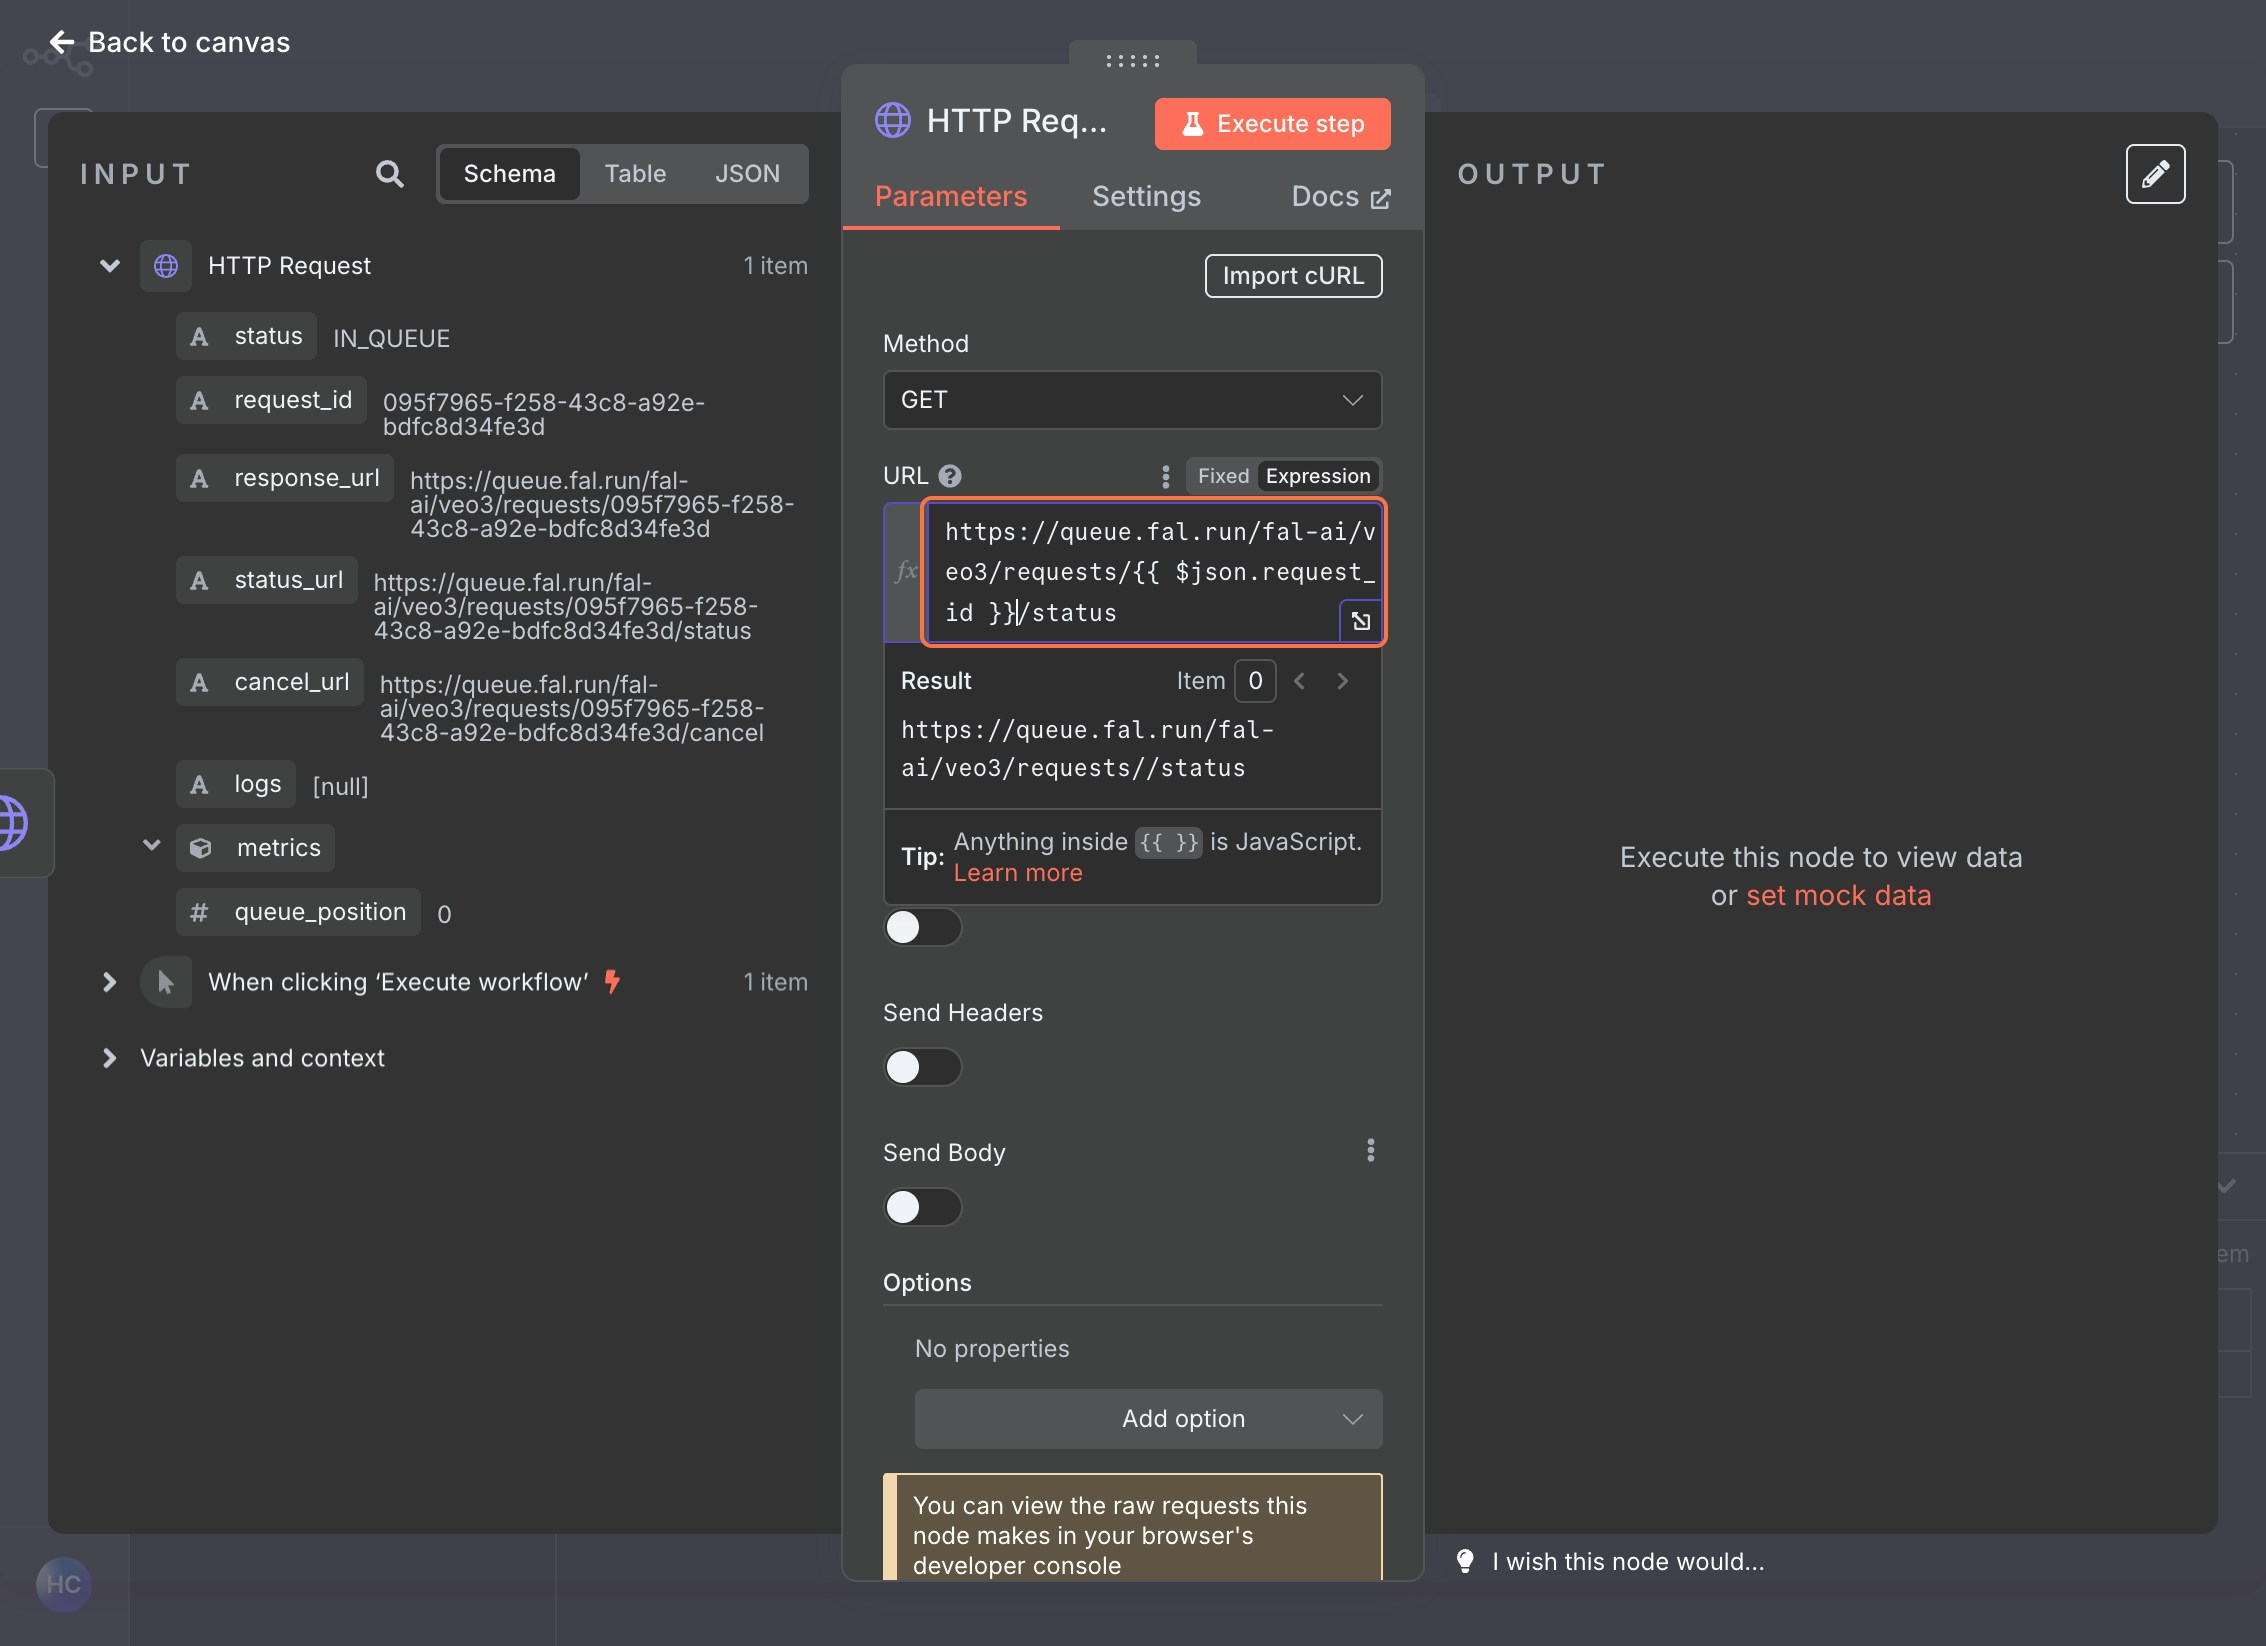
### Configure Status Check URL
In fal, go to your model's **API** section and find the **GET** URL for status checking
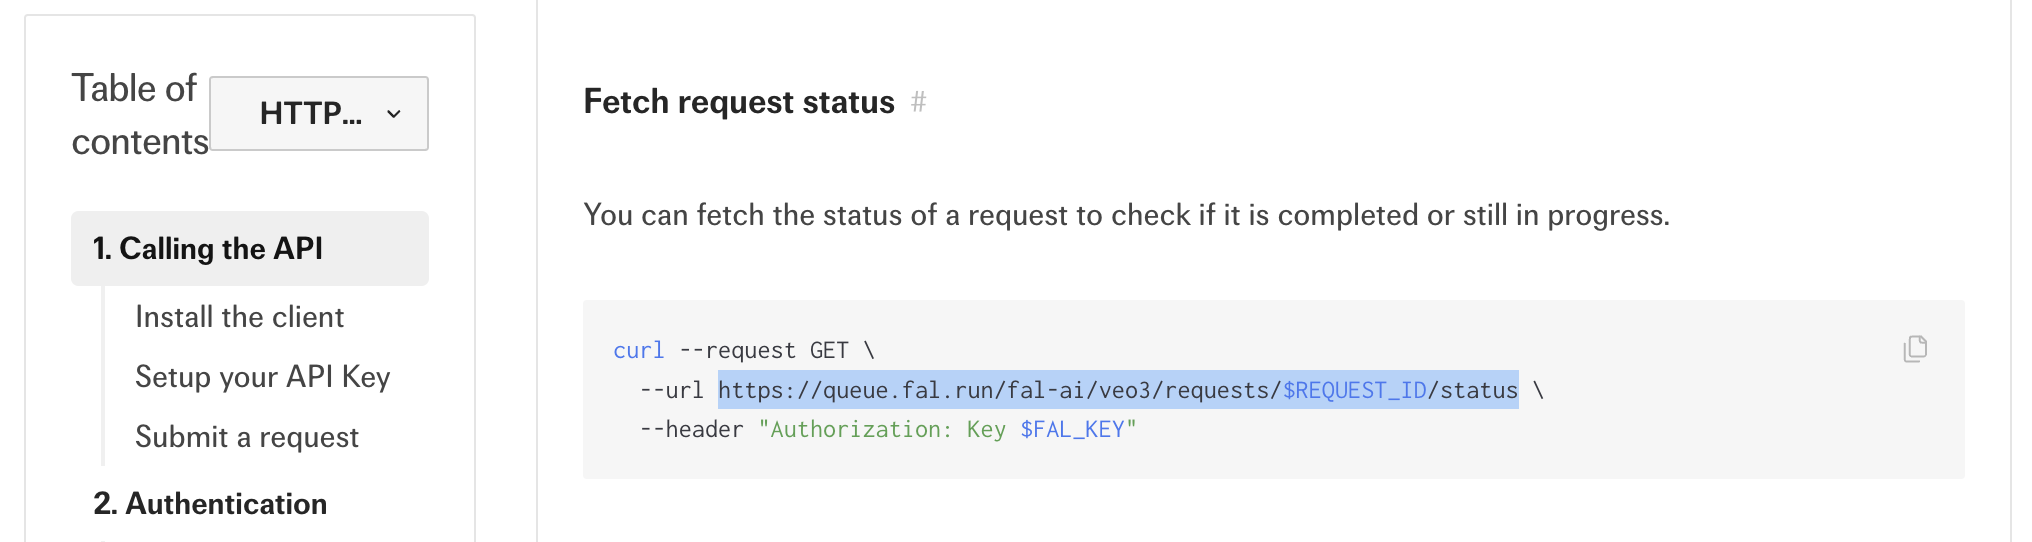 Copy this URL and paste it into the URL field
You'll need to replace the request ID from the previous step on this URL, with `{{ $json.request_id }}`
Copy this URL and paste it into the URL field
You'll need to replace the request ID from the previous step on this URL, with `{{ $json.request_id }}`
 ### Set Authentication
Use the same **Header Auth** credential created earlier
Select your existing **Authorization** credential
### Execute the Node
1. This will check the status of your generation request.
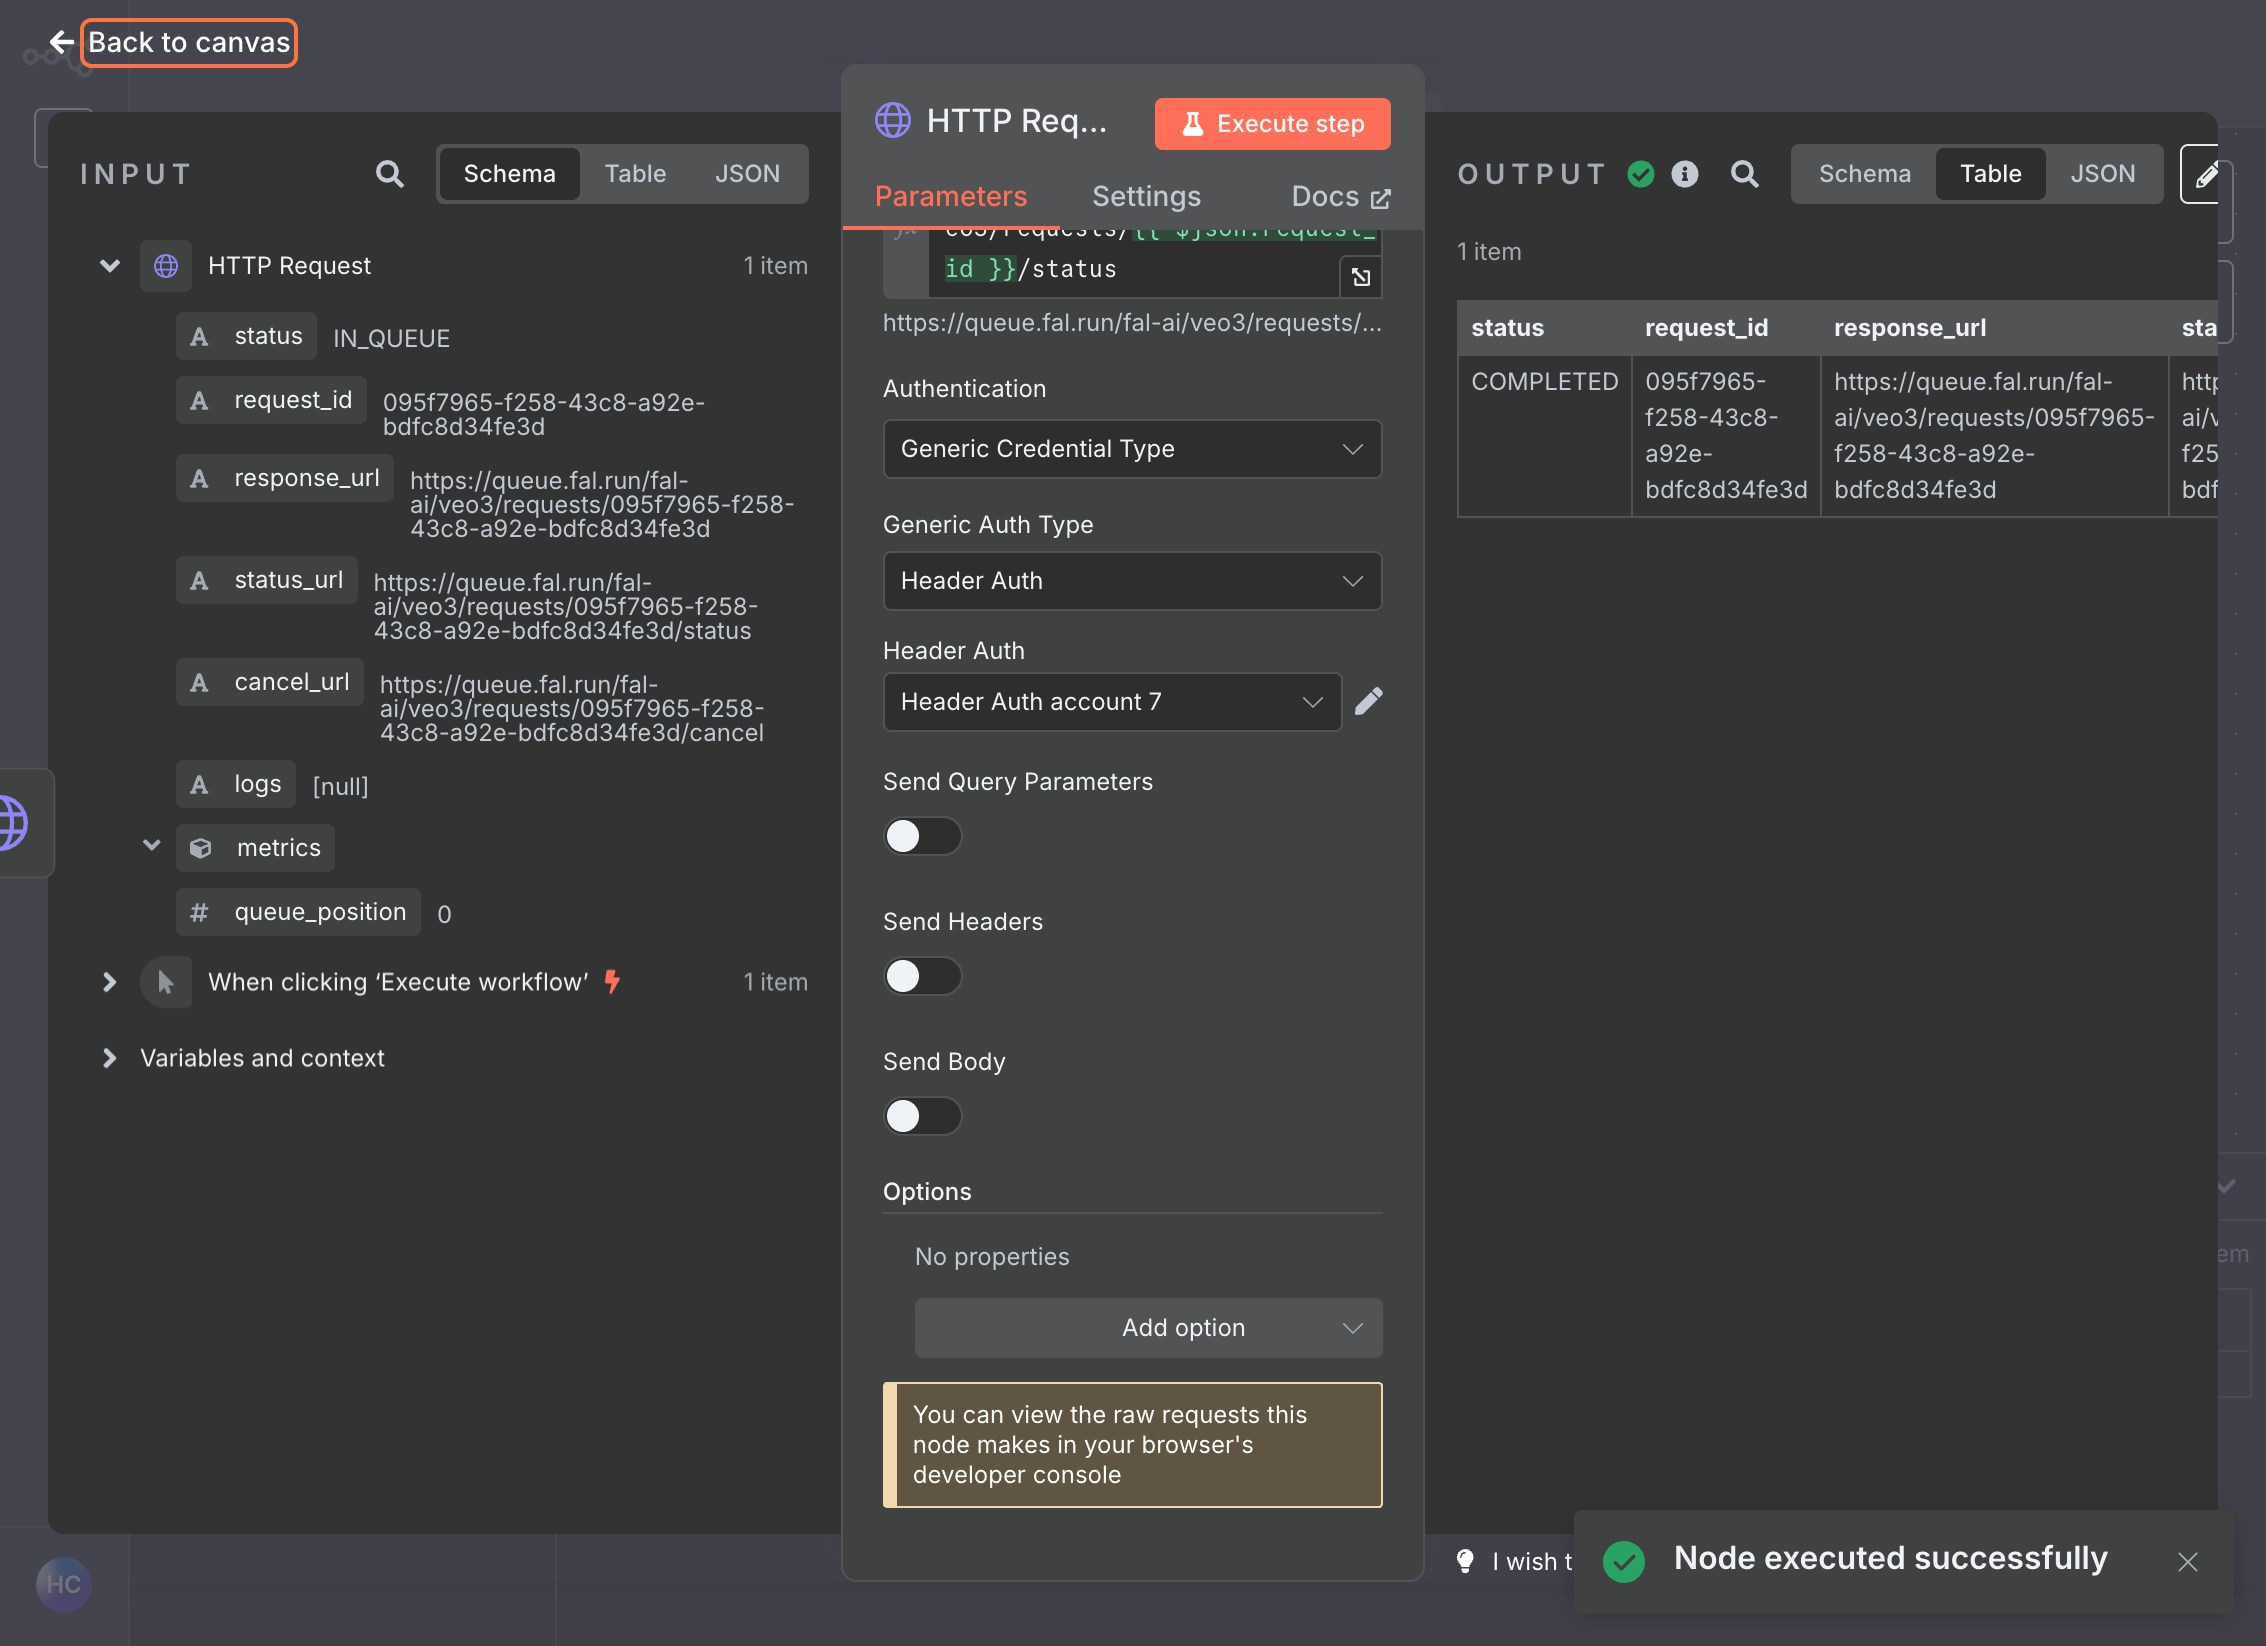
### Set Authentication
Use the same **Header Auth** credential created earlier
Select your existing **Authorization** credential
### Execute the Node
1. This will check the status of your generation request.
 ## Step 4: Retrieve Result (GET)
### Add Third HTTP Request Node
1. Add a final **HTTP Request** node
2. Set the **Method** to `GET`
### Configure Result URL
1. Use the result URL provided in the status response by setting the URL to `{{ $json.request_url }}`
### Set Authentication
1. Use the same **Header Auth** credential
### Execute the Node
This will retrieve your final generated content.
## Testing Your Workflow
Save your workflow
Click **Execute Workflow** to run the complete process
Monitor each node to ensure successful execution
Check the final node output for your generated content
## Best Practices
* **Error Handling**: Add error handling nodes to manage failed requests
* **Delays**: Consider adding **Wait** nodes between status checks to avoid overwhelming the API
* **Conditional Logic**: Use **IF** nodes to check status before proceeding to result retrieval
* **Data Transformation**: Use **Set** nodes to extract and format specific data from responses
## Troubleshooting
* **401 Unauthorized**: Check that your API key is correctly set in the authentication header
* **Request ID Missing**: Ensure the first POST request completed successfully and returned a request ID
* **Status Still Processing**: Add appropriate delays between status checks
* **Invalid JSON**: Verify your JSON payload matches the model's expected format
## Next Steps
Once you have a working workflow, you can:
* Connect it to external triggers (webhooks, schedules, etc.)
* Integrate with other services in your n8n workflow
* Add data processing and transformation steps
* Set up notifications for completed generations
## Step 4: Retrieve Result (GET)
### Add Third HTTP Request Node
1. Add a final **HTTP Request** node
2. Set the **Method** to `GET`
### Configure Result URL
1. Use the result URL provided in the status response by setting the URL to `{{ $json.request_url }}`
### Set Authentication
1. Use the same **Header Auth** credential
### Execute the Node
This will retrieve your final generated content.
## Testing Your Workflow
Save your workflow
Click **Execute Workflow** to run the complete process
Monitor each node to ensure successful execution
Check the final node output for your generated content
## Best Practices
* **Error Handling**: Add error handling nodes to manage failed requests
* **Delays**: Consider adding **Wait** nodes between status checks to avoid overwhelming the API
* **Conditional Logic**: Use **IF** nodes to check status before proceeding to result retrieval
* **Data Transformation**: Use **Set** nodes to extract and format specific data from responses
## Troubleshooting
* **401 Unauthorized**: Check that your API key is correctly set in the authentication header
* **Request ID Missing**: Ensure the first POST request completed successfully and returned a request ID
* **Status Still Processing**: Add appropriate delays between status checks
* **Invalid JSON**: Verify your JSON payload matches the model's expected format
## Next Steps
Once you have a working workflow, you can:
* Connect it to external triggers (webhooks, schedules, etc.)
* Integrate with other services in your n8n workflow
* Add data processing and transformation steps
* Set up notifications for completed generations